About NovelAI x Obesity

[Attention]
This article uses machine translation.
There may be incorrect grammar or sentences that are difficult to understand.
Please be aware of this before purchasing the paid part of the article.
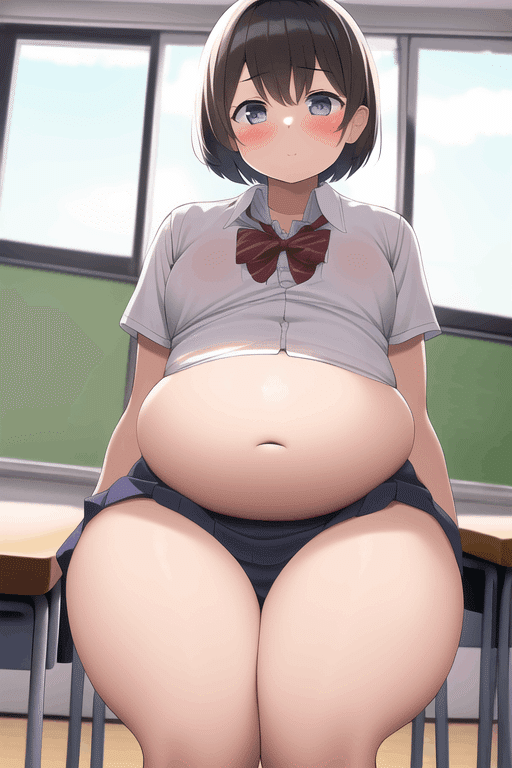
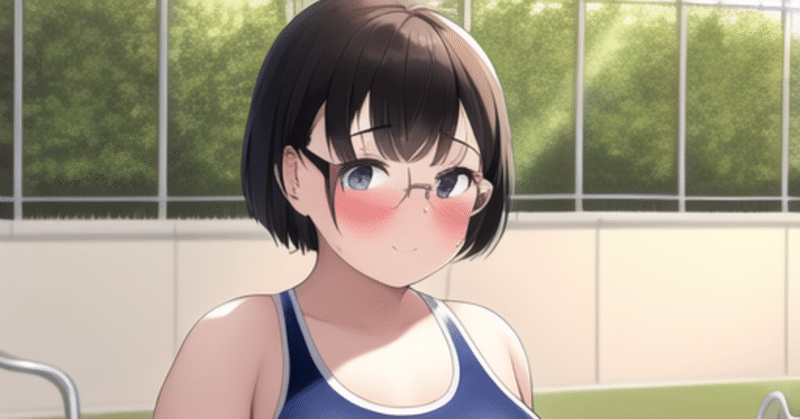
This article is about how to generate an image like the one above using NovelAI. If you are wondering "What? If you are reading this article, it is probably a waste of your time, so we recommend you to browser back.
If you have not yet registered for Novel AI, please refer to the following article and register by yourself.
https://note.com/kallibebe666/n/nae314cdb5c00
Introduction
You are solely responsible for the creation of the images and the handling of those images. Basically, we assume that you will use the images within the scope of your personal hobby, and this article is not intended to encourage any malicious use of the images.
Please do not forget to respect the creator of the image.
The heading "If you want to generate the same character" refers to the creation of sequences, etc., and is not a recommendation to use AI to reproduce copyrighted characters. Please observe the terms and conditions of each work with regard to copyrighted characters.
About various parameters
First, we will briefly explain the meaning of each parameter. Basically, you can skip reading this section, but if you are not familiar with the meaning of any of the items, please read on.
Basic Parameters
NAI Diffusion
This is a model for image generation. NAI Diffusion Anime(Full) is the safest choice for generating obese images. NAI Diffusion Anime(Curated) is for normal illustrations, and NAI Diffusion Furry(Beta) is for beastmen (still in testing phase).
prompt
This is a so-called spell. Describe here the image after completion. Enclosing a word with {} increases the AI's attention to that element by a factor of 1.05, and enclosing it with [] decreases it by a factor of 1.05.
undesired content
Anything described here will be difficult for the AI to create. Detailed usage is described below.
step
This is the value of how many times the AI performs the correction from the noise image. There is not much benefit to going over 30, as too many steps may be meaningless or counterproductive. If you reduce the number of steps, you can save Anlas, but if it goes close to a single digit, it will affect the quality of the image. It is most efficient in terms of Anlas to use ENHANCE after getting close to the image you like while lowering it to some extent.
scale
It is a measure of how faithful to the PROMPT it should be. A low scale allows AI to draw freely without being bound by the prompt, while a high scale increases the degree of reproduction of the prompt. When the scale is low, AI tends to produce softer pictures, and when the scale is high, AI tends to produce more detailed pictures.
seed値
This is the random number used by the AI to generate the image; setting the seed value to the same value will make it easier for the AI to generate pictures with the same orientation.
Parameters for img to img
strength
This is the strength of the influence AI can have on the image generation. A low setting produces an output that is close to the original image, while a high setting produces an output that has been significantly altered.
noise
This is the value of how much detail AI will write in. Increasing this value makes it easier for AI to add elements that are not in the original image, but setting it too high can lead to breakage.
Parameters for use with enhance
magnitude
When enhancement is performed with magnitude, noise is fixed at 0.
If you click on "Show individual setting," you can enhance with strength and noise.
upscale amount
This item indicates the degree to which image quality can be improved.
Basic Approach
NovelAI offers two methods of image generation: normal image generation and img to img generation. In the former, image generation starts from noise (like a TV sandstorm) and gradually updates the image until there is no more noise. The latter method uses the uploaded image as a starting point to generate a new image. The approach depends on which method is used.
For normal image generation
First, enter the desired element in the prompt with a tag. (Specifying by text is less efficient.) At this point, it is recommended to use your imagination and specify various elements here in advance. (For example, medium hair, school uniform, looking_at_viewer, etc.) *Prompts are explained in detail in the section on prompts. If you do not enter any factors other than obese, you will end up with a woman with blue eyes, long black hair, and other common characteristics (in two dimensions), which is a waste of money since it will generate only the same kind of image. Also, the trick is to set the size to a small size such as portrait(small) and instead of setting SCALE and STEP to small, increase the Number of Images and output many at once.
If you come up with ideas along the way, you can add prompts as needed. Once you have a favorite image, use variation and enhancement to make it closer to your own image.
When you have come close to your image to some extent, download the image and modify it by using img to img generation. Please refer to the following for the modification from this point.
For img to img generation
In img to img generation, I use a symptomatic approach to correct problems. While using the following methods, I try to get closer to the image with variations, etc. To improve the quality, it is important to be persistent and generate the image many times.
1)If you want to increase the quality beyond a certain level all at once
Set the strength value to 0.7 and the noise value to about 0.3, and enter a detailed image of the finished image in the prompt.
The closer the original image is to the finished image, the smaller the strength and noise values can be. If the image is far from the finished image, increase the strength value to some extent and repeat the output.
2)If you want to add a specific element
There are two methods. (1) Add the element you want to add to the prompt, and set the strength value to 0.5 and the noise value to about 0.2. The above values may go up or down depending on the new element you want to add. If it does not work, try changing to a different prompt with the same nuance.
If you want to add the element you want to change to the prompt, change the value of strength to 0.4 and the value of noise to 0.1 or so. For example, eyeglasses may be recognized.
3)When certain elements are disturbing
If you find that completely irrelevant or unnecessary elements are often output, it is possible that a minor (small sample) prompt is having an adverse effect. If you see one, replace it with a similarly meaningful prompt or weaken it with [].
It is also possible that you are extracting different elements from certain tags. If so, use undesired content to exclude the relevant element. (For example, a tag such as belly might also extract elements such as a belly, which would cause a vertical line to appear on the belly. In this case, entering "preferent" in the "undesired content" field will reduce the rate of vertical lines.) If these methods do not cure the problem, use external software to hand-draw out the disturbing elements; a strength value of 0.4 and a noise value of about 0.1 may work well to make them disappear.
4)If you want to enhance a particular element
There are two methods. The values of strength and noise are on a case-by-case basis, but it seems to work better if the strength value is slightly higher and the noise value is lower. In this case, if you are writing a large number of prompts, the trick is to delete the detailed elements and emphasize the elements you want to modify.
Method 2) Use edit image or external software to hand-draw and add the elements you want to enhance. The values of strength and noise are determined on a case-by-case basis, but the higher the quality of the addition, the lower the strength value.
5)When you want to correct details such as broken parts, etc.
First, use edit image or external software to hand-draw the area to be modified. Then, set the strength value to about 0.1 and the noise value to 0, and generate the image until it is fixed. If there are two belly buttons, or the clothes or hair are uncomfortable, etc., this can be used to fix the problem. If it is difficult to cure, removing minor elements out of the prompts may work. In some cases, it may be faster to add and correct them by yourself, since the AI is not good at hand and food.
Also, as a subterfuge, it may be a good idea to frame out the out-of-focus areas and crop them out.
6)When the picture becomes jittery
Repeated generation may result in a jittery illustration. In this case, the reason is that the NOISE is too high. This phenomenon is thought to be caused by AI forcibly trying to write details due to the high noize, even though the writing is already sufficient.
About the PROMPT (spell)
As mentioned a little earlier, it is considered a good idea to describe a PROMPT by listing tags and being more specific than a certain number of tags. Also, surrounding a word with {} increases the AI's attention to that element by a factor of 1.05, and surrounding it with [] increases it by a factor of 1.05. Use it aggressively. *Some people say that too much prompt tends to lower quality, but I personally have never felt this to be the case.
First, here is a summary of the PROMPTs I often use. I find it useful to put it on the side and use it as a memo.
*I will update it as soon as I find a good one.
Basic Prompt List
If any of these apply to you, include them.
1girl: one woman
2girls: two women
multiple_girls: many women
sitting: sitting
multiple views: multiple identical people in one picture
looking at viewer: looking at you
nsfw: non-workplace (R) If nsfw is included in the undesired content, please remove it.)
female_child: young girl
mature_female: mature woman
dark skin: brown
long hair: long hair
medium hair: medium hair
short hair: short hair
bob cut: bob
twintails: twin tail
ponytail ponytail: ponytail
blonde hair: blonde
brown hair: brown hair
black hair: black hair
(other hair colors can also be specified by color + hair)
blue eyes: blue eyes (other colors can also be specified by color + eyes)
flat chest: flat chest
smal breasts: small breasts
medium breasts: normal breasts
large breasts: large breasts
huge breasts: huge breasts
gigantic breasts: super breasts (more than twice the size of the face)
school uniform:school uniform
gym uniform:gym uniform
school swimsuit:school swimsuit
black bikini:black bikini
white bikini:white bikini
office_lady:office_lady
maid:maid
jeans:jeans
china dress:China dress
leotard:Leotard, bunny girl
smile: smile
blush : blush
List of prompts expressing obesity
PS: I have made it possible to see the same thing on pixiv fanbox!
If you don't want to register at "note", please do so here.
↓↓↓↓↓↓
ここから先は
¥ 480
この記事が気に入ったらサポートをしてみませんか?