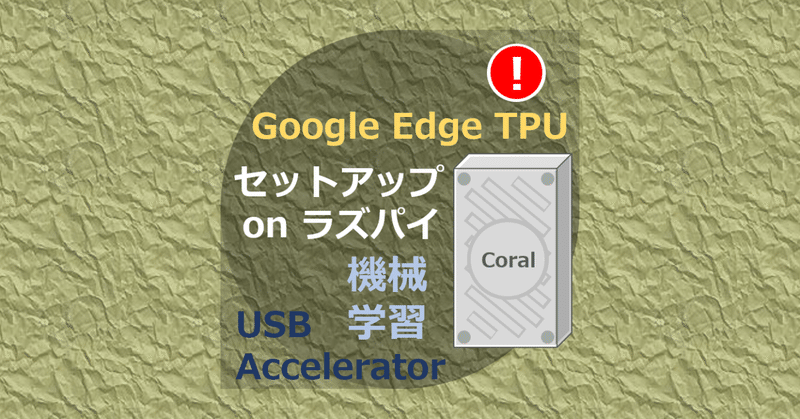
USB版のGoogle Edge TPUとラズベリーパイで機械学習しよう

ラズパイの機械学習の性能をアップするデバイスをセットアップします。
やること
・Google Edge TPUをラズパイで使用できるようにします。
・サンプルを使って画像解析をします
※ラズパイだけで実行できるサンプルもあります
Google Edge TPUとは
Coralというブランド名で発表したGoogle制のEdge TPUデバイスです。公式サイトはこちら
気になったので購入しました。

ラズパイ
使用するラズパイはRaspberry Pi 3 Model Bで、モニターやキーボードは繋いでおらず、SSH接続でリモート操作します。OSのバージョンは以下です。
$ cat /etc/debian_version
9.8

$ cat /etc/os-release
PRETTY_NAME="Raspbian GNU/Linux 9 (stretch)"
NAME="Raspbian GNU/Linux"
VERSION_ID="9"
VERSION="9 (stretch)"
ID=raspbian
ID_LIKE=debian
HOME_URL="http://www.raspbian.org/"
SUPPORT_URL="http://www.raspbian.org/RaspbianForums"
BUG_REPORT_URL="http://www.raspbian.org/RaspbianBugs"
Google Edge TPUをラズパイにつなごう
このように、コマンドでインストールします。
cd ~/
wget http://storage.googleapis.com/cloud-iot-edge-pretrained-models/edgetpu_api.tar.gz
tar xzf edgetpu_api.tar.gz
cd python-tflite-source
bash ./install.sh
# 最大パフォーマンスにするかは、Y/N で選択する
bash ./install.sh を実行すると、以下メッセージが表示されます。Yにすると処理性能が上がりますが高熱になるそうです。(私はNにしました)
Would you like to enable the maximum operating frequency? Y/Nデモやってみる
同梱のサンプルを使って機械学習をしてみます。
python-tflite-source\edgetpu\test_dataにparrot.jpgを解析して鳥の種類を判定します。

parrot.jpg
スクリプトを実行すると、このような結果になりました。
#スクリプトを実行するときのカレントディレクトリの確認
pi@raspberrypi:~/python-tflite-source/edgetpu $ pwd
/home/pi/python-tflite-source/edgetpu

# parrot.jpgを機械学習で分析しよー
pi@raspberrypi:~/python-tflite-source/edgetpu $ python3 demo/classify_image.py \
> --model test_data/mobilenet_v2_1.0_224_inat_bird_quant_edgetpu.tflite \
> --label test_data/inat_bird_labels.txt \
> --image test_data/parrot.jpg
W0430 06:10:28.202869   11806 package_registry.cc:65] Minimum runtime version required by package (5) is lower than expected (10).
---------------------------
Ara macao (Scarlet Macaw)
Score :  0.613281
---------------------------
Platycercus elegans (Crimson Rosella)
Score :  0.152344
Ara macao (Scarlet Macaw)とは、コンゴウインコだそうです。Google画像検索でコンゴウインコを調べると、解析した画像(parrot.jpg)と同じようなインコの写真が多数ヒットしました。どうやら正解のようです。ほほぉー
ここでコマンドのオプションを見てみます。
$ python3 demo/classify_image.py \
> --model test_data/mobilenet_v2_1.0_224_inat_bird_quant_edgetpu.tflite \
> --label test_data/inat_bird_labels.txt \
> --image test_data/parrot.jpg/python-tflite-source/edgetpu/demo配下には、サンプルスクリプトが用意されています。今回は、classify_image.pyを使用しました。このスクリプトは写真に何が映っているか分析するスクリプトのようです。
--model オプションは、機械学習モデル(.tflite)を指定します。python-tflite-source\edgetpu\test_data配下にいくつか用意されています。
xxxxx_edgetpu.tfliteはEdge TPU対応のモデルです(*1)
ファイル名に『_edgetpu』がない.tfliteデータはCPUで実行します(*2)
(*1) Edege TPUデバイス未接続だとエラーになります
$ python3 demo/classify_image.py \
>  --model test_data/mobilenet_v2_1.0_224_inat_bird_quant_edgetpu.tflite \
>  --label test_data/inat_bird_labels.txt \
>  --image test_data/parrot.jpg
ERROR: Failed to retrieve TPU context.
ERROR: Node number 0 (edgetpu-custom-op) failed to prepare.

Failed in Tensor allocation, status_code: 1
中止
(*2) Edge TPUデバイス未接続でも問題なく実行します
$  python3 demo/classify_image.py \
>  --model test_data/mobilenet_v2_1.0_224_inat_bird_quant.tflite \
>  --label test_data/inat_bird_labels.txt \
>  --image test_data/parrot.jpg
---------------------------
Ara macao (Scarlet Macaw)
Score :  0.601562
---------------------------
Platycercus elegans (Crimson Rosella)
Score :  0.148438
--label は、ラベル情報を持つテキストデータを指定します。
以下のように編集したinat_bird_labels_jpn.txtデータを用意すれば日本語ラベルに変更できます。
# 編集前
837 Platycercus elegans (Crimson Rosella)
923 Ara macao (Scarlet Macaw)
# 編集後
837 アカクサインコ
923 コンゴウインコ
編集したラベルを指定すると、実行結果が日本語になりました。
$ python3 demo/classify_image.py \
>  --model test_data/mobilenet_v2_1.0_224_inat_bird_quant.tflite \
>  --label test_data/inat_bird_labels_jpn.txt \
>  --image test_data/parrot.jpg
---------------------------
コンゴウインコ
Score :  0.601562
---------------------------
アカクサインコ
Score :  0.148438
ーーー
他のサンプルをやろう
今度は、object_detection.pyスクリプトを使います。このスクリプトは写真の中に何があるか見つけてくれます。ただし、このスクリプトをラズパイで実行するには ”feh” のインストールが必要です。
object_detection.pyスクリプトのためにfehをインストールしよう
fehとは画像ビューワーのことで、コマンドでインストールできます。私はmakeコマンドでエラーになり苦労しました。makeでエラーのトラブルシュートは下部に書いたので参考になれば幸いです。
wget https://feh.finalrewind.org/feh-3.1.3.tar.bz2
tar -xjf feh-3.1.3.tar.bz2
cd feh-3.1.3
# ↓ ここでエラーになる場合はトラブルシュート見てみて
make
sudo make install
object_detection.pyスクリプトで分析してみよう
機械学習モデルはModelsサイトから取得した機械学習モデルを使用します。今回は、mobilenet_ssd_v1_coco_quant_postprocess_edgetpu.tfliteを使いました。
ーーー ちょっと脱線 ---
(後から気が付いたのですが、『python-tflite-source\edgetpu\test_data』に、mobilenet_ssd_v2_coco_quant_postprocess_edgetpu.tfliteがあるのでそちらを使えばよかったかも)
ーーーーーーーーーーーーーー
こちらの絵を分析してみます。

分析する画像
このような結果になりました。
# カレントディレクト
$ pwd
/home/pi/python-tflite-source/edgetpu

# 分析
$ python3 demo/object_detection.py \
>  --model allmodels/mobilenet_ssd_v1_coco_quant_postprocess_edgetpu.tflite \
>  --label allmodels/coco_labels.txt \
>  --input allmodels/test.jpg \
>  --output allmodels/out-test.jpg
-----------------------------------------
person
score =  0.730469
box =  [1118.7108993530273, 913.4950432284126, 1304.9584579467773, 1423.9593143093175]
-----------------------------------------
person
score =  0.71875
box =  [1599.1937255859375, 818.3500663987521, 1779.1033172607422, 1414.8751055372172]
-----------------------------------------
umbrella
score =  0.695312
box =  [986.865234375, 689.9717942137142, 1160.2798461914062, 784.9161425798103]
-----------------------------------------
person
score =  0.640625
box =  [809.5940208435059, 889.2384073857603, 890.5571937561035, 1213.7700488855098]
-----------------------------------------
train
score =  0.613281
box =  [102.92129516601562, 370.88387934812187, 838.7649536132812, 1344.9629190666922]
-----------------------------------------
handbag
score =  0.558594
box =  [1117.2372436523438, 1034.4183085293605, 1237.7975463867188, 1280.4363493261667]
-----------------------------------------
person
score =  0.558594
box =  [1680.1400756835938, 833.4483057260513, 1853.9273071289062, 1361.895639834733]
-----------------------------------------
person
score =  0.515625
box =  [1802.600440979004, 954.8050984740257, 1890.8835983276367, 1279.3367399737754]
-----------------------------------------
person
score =  0.515625
box =  [1282.280044555664, 814.0289174585506, 1382.1505737304688, 1324.4931885394558]
-----------------------------------------
person
score =  0.5
box =  [0.0, 636.7314655719133, 1486.7700576782227, 1268.3061939375154]
feh ERROR: Can't open X display. It *is* running, yeah?
(最後のfehエラーは、画像ビューワー無効が原因なので無視します)
結果を確認しよう
先ほどのスクリプトを実行すると、検出した場所に赤枠が追記されたout-test.jpgという画像が出力されます。

out-test.jpg
どの画像を何と判定したのか順に確認していきます。
ーーー
person
score = 0.730469
box = [1118.7108993530273, 913.4950432284126, 1304.9584579467773, 1423.9593143093175]
後ろ姿でも人を認識しました。

ーーー
person
score = 0.71875
box = [1599.1937255859375, 818.3500663987521, 1779.1033172607422, 1414.8751055372172]
正面向きの人をちゃんと認識しました。

ーーー
umbrella
score = 0.695312
box = [986.865234375, 689.9717942137142, 1160.2798461914062, 784.9161425798103]
傘と認識しましたね。当たらずとも遠からず。

ーーー
person
score = 0.640625
box = [809.5940208435059, 889.2384073857603, 890.5571937561035, 1213.7700488855098]
横向きでも人と認識しました。

ーーー
train
score = 0.613281
box = [102.92129516601562, 370.88387934812187, 838.7649536132812, 1344.9629190666922]
電車をちゃんと認識しました。

ーーー
handbag
score = 0.558594
box = [1117.2372436523438, 1034.4183085293605, 1237.7975463867188, 1280.4363493261667]
白い服の女性が持つハンドバックを認識しましたが、赤枠の位置がずれました。おしい

ーーー
person
score = 0.558594
box = [1680.1400756835938, 833.4483057260513, 1853.9273071289062, 1361.895639834733]
頭髪しか見えてない女性を認識した(?)ようです。

ーーー
person
score = 0.515625
box = [1802.600440979004, 954.8050984740257, 1890.8835983276367, 1279.3367399737754]
赤、黒、灰色の縞模様の服を着た男性を認識したようです。一部隠れているのに人と認識できました。赤枠がずれていますが、サンプルなら十分な精度と思います。

ーーー
person
score = 0.515625
box = [1282.280044555664, 814.0289174585506, 1382.1505737304688, 1324.4931885394558]
体が半分隠れていても人を認識しました。

ーーー
person
score = 0.5
box = [0.0, 636.7314655719133, 1486.7700576782227, 1268.3061939375154]
人と認識したようです。最後は大きく外しましたね。

ーーー
トラブルシュート
<問題>fehがインストールできない
tar -xjf feh-3.1.3.tar.bz2
cd feh-3.1.3
make     <-- ここでエラーになった
sudo make install
makeを実行すると、このようなエラーになった
$ make
make[1]: ディレクトリ '/home/pi/feh-3.1.3/src' に入ります
cc -g -O2 -Wall -Wextra -pedantic -std=c11 -D_POSIX_C_SOURCE=200809L -D_XOPEN_SOURCE=700 -DHAVE_LIBCURL -DHAVE_VERSCMP -DHAVE_LIBXINERAMA -DPREFIX=\"/usr/local\" -DPACKAGE=\"feh\" -DVERSION=\"3.1.3\"   -c -o events.o events.c
In file included from events.c:27:0:
feh.h:38:22: fatal error: X11/Xlib.h: そのようなファイルやディレクトリはありません
 #include <X11/Xlib.h>
                      ^
compilation terminated.
<ビルトイン>: ターゲット 'events.o' のレシピで失敗しました
make[1]: *** [events.o] エラー 1
make[1]: ディレクトリ '/home/pi/feh-3.1.3/src' から出ます
Makefile:6: ターゲット 'build-src' のレシピで失敗しました
make: *** [build-src] エラー 2
これは X11/Xlib.hが無いことが原因です。以下のように、他にも必要なファイルが無くエラーになることがあります。
# (1)
feh.h:45:37: fatal error: X11/extensions/Xinerama.h: そのようなファイルやディレクトリはありません
 #include <X11/extensions/Xinerama.h>

# (2)
feh.h:67:20: fatal error: Imlib2.h: そのようなファイルやディレクトリはありません
 #include <Imlib2.h>

# (3)
imlib.c:40:23: fatal error: curl/curl.h: そのようなファイルやディレクトリはありません
 #include <curl/curl.h>

# (4)
wallpaper.h:31:68: fatal error: X11/Intrinsic.h: そのようなファイルやディレクトリはありません
 #include <X11/Intrinsic.h> /* Xlib, Xutil, Xresource, Xfuncproto */
<対策>
無いファイルを含むパッケージをインストールすればエラーは出なくまりました。
# (1)
sudo apt-get install libx11-dev libxinerama-dev

# (2)
sudo apt-get install libimlib2-dev --fix-missing

# (3)
sudo apt-get install libcurl4-openssl-dev

# (4)
sudo apt-get install libxt-dev他にも『そのようなファイルやディレクトリはありません』となった場合は、それらファイルをインストールします。インストール方法は、ネット検索が有効と思いますが、apt-fileコマンドで探す方法もあります。
以下のように、X11/Intrinsic.hを含むパッケージがlibxt-devとわかります。
$ apt-file search X11/Intrinsic.h
libxt-dev: /usr/include/X11/Intrinsic.h
apt-fileコマンドのインストール方法はこちら
$ sudo apt-get update
$ sudo apt-get install apt-file
$ sudo apt-file update <--すげー時間かかるかも(2時間くらい)
さいごに
こんなに簡単に画像解析できるとは便利な世の中になりました。
次は、カメラ映像をリアルタイムに分析しようと思いますが、長くなったので今回はここまでにします。
こんな弱小ブログでもサポートしてくれる人がいることに感謝です。