何かかんかlaravel sailで最速開発セットアップしたい場合 (その2)

前回
bladeでもinertiaでも最初に考えておいたりすると良さそうな点
デモユーザーのseed
database/seeders/DatabaseSeeder.php
    public function run(): void
    {
        // \App\Models\User::factory(10)->create();

        // \App\Models\User::factory()->create([
        //     'name' => 'Test User',
        //     'email' => 'test@example.com',
        // ]);
    }
このコメントを外せば
    public function run(): void
    {
        // \App\Models\User::factory(10)->create();

        \App\Models\User::factory()->create([
            'name' => 'Test User',
            'email' => 'test@example.com',
        ]);
    }
パスワード「password」でemailをキーにしてログインできるようになる。なぜpasswordなのかはfactoryみてね。
(なお、factory(10)も外すと適当なemailで10ユーザー作成される。何が作成されたかはDBを確認する必要がある。
ユーザーのソフトデリートの検討
要するに、論理削除である。ユーザーってのは大抵softDeleteを設定しておいた方がトラブルが少ないように思えたり、思えなかったり…
    public function up(): void
    {
        Schema::create('users', function (Blueprint $table) {
            $table->id();
            $table->string('name');
            $table->string('email')->unique();
            $table->timestamp('email_verified_at')->nullable();
            $table->string('password');
            $table->rememberToken();
            $table->timestamps();

            $table->softDeletes(); // <- これ
        });
    }
これを追加しておく。
モデルにuse SoftDeletesを追加
// ...
use Illuminate\Database\Eloquent\SoftDeletes;

class User extends Authenticatable
{
    use SoftDeletes, HasApiTokens, HasFactory, Notifiable;
確認はtinkerで行う
% vi database/migrations/2014_10_12_000000_create_users_table.php
% ./vendor/bin/sail artisan tinker
$Psy Shell v0.11.20 (PHP 8.2.7 — cli) by Justin Hileman
> $u = User::first()
[!] Aliasing 'User' to 'App\Models\User' for this Tinker session.
= App\Models\User {#7242
    id: 1,
    name: "Test User",
    email: "test@example.com",
    email_verified_at: "2023-08-05 07:03:20",
    #password: "$2y$10$92IXUNpkjO0rOQ5byMi.Ye4oKoEa3Ro9llC/.og/at2.uheWG/igi",
    #remember_token: "iBuwV2RVwP",
    created_at: "2023-08-05 07:03:20",
    updated_at: "2023-08-05 07:03:20",
    deleted_at: null,
  }

> $u->delete()
= true

> User::all()
= Illuminate\Database\Eloquent\Collection {#7243
    all: [],
  }

> User::withTrashed()->get()
= Illuminate\Database\Eloquent\Collection {#7244
    all: [
      App\Models\User {#7245
        id: 1,
        name: "Test User",
        email: "test@example.com",
        email_verified_at: "2023-08-05 07:03:20",
        #password: "$2y$10$92IXUNpkjO0rOQ5byMi.Ye4oKoEa3Ro9llC/.og/at2.uheWG/igi",
        #remember_token: "iBuwV2RVwP",
        created_at: "2023-08-05 07:03:20",
        updated_at: "2023-08-05 07:03:57",
        deleted_at: "2023-08-05 07:03:57",
      },
    ],
  }
以上のように、withTrashed()を使う事で削除したユーザーがまだ残っている事を確認できる。
ここからは個人的に入れときたい奴
ログインイベントを掴まえとく
ログインした時のイベントが裏ではファイヤーしている。具体的にはこの辺
% find vendor/laravel/framework/src/Illuminate/Auth/Events/
vendor/laravel/framework/src/Illuminate/Auth/Events/
vendor/laravel/framework/src/Illuminate/Auth/Events/Validated.php
vendor/laravel/framework/src/Illuminate/Auth/Events/OtherDeviceLogout.php
vendor/laravel/framework/src/Illuminate/Auth/Events/Lockout.php
vendor/laravel/framework/src/Illuminate/Auth/Events/Verified.php
vendor/laravel/framework/src/Illuminate/Auth/Events/Authenticated.php
vendor/laravel/framework/src/Illuminate/Auth/Events/Registered.php
vendor/laravel/framework/src/Illuminate/Auth/Events/PasswordReset.php
vendor/laravel/framework/src/Illuminate/Auth/Events/Login.php
vendor/laravel/framework/src/Illuminate/Auth/Events/Failed.php
vendor/laravel/framework/src/Illuminate/Auth/Events/Logout.php
vendor/laravel/framework/src/Illuminate/Auth/Events/Attempting.php
vendor/laravel/framework/src/Illuminate/Auth/Events/CurrentDeviceLogout.php
これらは基本的にListenしてないと捨てられる。ログイン成功時に何かしたいという場合はListenerを作らなくてはいけない。まあよくある奴
% ./vendor/bin/sail  artisan make:listener LogSuccessfulLogin

   INFO  Listener [app/Listeners/LogSuccessfulLogin.php] created successfully
イベントとリスナーを関連付ける。
app/Providers/EventServiceProvider.php
namespace App\Providers;

use Illuminate\Auth\Events\Registered;
use Illuminate\Auth\Listeners\SendEmailVerificationNotification;
use Illuminate\Foundation\Support\Providers\EventServiceProvider as ServiceProvider;
use Illuminate\Support\Facades\Event;

class EventServiceProvider extends ServiceProvider
{
    /**
     * The event to listener mappings for the application.
     *
     * @var array<class-string, array<int, class-string>>
     */
    protected $listen = [
        Registered::class => [
            SendEmailVerificationNotification::class,
        ],
    ];
このような記述がみられ、これはRegistered、つまりユーザーが登録されたときの処理はデフォで書かれているわけだ。これに従ってこのようにする。
namespace App\Providers;

use Illuminate\Auth\Events\Registered;
use Illuminate\Auth\Events\Login; // 追加
use Illuminate\Auth\Listeners\SendEmailVerificationNotification;
use Illuminate\Foundation\Support\Providers\EventServiceProvider as ServiceProvider;
use Illuminate\Support\Facades\Event;
use App\Listeners\LogSuccessfulLogin; // 追加

class EventServiceProvider extends ServiceProvider
{
    /**
     * The event to listener mappings for the application.
     *
     * @var array<class-string, array<int, class-string>>
     */
    protected $listen = [
        Registered::class => [
            SendEmailVerificationNotification::class,
        ],
        // ↓ この辺追加
        Login::class => [
            LogSuccessfulLogin::class,
        ],
    ];
あとは app/Listeners/LogSuccessfulLogin.php に何か処理を書けばok。アイデアがなればとりあえずddとかで確認しておく。
    public function handle(object $event): void
    {
        dd($event);
    }
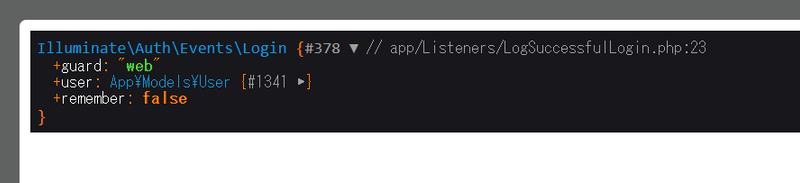
確認できたらコメントアウトしておくか、あるいは適当な処理を入れておいたりとか…
    public function handle(object $event): void
    {
        // dd($event);

        // update user column
        $event->user->last_login = now();
        $event->user->timestamps = false;
        $event->user->save();
    }
last_loginというカラムにnowを記録している。last_loginは作らないといけないが。
この記事が気に入ったらサポートをしてみませんか?