Shopify|お知らせ(新着)セクションを追加する(Dawn)

こんにちは、ななこまです。
今回は、サイトでよく見かける「お知らせ」のセクションを作成します。
オールコピペでOKなので、Shopify初心者さんでも大丈夫です!
《 今回やったこと 》
①お知らせ.liquidを作成する
②お知らせ.cssを追加してデザインを整える
③カスタムcssでアレンジ
④おまけ
①お知らせ.liquidを作成する
コード編集>セクション>新しいセクションを追加する を選択し、
「new-news.liquid」を作成。下記コードをコピペします。
{%- assign blog = blogs[section.settings.new-news] -%}
<div id="section-new-news">
<div class="container">
<div class="new-news-head">
<h3>{{ section.settings.title | escape }}</h3>
<a href="{{ blog.url }}" class="link underlined-link large-up-hide">一覧を見る</a>
</div>
<ul class="new-news">
{% for article in blog.articles limit: section.settings.post_limit %}
<li class="new-news-item">
<div class="new-news-info">
{% if section.settings.new-news_date %}
<span class="new-news-date">{{ article.published_at | date: "%Y.%m.%d" }}</span>
{% endif %}
{% if section.settings.new-news_category %}
<span class="new-newscategory">{{ article.tags }}</span>
{% endif %}
</div>
<a href="{{ article.url }}" class="new-news-title">{{ article.title }}</a>
</li>
{% endfor %}
</ul>
</div>
</div>
{% schema %}
{
"name": "お知らせ",
"settings": [
{
"id": "title",
"type": "text",
"label": "見出し",
"default": "お知らせ"
},
{
"id": "new-news",
"type": "blog",
"label": "ブログ記事を選択"
},
{
"id": "post_limit",
"type": "range",
"label": "表示数を選択",
"min": 1,
"max": 6,
"step": 1,
"default": 3
},
{
"id": "new-news_date",
"type": "checkbox",
"label": "日付を表示",
"default": true
},
{
"id": "new-news_category",
"type": "checkbox",
"label": "カテゴリを表示",
"default": true
}
],
"presets": [
{
"name": "お知らせ",
"category": "お知らせ"
}
]
}
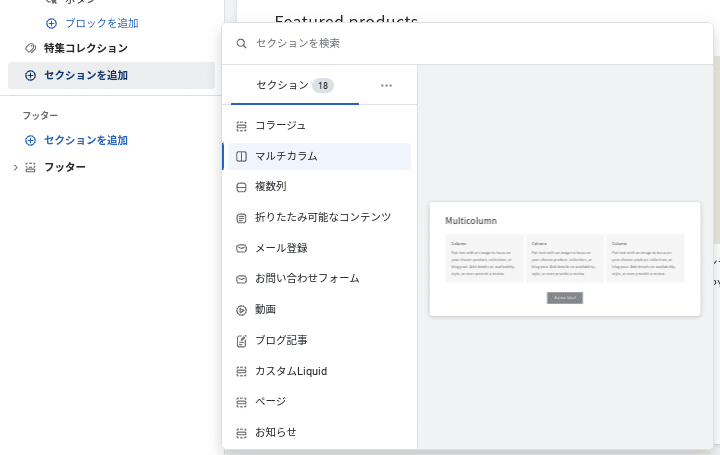
{% endschema %}そうすると、テンプレート>セクションを追加に「お知らせ」が追加され、選択すると画像のようになっているはずです。
②お知らせ.cssを追加してデザインを整える
続いてコード編集に戻り、アセット>新しいアセットを追加する を選択し、「new-news.css」を作成。下記コードをコピペします。
.new-news-head {
display: flex;
justify-content: space-between;
align-items: center;
}
.container {
max-width: 1200px;
margin: 0 auto;
padding: 20px 50px;
}
.new-news {
padding: 0 0.5rem;
margin: 0;
}
.new-news-item {
display: flex;
align-items: center;
padding: 1rem;
border-bottom: 0.5px solid #ccc;
}
.new-news-item:last-child {
border-bottom: none;
}
.new-news-date {
font-size: 12px;
color: #3a3a3a;
margin-right: 10px;
}
.new-news-info {
position: relative;
}
.new-news-title {
font-size: 14px;
margin-bottom: 0;
text-overflow: ellipsis;
white-space: normal;
overflow: hidden;
position: relative;
color: #000;
text-decoration: none;
}
@media screen and (max-width: 768px){
.container {
padding: 1rem 2rem 5rem ;
}
.new-news-item {
display: flex;
padding: 1rem;
}
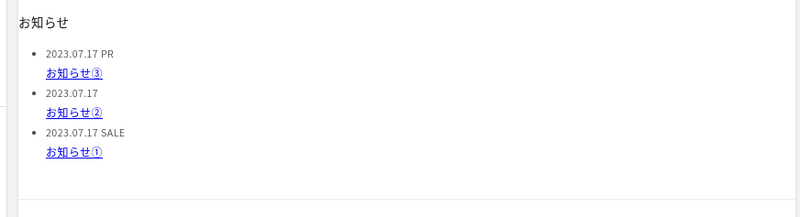
}このcssを反映させるため、先程作成した「new-news.liquid」の1番上に下記を追加します。
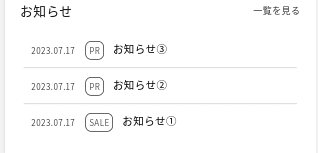
{{ 'new-news.css' | asset_url | stylesheet_tag }}そうすると、画像のように一般的なお知らせ欄ができます。

③カスタムcssでアレンジ
上画像のままでも使用できますが、「一覧を見る」のリンク下線を消したい場合は、セクション画面のカスタムcssに以下を追加します。
.link {
  font-size: 1.2rem;
  text-decoration: none;
}
フォントサイズもやや小さくしてみました。
④おまけ
カテゴリ(ブログのタグ)をつける場合、new-news.cssに「.new-newscategory」を追加して、カテゴリ名のデザインを変更することができます◎例えば、、
.new-newscategory {
font-size: 1.2rem;
border: solid 1px #3a3a3a;
padding: 0.4rem;
margin-right: 1.2rem;
border-radius: 8px;
}
↓
.new-newscategory {
  font-size: 1.2rem;
  font-weight: bold;
  color: #F7914D;
  margin-right: 1.5rem;
}
↓
(new-news.liquidの<span class="new-newscategory">#{{ article.tags }}</span>にハッシュタグをつけてます)↓
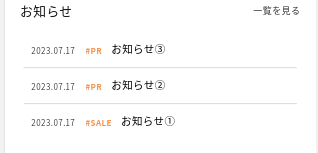
色々試して、サイトに合ったデザインを見つけてみてください!
以上、ななこまでした☺
この記事が気に入ったらサポートをしてみませんか?