How to use Facemotion3d's .scn file import function

In version 1.1.1 of the Facemotion3d application, the ability to read .scn format extensions has been added. Since this is a minor extension that is not often used, I will explain how it was implemented and how to use it in this article.
Explanation of the .scn extension and how it was implemented
In iOS application development, we use a mechanism called SceneKit, which is a standard iOS viewport.
As far as I know, the only extensions that can be displayed and loaded in the SceneKit are .scn and .usdz at the time of this writing.
However, at the time of writing this article, USDZ files are not yet ready for BlendShape export and other functions, so BlendShapes cannot be run using USDZ files.
For this reason, I added the ability to read .scn files in the iOS app.
How to create a .scn file
Creating a .scn file is not so easy for many users. However, if you are a Mac user, you can create it by using a PC software called Xcode. This time, I received a request from a Mac user who wanted to import a custom avatar, so I implemented this feature.
Before creating a .scn file, you need to export a DAE (COLLADA) file using Maya, Blender, etc. DAE itself is an unfamiliar extension to many people, but it is a standard export function in many DCC tools.
DAE files can also be used to export lights, so export them along with your lights. If you do not include the lights in the DAE file, the object may go dark in the application.
I don't know about Blender, but it is recommended to bake the pivot point of the object before exporting the dae file in Maya. After exporting, open the dae file in a text editor and rewrite some of its contents. In the text editor, change the word "RELATIVE" to "NORMALIZED".
Then, load the rewritten DAE file into your Mac's Xcode software and convert it to a .scn file.
Importing the .scn file
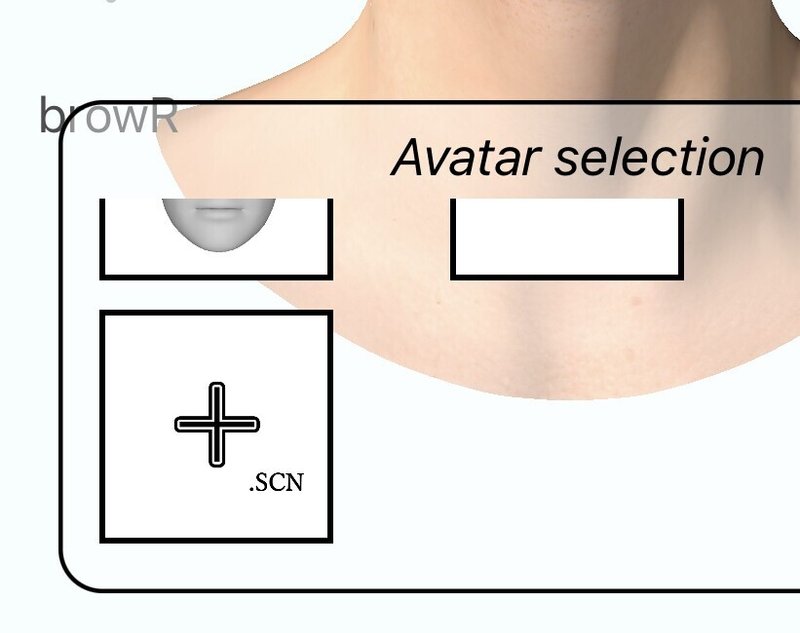
To actually import the .scn file into the app, press the button with the cross mark in the app to import it.
The scale and position of the object is automatically adjusted by the program in the app by checking the bounding box of the object, so you don't need to be particularly conscious of it when creating it.
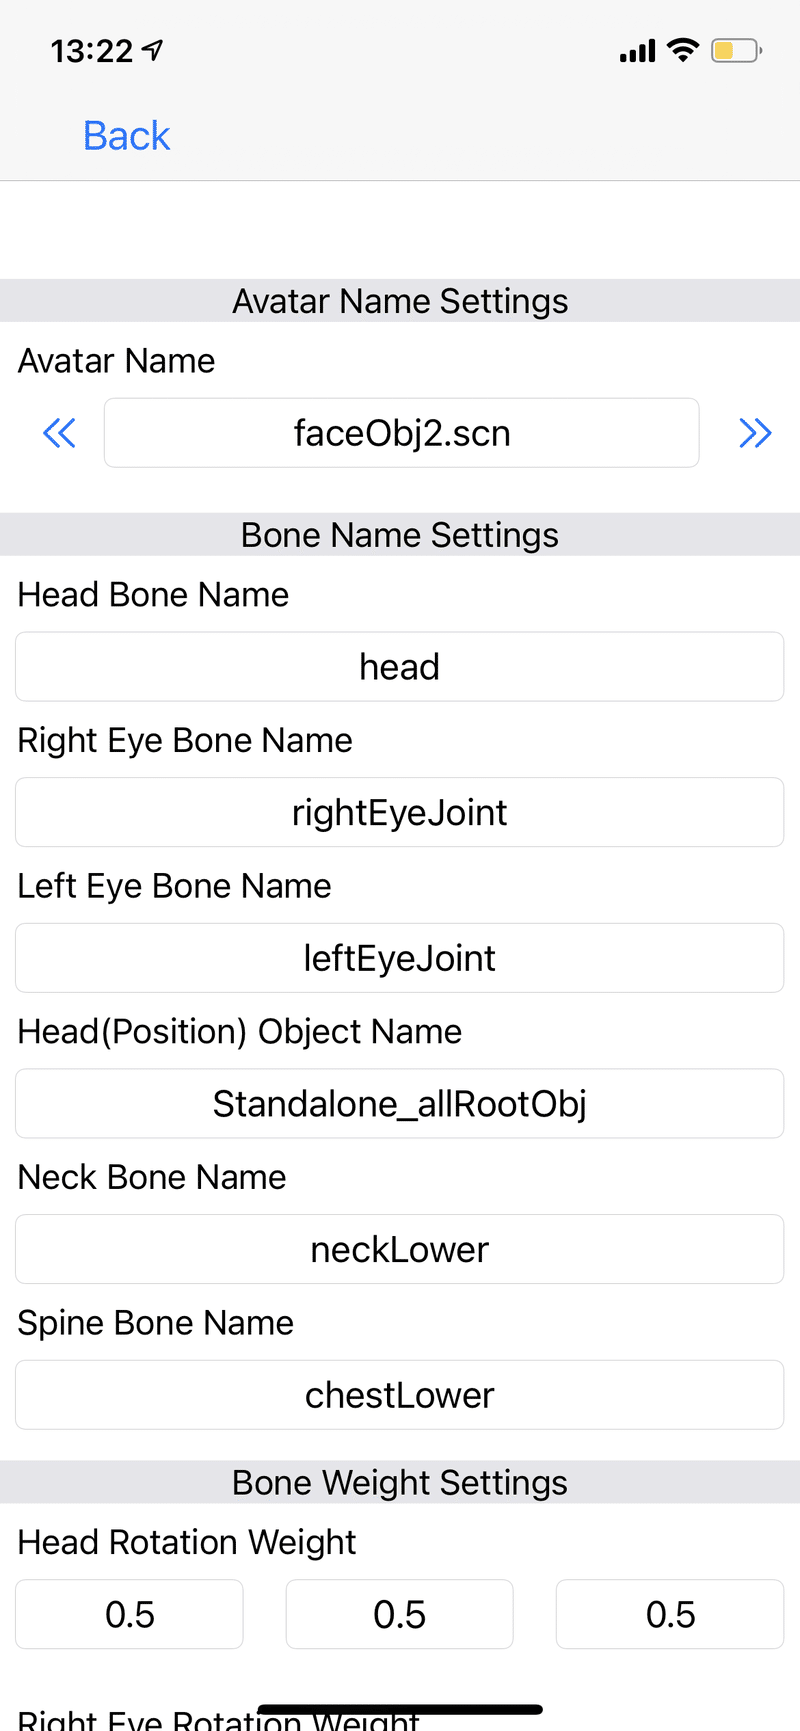
There is a section in the avatar's advanced settings where you can specify the name of the head bone, etc., so please use that to give it a name.
You don't need to specify a name for the part that moves the BlendShape, because it scans all the nodes in the scene that have a BlendShape.
Just follow the Facemotion3d BlendShape naming conventions and you should be fine. If you convert it to a .scn file, the name "Mesh" will be added to the end of the BlendShape name. For example, if you create a BlendShape for "eyeBlinkLeft" and convert it to a .scn file, "eyeBlinkLeftMesh" will be created. However, this "Mesh" name is ignored in the application.
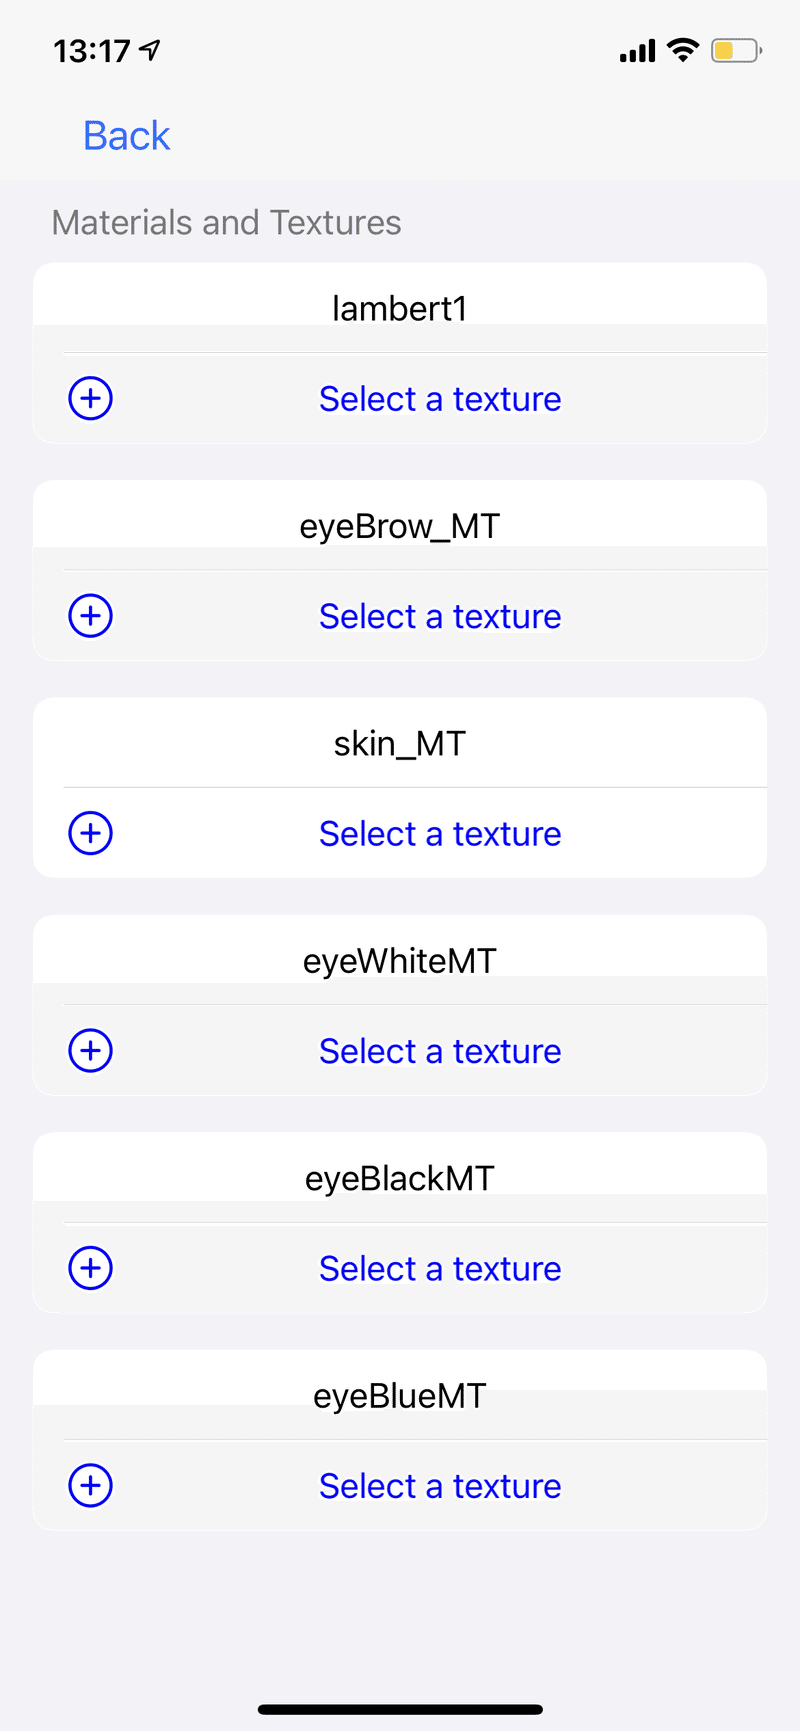
The .scn file does not contain a texture, so you will need to re-link the texture path in your app. There is a function in the app to link textures, so use it.
Types of materials that can be used
Basically, phong, lambert and blin are used. the default avatar in Facemotion3d consists of only the phong shader.
Please check on Xcode for other supported materials.
Difference between VRM import and SCN import
Facemotion3d also comes with the ability to import VRMs, which are great for loading at runtime in Unity, but have some disadvantages for loading within an iOS app. Running Unity inside an iOS app has some disadvantages, such as increasing the device temperature and preventing audio recording.
Therefore, it is somewhat incompatible with Facemotion3d, which is used for long duration delivery and has recording with audio. Also, VRM materials are basically toon shaders, so for those who want to use something other than that, .scn is a good choice.
Also, as I am developing the application, I don't understand how to create VRM avatars myself, so I can't answer questions when asked.
この記事が気に入ったらサポートをしてみませんか?