Uploading your first VRChat avatar: A complete guide

Hello, This is Reze,
I have a number of friends who play VRchat who also want to get into avatar creation, so I will be outlining the basics of setting up the proper applications to begin creating and how to upload a model to VRChat in this article. There are currently two ways to do so as VRChat has recently added "VRChat creator companion" which I will be covering.
I am writing this article due to a lack of clarity and documentation on the VRchat website and for those who do not know how to access that documentation.
This is a very thorough guide for those who have absolutely no experience with unity and VRChat avatar creation.
Background knowledge
VRchat is an application that runs on the game engine "Unity". Unity handles all 3d models and game mechanics for VRchat. Using the VRchat SDK (software development kit), you are able to upload content from unity into VRchat.

All content you can find in VR is handled by unity and uploaded from unity. you can create content in other applications such as Blender, Zbrush, or other 3d applications, but you will always need to put everything together, set it up, and upload it through unity.
Getting started
I will be covering both Vrchat Creator Companion and the traditional Unity installation.
VRchat Creator Companion Installation
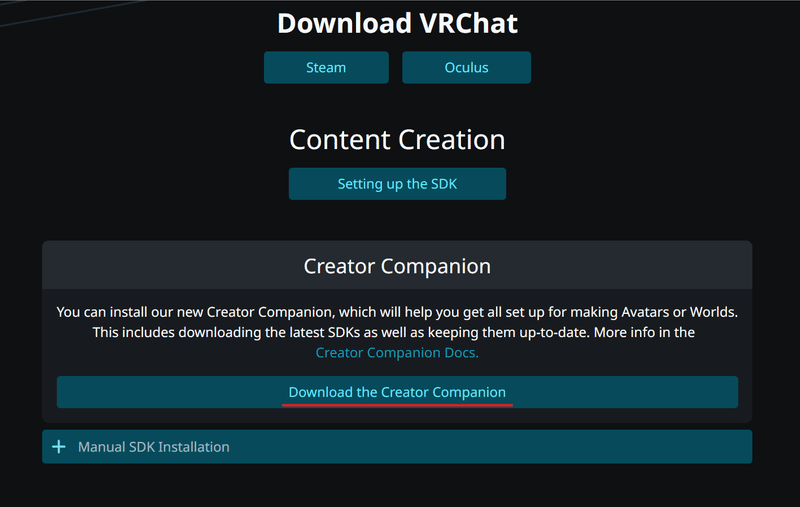
With the recent release of VRchat creator companion (VCC), the process of setting up your computer for VRchat creation has been simplified. To begin with, download VCC from the official VRchat website.
Upon installing VCC and running it, VCC will check if Unity is installed on launch for you so you do not have to download it yourself. If you do not own Unity, there will be a prompt for it to install unity for you. VCC will install the latest version of unity compatible with the VRCSDK. Please refrain from tampering with your unity editor as it can break VCC.
Now VCC is set up for usage and you can begin creating avatars by pressing "New".
Here is the VCC documentation in case you require further assistance: https://vcc.docs.vrchat.com/
Traditional Unity Installation
There are many benefits to installing VCC, but some choose to continue using the outdated method of avatar creation whether it be that some of their old VRC unity tools do not work with the new version of VCC (some tools are unable to detect some scripts in VCC and break as a result) or simply out of habit or spite. One other reason to use a traditional unity installation is if VCC does not support your computer operating system (i.e. Mac and Linux).
It should be known that VCC includes a number of tools and slight optimizations for creating avatars and it is not recommended to do a traditional unity installation for new users as base unity does not contain the tools VCC has and the Legacy VRCSDK may be depreciated in the future (Although unlikely) if there is an option to do so.
To start off, one needs to download Unity Hub
After installing and running unity hub, get a free personal license.

download Unity 2019.4.31f
This is a download link to the correct version of unity:
If there is an option, you may install it through Unity hub.

The correct version of Unity should now be installed and ready for use!
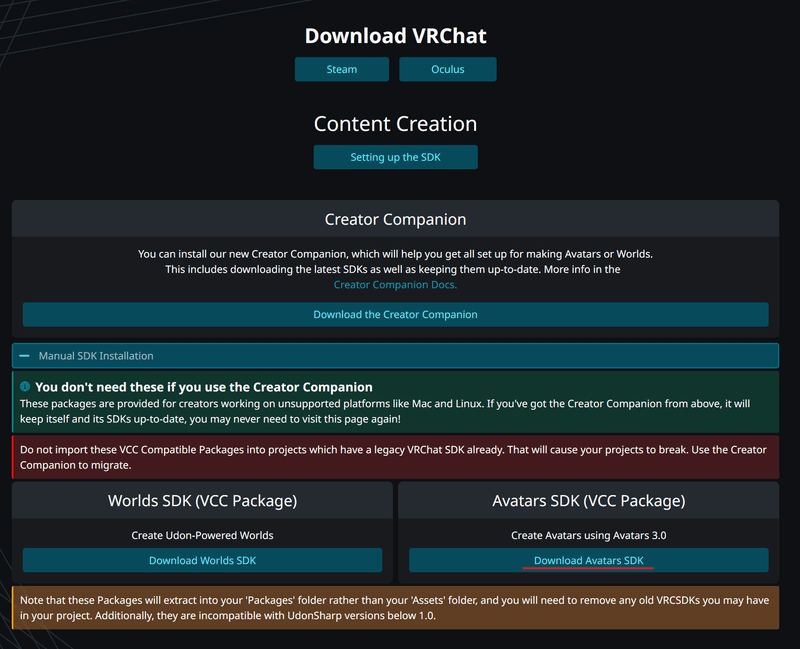
Locate VRchat downloads and download the VRCSDK.
This will be used later.
If you are doing a traditional unity installation for outdated tools, use this download. This contains a legacy VRCSDK version and should function similarly to the current manual installation.
Creating your first project
Creating a new project for your avatar is a slightly different process in VCC and base unity. In base unity, one has to manually install the SDK package and in VCC, projects are created with this package along with a couple of other tool packages preinstalled.
VCC
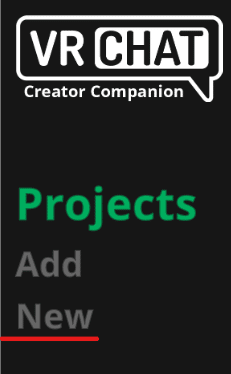
Click the "new" button to create a new project.

Select the template you wish to use (in this case most likely avatar).
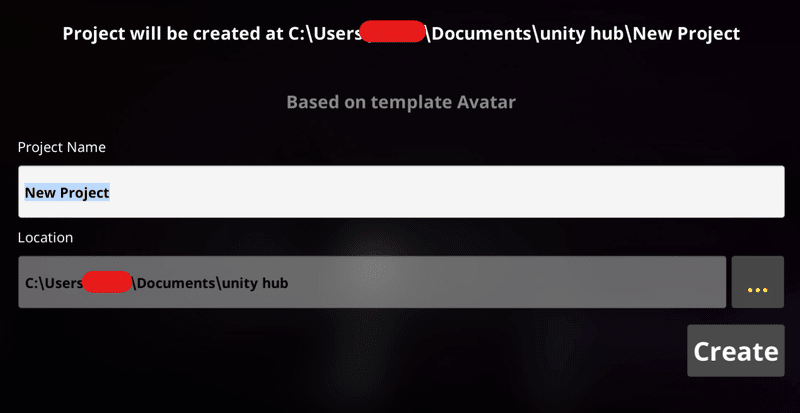
Name your project, set its file location, and create it. Typically file location is stored in Unity Hub's dedicated folder so leave it unchanged if you so please.

Open your project. Opening a project can take a long time. One can expect Unity to take its time in doing what it does, so know to be patient; some installations can take minutes, and longer ones can take upwards of one entire hour.

At the top of your project, you can see that your VRCSDK has already been installed.
Now you can start uploading your first avatar.
Traditional Unity

In Unity hub, press new project to create a new project

make sure your unity editor version is 2019.4.31f. This is the version of unity compatible with the legacy VRCSDK.
Make sure you are creating a project with the core 3D template. any other template will not work properly with VRCSDK
Name your project
Edit file location if necessary. Your project files are stored in unity hub's dedicated folder.
Create project.
*note that the creation of a new project may take a decent amount of time. Unity is not optimized for importing and exporting very well so doing so may take a decent amount of time

You now have an empty unity scene. This project is not ready for avatar creation for VRchat.

locate the VRCSDK you downloaded previously (if you did not, please download it here manual SDK installation > download avatars SDK) and either double click it, drag it into the scene, on the upper tabs in unity go to assets > import package > custom package > select your SDK > Open.

After a bit, there should be a prompt to import the SDK. Import and wait.

Your SDK should now be imported and you should be able to see its tab on top.
Uploading your first avatar
If you are here, you should have a VCC setup project ready or a base unity project ready for VRChat. If you have not done this, please review the rest of the article above.
General information
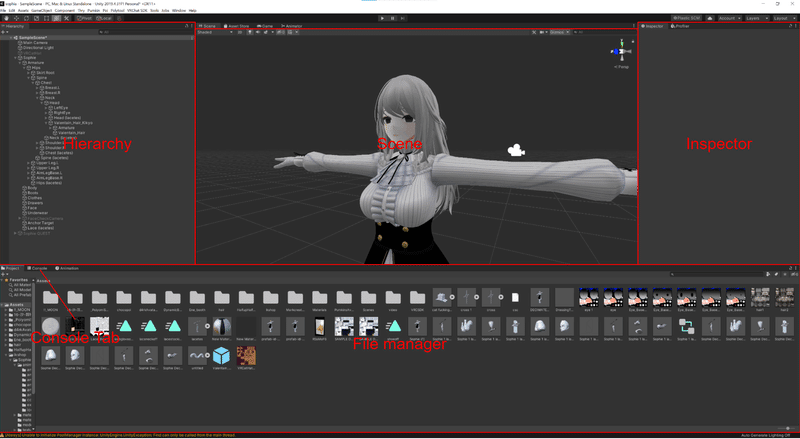
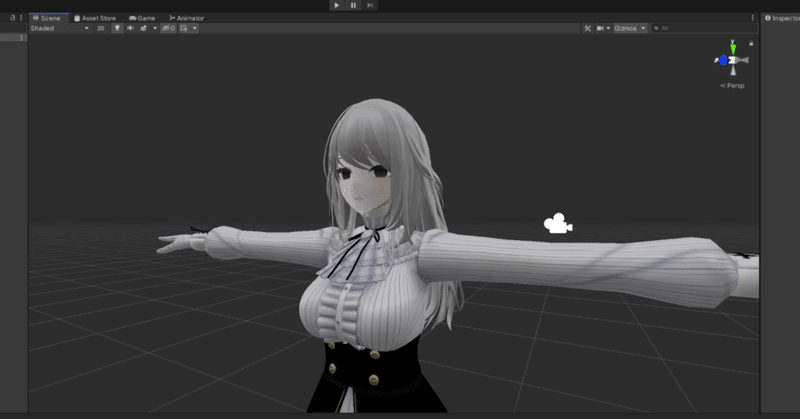
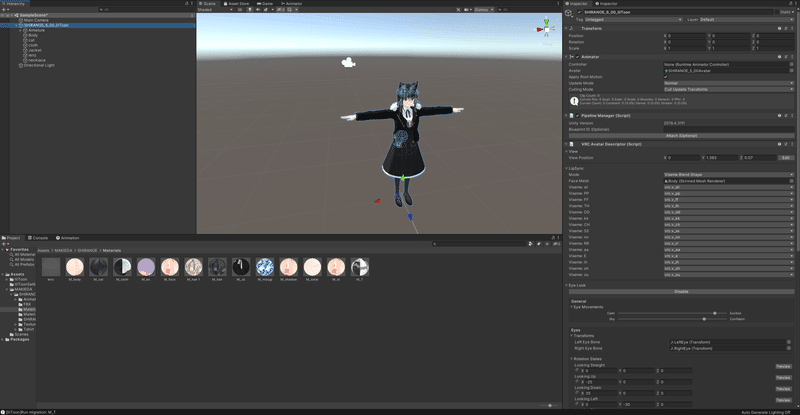
Please reference this image to know where to find referenced areas. note that each box's tab can be changed or swapped out. These are just your default settings.
There are a couple of controls in unity:
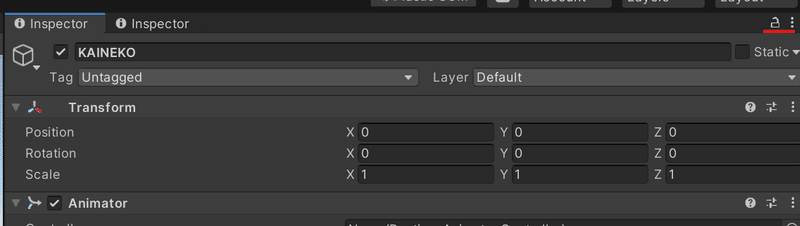
Tabs can be locked and unlocked to not be able to change.
In your scene:
To move, use WSAD.
You can zoom in with your scroll wheel.
To look around, hold right click and move your mouse.
You can use left click to select objects in the scene. Holding it down will allow you to select multiple objects in your scene.
In your hierarchy:
Click to select specific objects
Hold down control and click to select multiple specific objects
Hold down shift and click to select a range of objects.
Objects can be dragged to be parented by other objects
Right-clicking in your hierarchy will open a number of options in your hierarchy.
Clicking on the arrows in your hierarchy will open up parenting objects and reveal what is inside of them.
In your inspector:

objects and scripts can be toggled on and off.
VRCSDK
on the top of your unity project, you should see VRChat SDK.
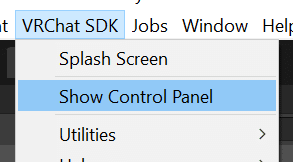
Click on the tab and show the Control Panel

Sign in with your VRchat credentials. The email associated with your VRchat account may be used as a substitute if your username contains special characters or you are too lazy to type it out.

There are a couple of options in your VRCSDK
Authentication: This is where you manage your VRChat account and is where you can log in or out. The account you are logged into in VRChat is the account you will be publishing content to.
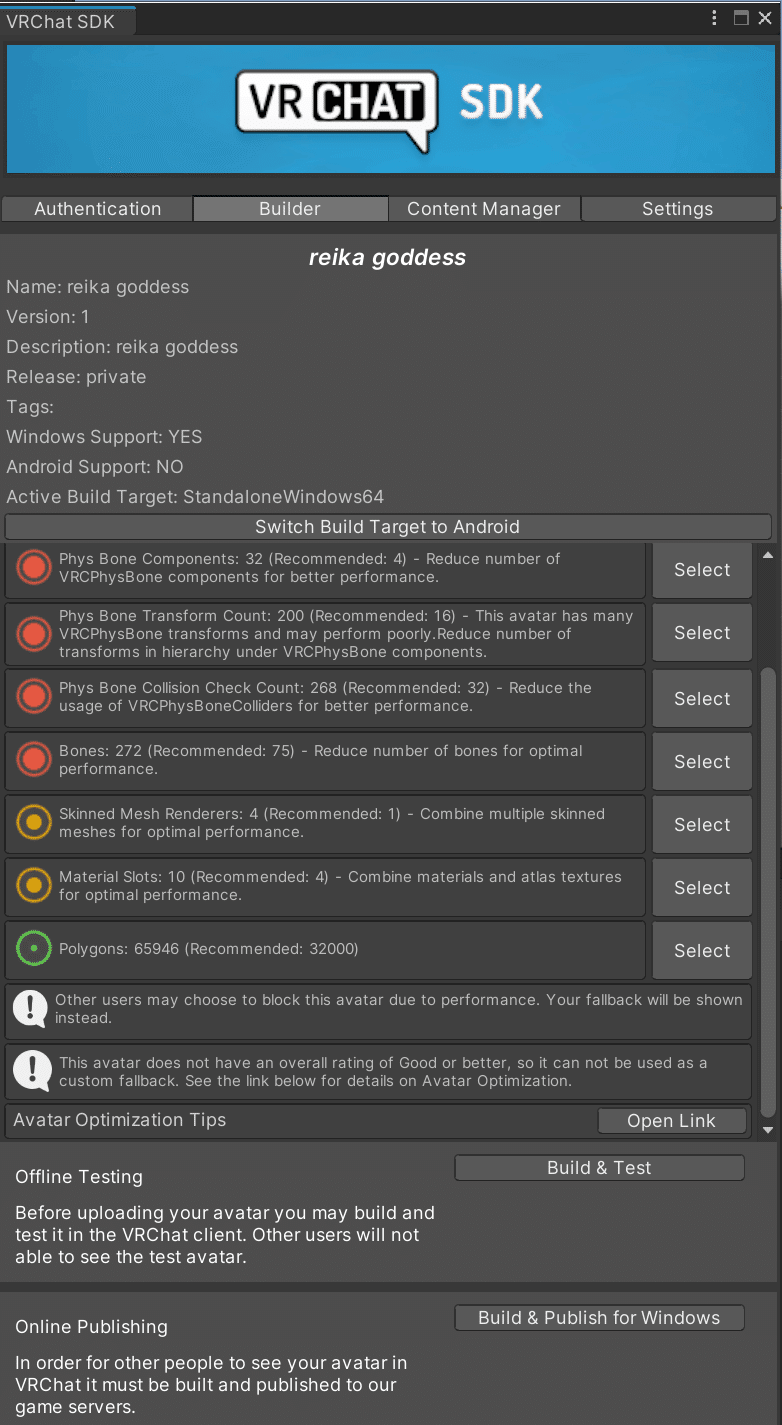
Builder: The builder is used to display information about the avatar you are building, its level of optimization, and it contains the prompts for publishing your avatar. If there is not an avatar set up for VRChat in the scene it will show "A VRC avatar descriptor is required to build an avatar."

The content manager contains information on all avatars you have published to your account. you can toggle your avatars clonability by selecting if you want it public or private

settings contain some extra settings you can tweak in your SDK. it is recommended to turn off future proofing as it can cause a bug where you are unable to upload your avatar. turn on "Show all avatar performance details" so you can see all of the information that is accessible in your builder.
Importing an avatar

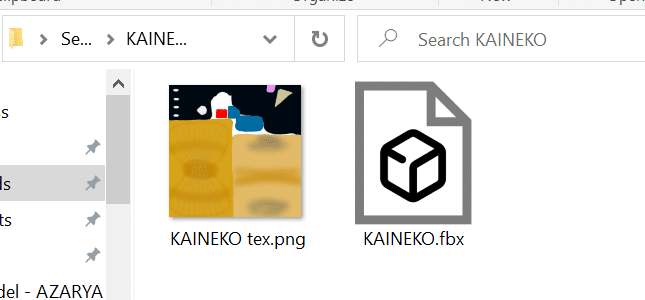
Upon purchasing an avatar or downloading an avatar that is created for VRChat you will typically receive a unity package. Some models may only contain an FBX.

double-clicking the .unitypackage or dragging it into your project scene will begin the import. you do not need to import anything other than the unity package normally. If your folder only contains an FBX, drag that along with any textures (in image file format such as .png .jpg etc)
Shaders
After importing your avatar you may want to import a shader. A third-party shader will allow you to make adjustments to your avatar's lighting and usually looks better than default provided shaders. Shaders are not required by any means but are very useful. Two popular free shaders I recommend are Liltoon and Poiyomi. Their respective links are provided below:
You will want to download one (or both) of these and open the .unitypackage to import it into your project. They will be explained further later.
Setting up an FBX
Only read this if your avatar came with no .unitypackage

In your project you should have:
A folder for your shader
A project set up VCC or VRChat SDK imported
Textures
An FBX
Setting up your FBX as a humanoid model:

click on your fbx in the file manager.

Open the rig tab

Open the first dropdown and set the rig to humanoid. click apply below.
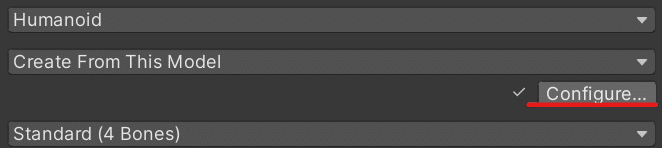
After the rig has been applied, click configure and save after the prompt appears.

Click configure avatar if it does not automatically take you to the bone configuration screen.

Check that all bones with a solid circle indicator are mapped. Apply any optional bones (dotted line) that your avatar may have.
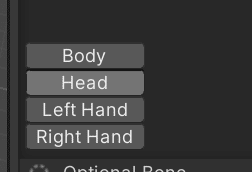
Be sure to check all tabs.

To select or change a bone, click the little circle and choose the correct bone. typically bones will be named similarly to where they are mapped. if your fbx does not contain the necessary bones for a humanoid rig, they cannot be used in VRChat as a humanoid animated model but can be operated as a standstill object in VRChat.
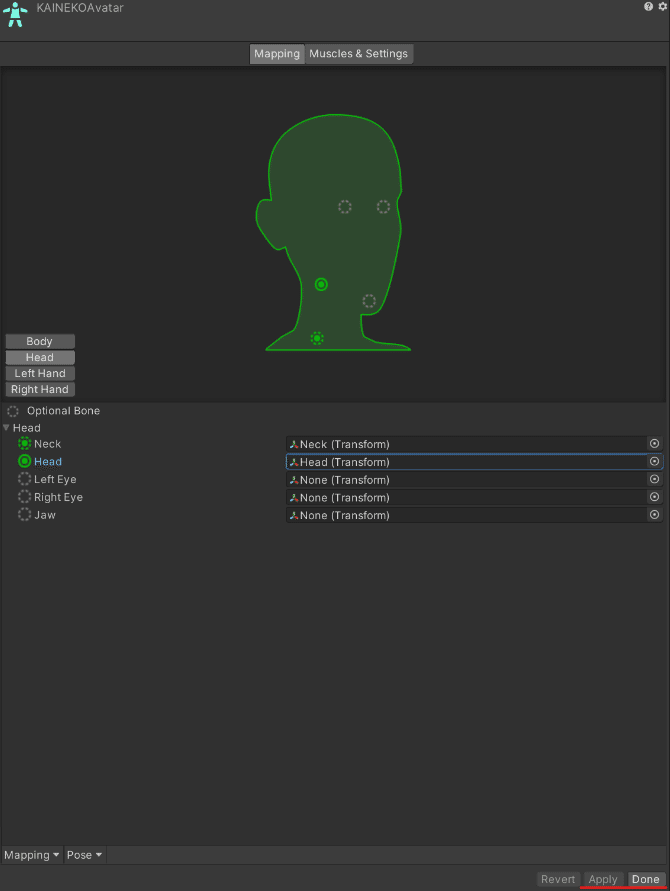
Once you have completed mapping your bones click apply and done.
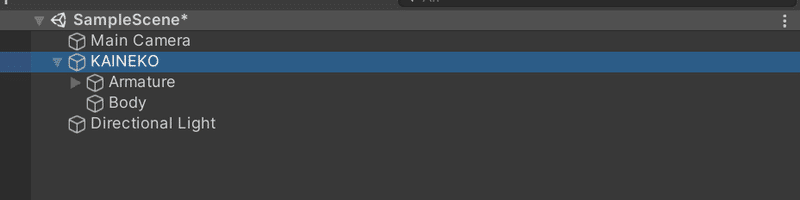
Drag the FBX into the Scene or Hierarchy

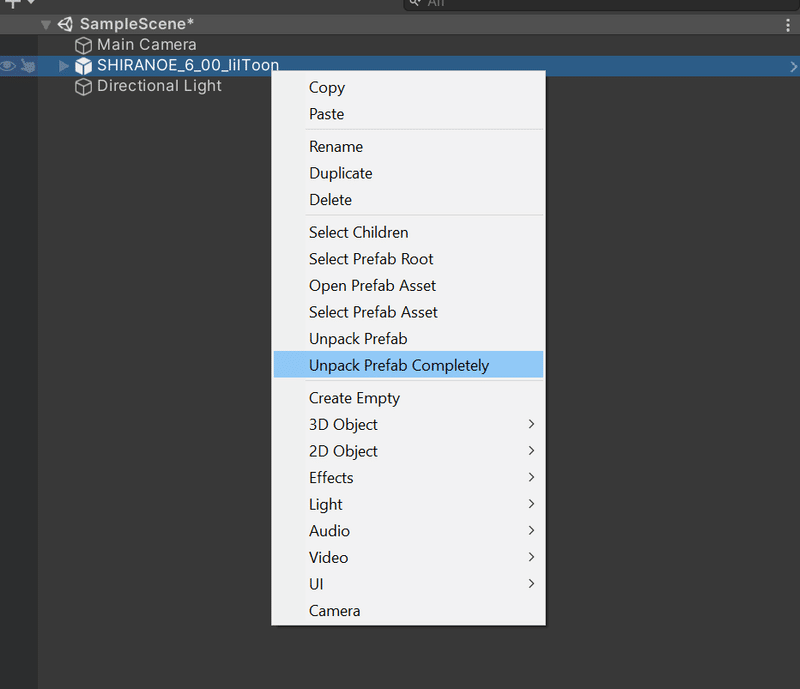
Right-click your model object and unpack prefab.

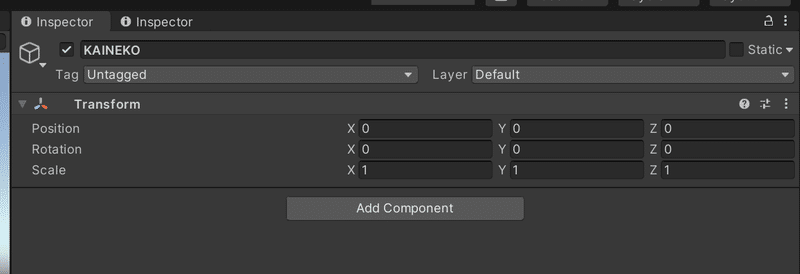
Locate the transform script in the inspector and set the position to 0/0/0 if it is not already.

Right-click in your project file manager and create a new material

click on your material in the project file manager and drag your texture into the little box next to "albedo"

Click the dropdown on top and select the shader you imported.


Drag your material into your scene, onto the mesh of choice or locate that mesh in your hierarchy by finding an object with the "skinned mesh renderer" script and drag the material into the box under the materials tab. Some meshes contain more than one texture and you will have to experiment to see what material matches up.

This model contains an extra "dummy" object for positioning reference. we will be deleting that from the hierarchy as we do not want it on the avatar when we upload it.
click on your avatar object
In the inspector, there should be nothing but a transform script.
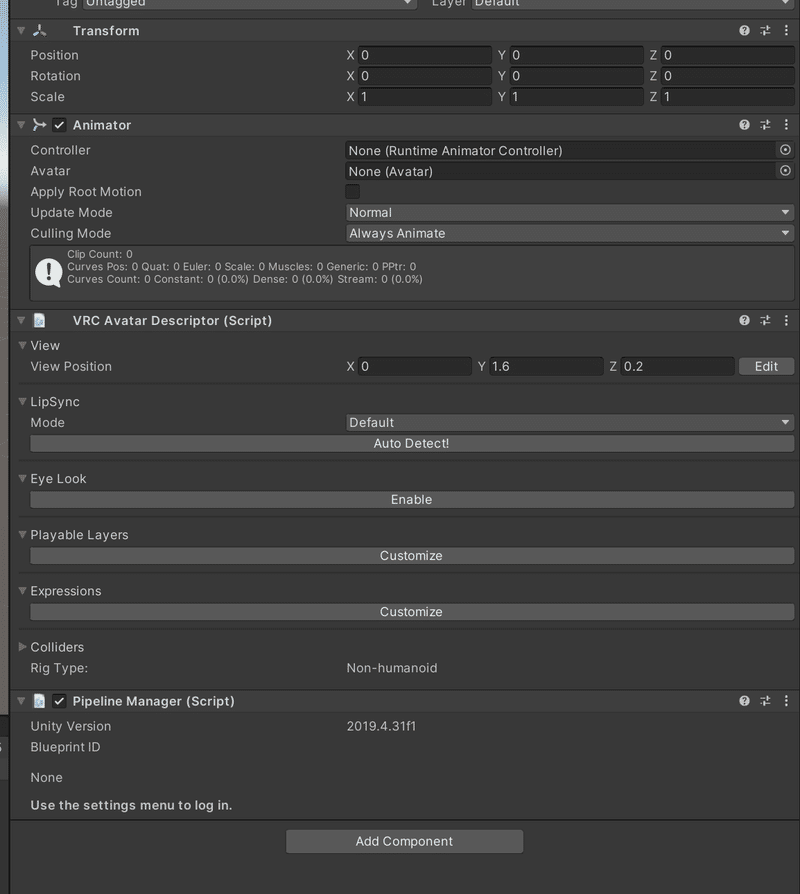
click add component and add a "VRChat avatar descriptor" and an "animator". adding a VRChat avatar descriptor will add a pipeline manager along with it.

click the arrow on the FBX file to see its contents and locate the "avatar". This "avatar" was created by mapping the bones of the FBX for unity to recognize and will allow unity to move those bones.

Drag the avatar into the avatar section in your animator script.
In the avatar descriptor there are a couple parts that can be set up given that the FBX supports it.
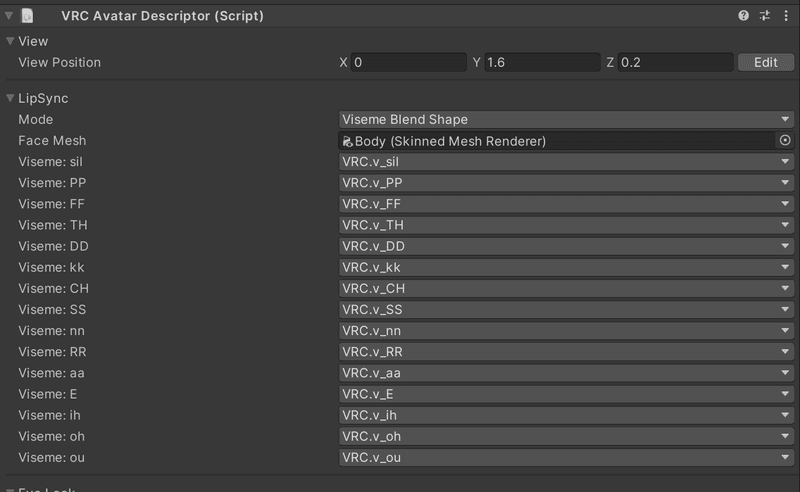
autodetect lipsync. If the FBX is prepared for VRChat usage it will fill in the blanks for you.
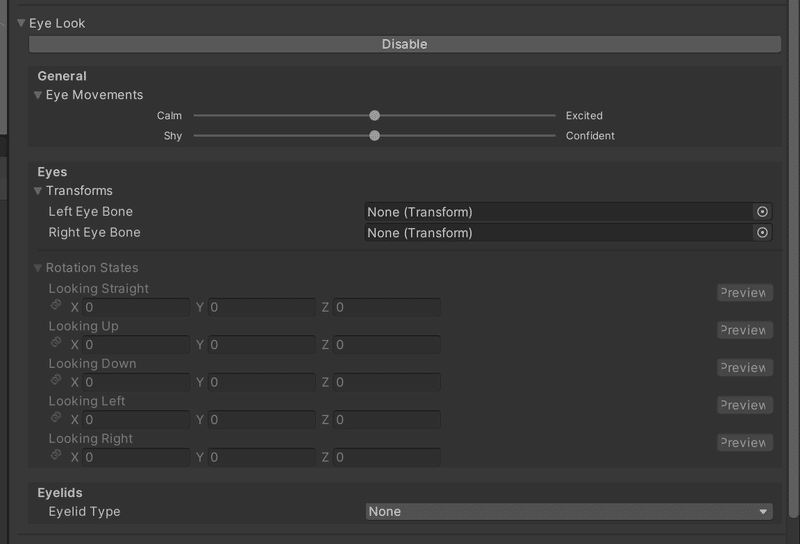
Enable eye look and select the eye bones if there are any.

select eyelid type (most FBX ready for VRChat use blendshapes)

Select this mesh if it exists in this priority:
eyelid
eye
face
body
these will typically be where your eyelid blendshape is.

Select the blendshape that does that the state says. ex: blink should have a blinking blendshape.

Blendshapes can be previewed with the preview button so apply one and test it out.

If there is no blendshape for a task then set none.

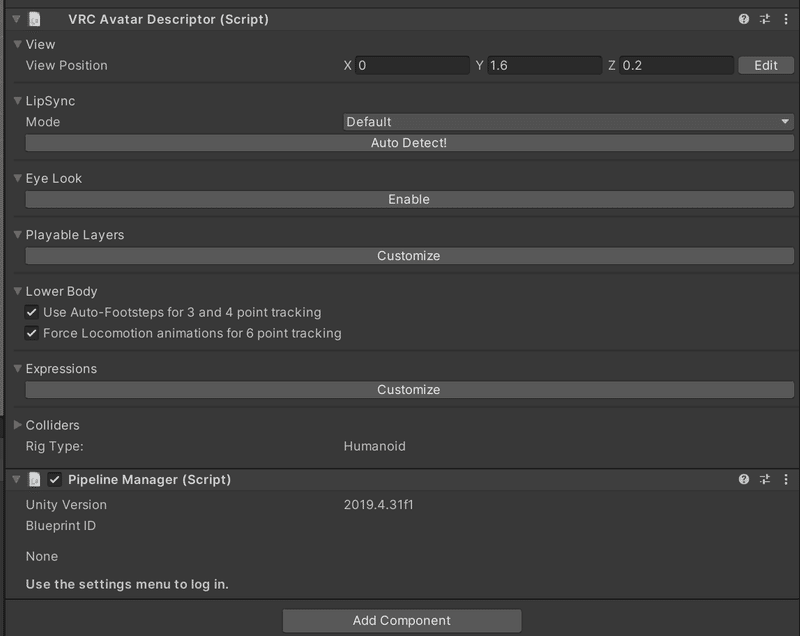
You may customize playable layers if you have any custom additions, but all empty playable layers have defaults that function fine.

The same applies to expressions.
Preparing for upload
If you have set up an FBX instead of importing a prefab this section can be skipped

in your file manager, you will find a folder produced for the avatar you just imported, a folder for the shader you have imported, a folder for your unity scenes produced by default, and potentially a VRCSDK folder if your version of VRCSDK is older.

Locate the prefab asset in your avatar folder. A prefab asset should have an image of the avatar. Do not confuse it with an FBX file type.

An FBX file will look like a prefab file but has an arrow on the right. Prefab files reference FBX files for meshes so all prefabs will come with FBX files.

Drag your prefab file into the hierarchy or the scene tab.
Right click on the prefab in the scene and unpack it.

An avatar that is set up for VRChat should have a couple of scripts attached to it. You will find them in the inspector after selecting your avatar's object in the hierarchy.
Transform is applied to all objects in the scene and defines their location
The animator defines how the object is animated and is what the program uses to define what parts are movable
The pipeline manager is what the SDK uses to identify what avatar is being uploaded to VRChat servers and where to upload it to.
The VRC Avatar Descriptor defines the avatar as an avatar object. The SDK references it to identify it as an avatar and contains a lot of information that is used by VRChat that is not provided by unity by default.

In the inspector, set the position of your model to 0/0/0 under the transform tab.

Typically avatar creators include what kind of shader your avatar should be using by default. If this shader is not imported or you wish to use a different shader than is referenced by the avatar, your avatars will appear in pink. This indicates there is something wrong with your texture or shader.
Typically this can be fixed by importing the correct shader.
If you cannot find the correct shader or you still wish to use another shader, this issue is easily fixed.
Fixing your shader and changing your shader.
This section is skippable if your shader is functional.

To start you will either want to locate where your material files are stored. This can be done by either searching in your avatar's folder or by locating a skinned mesh. A skinned mesh is an object with a 3D mesh that has a material on it.

You can find a skinned mesh by either searching in your hierarchy for one and looking for a "skinned mesh renderer" script in your inspector or by clicking on one in the scene.
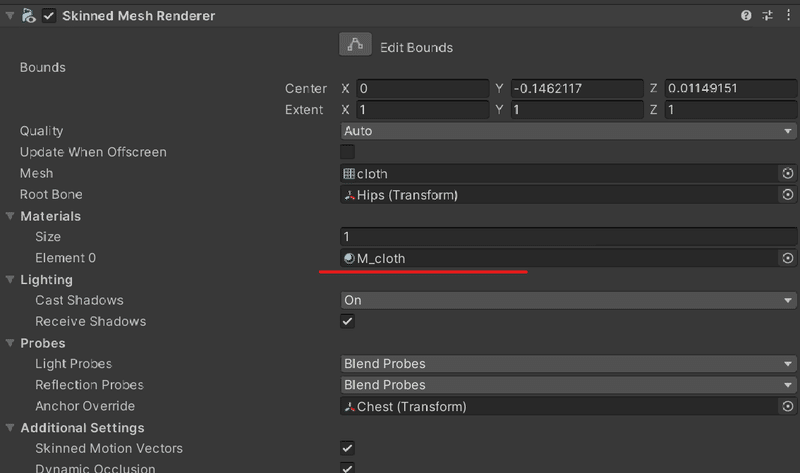

clicking on the material element on the skinned mesh renderer (click on where M_cloth is) will direct you to its location in the file manager.

Without the referenced shader the material has on by default, the material will appear pink.
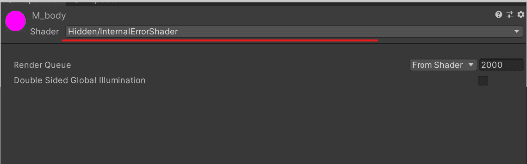
Click on your material in the file manager and look at the inspector.

Open the dropdown and select the shader you imported or the one you wish to use.

repeat until all of your materials are no longer pink.
Prerequisites for upload
At this point your project should have:
- An avatar object with:
- a pipeline manager
- A VRC avatar descriptor
- An animator
- Functional materials
- VRCSDK imported
- A VRChat-compatible shader imported
Uploading
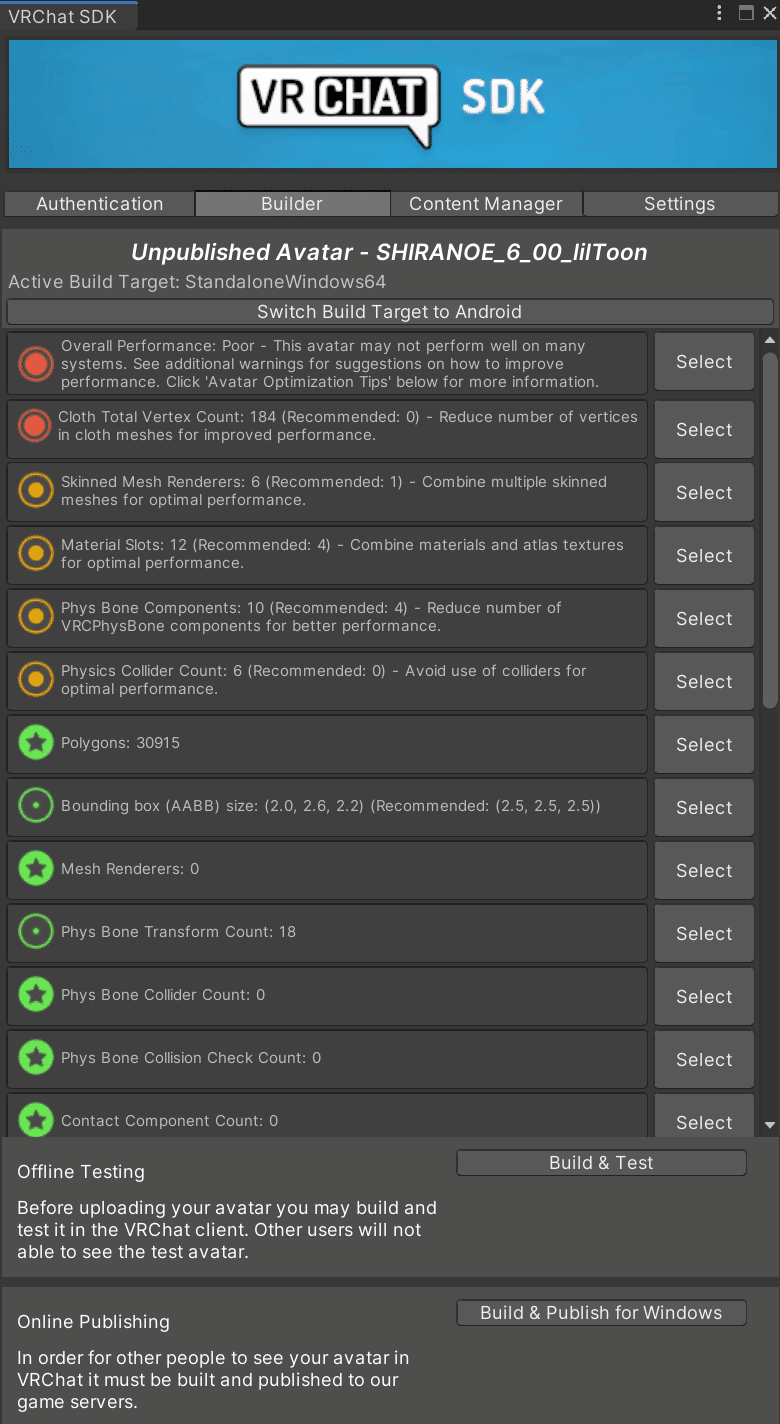
Open your VRChat SDK control panel and enter the builder tab.

Click "Build & Publish for Windows" and wait for unity to process your request. Uploading avatars requires an internet connection

After processing, you should be switched over to the game tab where the scene usually is. Name your avatar, give it a description, apply any content warnings as necessary, set your sharing settings, click the checkbox below and you should be good to go for uploading.
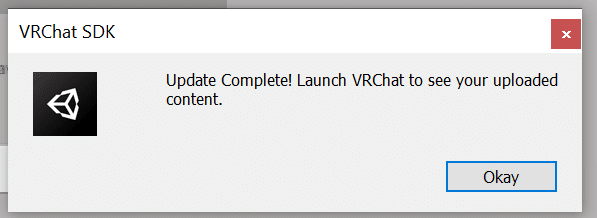
Once uploading is complete you will receive this prompt.
Your newly uploaded avatar should be accessible in VRChat now. Know that sometimes it takes VRChat a while to process an avatar upload. You may have to restart your game to find it in your uploads.

Thanks for reading~
この記事が気に入ったらサポートをしてみませんか?