【AWS EKS】 Github webhook イベントを検知して、Tektonパイプラインを自動で動かしてみる


こんにちは。SHIFTからグループのシステムアイに出向中の松野です。
少し前にAWS EKS上にCIツールの1つであるTektonをデプロイして、Github webhookトリガーでパイプラインを動かしてみました。
具体的には、Githubから取得したDockerfileを用いて、PodmanでDockerイメージをビルド、ECRにPushするCIジョブを作成してみたのですが、今回はその様子を書いてみたいと思います。
構成
EKSクラスタにTektonをインストールするとnamespace tekton-pipelines が作成されます。この namespace 上でDockerイメージのビルド処理を動かすことにします。

環境構築
パイプラインの実装をする前に、Tektonコントローラーやダッシュボードをインストールする必要があります。
アドオンも含めるとPod数が30~35くらいになるので、EKSノードグループをスケールアウトしておきましょう。
今回は t3.medium で4ノード起動させました。
Tekton をインストール
Masterノードに、公開されているTektonの各種yamlをapplyします。
$ kubectl apply -f https://storage.googleapis.com/tekton-releases/pipeline/latest/release.yaml
$ kubectl apply -f https://storage.googleapis.com/tekton-releases/triggers/latest/release.yaml
$ kubectl apply -f https://storage.googleapis.com/tekton-releases/operator/latest/release.yaml
$ kubectl apply -f https://storage.googleapis.com/tekton-releases/dashboard/latest/tekton-dashboard-release.yaml
tkn コマンドのインストール
tknコマンドのバイナリをGitHubからダウンロードします。
使い方はこちらの記事が参考になります。
# Get the tar.xz
$ curl -LO https://github.com/tektoncd/cli/releases/download/v0.28.0/tkn_0.28.0_Linux_x86_64.tar.gz
# Extract tkn to your PATH (e.g. /usr/local/bin)
$ sudo tar xvzf tkn_0.28.0_Linux_x86_64.tar.gz -C /usr/local/bin/ tkn
Helm のインストール
EKSアドオンのインストールにHelmが使えるので、インストールしておきます。
$ curl https://raw.githubusercontent.com/helm/helm/master/scripts/get-helm-3 > get_helm.sh
  % Total    % Received % Xferd  Average Speed   Time    Time     Time  Current
                                 Dload  Upload   Total   Spent    Left  Speed
100 11345  100 11345    0     0  45385      0 --:--:-- --:--:-- --:--:-- 45562

$ chmod 700 get_helm.sh
$ ./get_helm.sh
Downloading https://get.helm.sh/helm-v3.11.0-linux-amd64.tar.gz
Verifying checksum... Done.
Preparing to install helm into /usr/local/bin
helm installed into /usr/local/bin/helm

$ helm version
version.BuildInfo{Version:"v3.11.0", GitCommit:"472c5736ab01133de504a826bd9ee12cbe4e7904", GitTreeState:"clean", GoVersion:"go1.18.10"}
EKSノードグループにECRアクセス権限を付与
TektonのパイプラインからDockerイメージをPushするので、EKSノードグループのIAMにECRアクセス権限を追加します。
私の場合、以前に作成したポリシーがあったので、それを流用します。
{
    "Version": "2012-10-17",
    "Statement": [
        {
            "Sid": "VisualEditor0",
            "Effect": "Allow",
            "Action": "ecr:*",
            "Resource": "arn:aws:ecr:ap-northeast-1:<Account ID>:repository/*"
        }
    ]
}
AWS Load Balancer Controller アドオンをインストール
こちらを参考に AWS Load Balancer Controller をクラスタにインストールします。
※私の環境はインストール済みなのでここでは省略します。
Nginx Ingress Controller をインストール
こちら を参考に Nginx Ingress Controller をクラスタにインストールします。
$ kubectl apply -f https://raw.githubusercontent.com/kubernetes/ingress-nginx/controller-v1.5.1/deploy/static/provider/aws/deploy.yaml
namespace/ingress-nginx created
serviceaccount/ingress-nginx created
serviceaccount/ingress-nginx-admission created
role.rbac.authorization.k8s.io/ingress-nginx created
role.rbac.authorization.k8s.io/ingress-nginx-admission created
clusterrole.rbac.authorization.k8s.io/ingress-nginx created
clusterrole.rbac.authorization.k8s.io/ingress-nginx-admission created
rolebinding.rbac.authorization.k8s.io/ingress-nginx created
rolebinding.rbac.authorization.k8s.io/ingress-nginx-admission created
clusterrolebinding.rbac.authorization.k8s.io/ingress-nginx created
clusterrolebinding.rbac.authorization.k8s.io/ingress-nginx-admission created
configmap/ingress-nginx-controller created
service/ingress-nginx-controller created
service/ingress-nginx-controller-admission created
deployment.apps/ingress-nginx-controller created
job.batch/ingress-nginx-admission-create created
job.batch/ingress-nginx-admission-patch created
ingressclass.networking.k8s.io/nginx created
validatingwebhookconfiguration.admissionregistration.k8s.io/ingress-nginx-admission created

$ kubectl get all -n ingress-nginx --selector app.kubernetes.io/instance=ingress-nginx
NAME                                            READY   STATUS      RESTARTS   AGE
pod/ingress-nginx-admission-create-r4skk        0/1     Completed   0          10m
pod/ingress-nginx-admission-patch-hm4db         0/1     Completed   0          10m
pod/ingress-nginx-controller-6f7bd4bcfb-h4flz   1/1     Running     0          10m

NAME                                         TYPE           CLUSTER-IP       EXTERNAL-IP                                                                          PORT(S)                      AGE
service/ingress-nginx-controller             LoadBalancer   10.100.148.142   a263bbd22f869436b96c2b29cdf30f32-9dc865adffa4ecfa.elb.ap-northeast-1.amazonaws.com   80:31779/TCP,443:31943/TCP   10m
service/ingress-nginx-controller-admission   ClusterIP      10.100.124.204   <none>                                                                               443/TCP                      10m

NAME                                       READY   UP-TO-DATE   AVAILABLE   AGE
deployment.apps/ingress-nginx-controller   1/1     1            1           10m

NAME                                                  DESIRED   CURRENT   READY   AGE
replicaset.apps/ingress-nginx-controller-6f7bd4bcfb   1         1         1       10m

NAME                                       COMPLETIONS   DURATION   AGE
job.batch/ingress-nginx-admission-create   1/1           5s         10m
job.batch/ingress-nginx-admission-patch    1/1           4s         10m

$ kubectl get ingressclass
NAME    CONTROLLER             PARAMETERS                             AGE
alb     ingress.k8s.aws/alb    IngressClassParams.elbv2.k8s.aws/alb   126d
nginx   k8s.io/ingress-nginx   <none>                                 11m
EBS CSI ドライバーのインストール
PVの作成時に利用するアドオン「EBS CSI ドライバー」をインストールします。
EBSを割り当てるので、IAMの設定が必要です。公式ドキュメントの通りに進めれば問題ないと思いますが、大まかな流れはこんな感じです。
EBS CSI ドライバーをHelmでインストール
公式ドキュメントを参考にIAMロール・ポリシーを作成
kubectl annotate で ServiceAccount(ebs-csi-controller-sa)にIAM ロールのARNを紐づける
ドライバーポッドを削除(再起動)
# ドライバーのインストール
$ helm upgrade --install aws-ebs-csi-driver \
>     --namespace kube-system \
>     --set enableVolumeScheduling=true \
>     --set enableVolumeResizing=true \
>     --set enableVolumeSnapshot=true \
>     https://github.com/kubernetes-sigs/aws-ebs-csi-driver/releases/download/helm-chart-aws-ebs-csi-driver-2.16.0/aws-ebs-csi-driver-2.16.0.tgz
Release "aws-ebs-csi-driver" does not exist. Installing it now.
NAME: aws-ebs-csi-driver
LAST DEPLOYED: Sat Jan 21 04:39:26 2023
NAMESPACE: kube-system
STATUS: deployed
REVISION: 1
...

# 起動確認
$ kubectl get pod -n kube-system -l "app.kubernetes.io/name=aws-ebs-csi-driver,app.kubernetes.io/instance=aws-ebs-csi-driver"
NAME                                  READY   STATUS    RESTARTS   AGE
ebs-csi-controller-6c477f67cf-j5pq9   5/5     Running   0          3m44s
ebs-csi-controller-6c477f67cf-q59m6   5/5     Running   0          3m44s
ebs-csi-node-8qt9v                    3/3     Running   0          3m44s
ebs-csi-node-b2zvp                    3/3     Running   0          3m44s
ebs-csi-node-mcvlw                    3/3     Running   0          3m44s
ebs-csi-node-w9h8n                    3/3     Running   0          3m44s
セキュリティアドミッションの変更
ジョブ内で securityContext を設定するため、namespace の pod-security.kubernetes.io/enforce ラベルを変更します。詳細は公式ドキュメントを参照してください(こういった変更がある場合、ビルド環境の namespace は分けた方が良さそうですね)。
$ kubectl label --overwrite ns tekton-pipelines pod-security.kubernetes.io/enforce=privileged
namespace/tekton-pipelines labeled
パイプラインの実装
ここからはTektonのCRD(PipelineやTask)、付随する各種リソースをデプロイしていきます。
Secret作成
以下の内容でSecretを作成します。
Github プライベートレポジトリ認証情報
AWS アクセスキー・シークレットアクセスキー(aws-cli 実行用)
# Github プライベートレポジトリ認証情報
apiVersion: v1
kind: Secret
metadata:
  name: github-tekton-secret
  namespace: tekton-pipelines
data:
  id_rsa: $(cat ~/.ssh/id_rsa | base64 -w 0)
  known_hosts: $(ssh-keyscan -t rsa github.com | base64 -w 0)

# Github webhook用トークン
apiVersion: v1
kind: Secret
metadata:
  name: github-webhook-token
  namespace: tekton-pipelines
data:
  webhook-token: $(echo <webhook用認証トークン> | base64 -w 0)

# AWS アクセスキー・シークレットアクセスキー
apiVersion: v1
kind: Secret
metadata:
  name: aws-credentials
  namespace: tekton-pipelines
data:
  credentials: |-
    [default]
    aws_access_key_id     = $(echo <アクセスキー> | base64 -w 0)
    aws_secret_access_key = $(echo <シークレットアクセスキー> | base64 -w 0)
  config: |-
    [default]
    region = ap-northeast-1
ServiceAccount の作成
パイプライン専用の ServiceAccount を trigger-sa という名前で作成します。
必要に応じて、RBACの権限を調整します。
apiVersion: v1
kind: ServiceAccount
metadata:
  name: trigger-sa
  namespace: tekton-pipelines

---
kind: Role
apiVersion: rbac.authorization.k8s.io/v1
metadata:
  name: trigger-role
  namespace: tekton-pipelines
rules:
- apiGroups:
  - triggers.tekton.dev
  resources:
  - eventlisteners
  - triggers
  - triggerbindings
  - triggertemplates
  verbs:
  - get
  - list
  - watch
- apiGroups:
  - tekton.dev
  resources:
  - pipelineruns
  - pipelineresources
  verbs:
  - create
- apiGroups:
  - ""
  resources:
  - configmaps
  - secrets
  verbs:
  - get
  - list
  - watch
- apiGroups: [""]
  resources:
  - pods
  verbs:
  - get
  - list
  - watch
  - create
  - update
  - delete
  - patch

---
apiVersion: rbac.authorization.k8s.io/v1
kind: RoleBinding
metadata:
  name: triggers-role-binding
  namespace: tekton-pipelines
subjects:
  - kind: ServiceAccount
    name: trigger-sa
roleRef:
  apiGroup: rbac.authorization.k8s.io
  kind: Role
  name: trigger-role

---
kind: ClusterRole
apiVersion: rbac.authorization.k8s.io/v1
metadata:
  name: tekton-clustertriggerbindings-view
  namespace: tekton-pipelines
rules:
- apiGroups:
  - triggers.tekton.dev
  resources:
  - clustertriggerbindings
  - clusterinterceptors
  - interceptors
  verbs:
  - get
  - list
  - watch

---
apiVersion: rbac.authorization.k8s.io/v1
kind: ClusterRoleBinding
metadata:
  name: triggers-clusterrole-binding
  namespace: tekton-pipelines
subjects:
  - kind: ServiceAccount
    name: trigger-sa
    namespace: tekton-pipelines
roleRef:
  apiGroup: rbac.authorization.k8s.io
  kind: ClusterRole
  name: tekton-clustertriggerbindings-view
Git クローン用タスクの作成
さて、タスクの作成に進みます。最初のタスクは Git のクローン用のタスクですが、これは Tekton Hub に ある「git-clone」 をそのまま利用します。
共通的に使用するTaskはClusterTaskに変更するのも有りです。
$ kubectl apply -n tekton-pipelines -f https://raw.githubusercontent.com/tektoncd/catalog/main/task/git-clone/0.9/git-clone.yaml
Dockerイメージビルド用 Task の作成
続いて、ECRにイメージをPushするためのTaskを用意します。レジストリURIとログイン用パスワードを emptyDir の volume に配置して、ステップ間で共有します。
script の先頭行にShebangを書けばShell以外の言語に変更できますので、エラー判定などを作りこむ時は一考の余地がありそうです。(要インストール)
aws-cli でECRにレポジトリ作成
aws-cli でECRのログインパスワード取得
PodmanでDockerイメージの Build・Push
apiVersion: tekton.dev/v1beta1
kind: Task
metadata:
  name: aws-ecr-push-image
  namespace: tekton-pipelines
spec:
  description: >-
    This task pushes a Docker image to`Amazon ECR registry`.
    After creating a Docker image registry and executing login, push Docker image.

  workspaces:
  - name: source
  - name: aws-secrets
  - name: cache-volume

  params:
  - name: image-name
    type: string
    description: Image name given to Docker image.
  - name: image-tag
    type: string
    description: Tag name given to Docker image.
  - name: region
    type: string
    description: AWS region.

  steps:
  - name: create-repository
    image: docker.io/amazon/aws-cli:2.9.11
    script: |
      REPO_URI=$(aws ecr describe-repositories --repository-names $(params.image-name) --query "repositories[0].repositoryUri" --output text 2>/dev/null || \
                 aws ecr create-repository --repository-name $(params.image-name)  --query "repository.repositoryUri" --output text)
      echo ${REPO_URI} > /cache/ecr-repo
      aws ecr get-login-password --region $(params.region) > /cache/ecr-password

  - name: push-image-to-ecr
    image: quay.io/podman/stable:v4.3.1
    workingDir: $(workspaces.source.path)
    command: ["bash", "-c"]
    args:
    - |
      repo_url=$(cat /cache/ecr-repo)
      cat /cache/ecr-password | podman login --username AWS --password-stdin ${repo_url}
      podman build -t ${repo_url}:$(params.image-tag) .
      podman images ${repo_url}:$(params.image-tag)
      podman push ${repo_url}:$(params.image-tag)
    securityContext:
      privileged: true
      capabilities:
        drop: ["all"]
Pipeline 作成
先に作成した各Taskを組み込んだPipelineを作成します。このPipelineがCIジョブの本体となります。
apiVersion: tekton.dev/v1beta1
kind: Pipeline
metadata:
  name: push-image-pipeline
  namespace: tekton-pipelines
spec:
  workspaces:
    - name: result-workspace
    - name: ssh-creds
    - name: aws-secrets
    - name: cache-volume
  params:
    - name: private-github-repo-url
      description: The private GitHub repository URL
      type: string
      default: git@github.com:tmatsuno200/tekton-ci-test.git
    - name: revision
      description: The private GitHub revision to use
      type: string
      default: main
    - name: image-name
      description: Docker image name
      type: string
      default: t-matsuno/hadoop
    - name: image-tag
      description: Docker image tag name
      type: string
      default: latest
    - name: region
      description: AWS region
      type: string
      default: ap-northeast-1
  tasks:
    - name: clone-private-repo
      taskRef:
        kind: Task
        name: git-clone
      workspaces:
        - name: output
          workspace: result-workspace
        - name: ssh-directory
          workspace: ssh-creds
      params:
        - name: url
          value: $(params.private-github-repo-url)
        - name: revision
          value: $(params.revision)

    - name: push-image-to-ecr
      runAfter:
        - clone-private-repo
      taskRef:
        kind: Task
        name: aws-ecr-push-image
      workspaces:
        - name: source
          workspace: result-workspace
        - name: aws-secrets
          workspace: aws-secrets
        - name: cache-volume
          workspace: cache-volume
      params:
        - name: image-name
          value: $(params.image-name)
        - name: image-tag
          value: $(params.image-tag)
        - name: region
          value: $(params.region)
TriggerBinding の作成
Githubから受信する webhook リクエストと後述の EventListener に渡すパラメータを紐づけるための定義です。
webhook リクエストから利用するパラメータを抽出しています。
apiVersion: triggers.tekton.dev/v1alpha1
kind: TriggerBinding
metadata:
  name: github-push-binding
  namespace: tekton-pipelines
spec:
  params:
    - name: gitrepositoryurl
      value: "$(body.repository.ssh_url)"
    - name: revision
      value: "$(body.head_commit.id)"
TriggerTemplate の作成
Webhookを受け取った際に作成するリソースの定義です。resourcetemplates にPipelineRunを定義して、pipelineRef で先に作成した Pipeline と紐づけています。
また、PVなどマウントしたい volume を workspaces に定義することで、Taskからマウントできるようになります。
apiVersion: triggers.tekton.dev/v1alpha1
kind: TriggerTemplate
metadata:
  name: github-push-template
  namespace: tekton-pipelines
spec:
  params:
    - name: gitrepositoryurl
    - name: revision
    - name: image-name
      default: "t-matsuno/hadoop"
    - name: image-tag
      default: "1.0.0"
  resourcetemplates:
    - apiVersion: tekton.dev/v1beta1
      kind: PipelineRun
      metadata:
        generateName: github-push-trigger-
        namespace: tekton-pipelines
        labels:
          tekton.dev/pipeline: push-image-pipeline
      spec:
        podTemplate:
          securityContext:
            fsGroup: 65532
        serviceAccountName: trigger-sa
        timeout: 1h0m0s
        pipelineRef:
          name: push-image-pipeline
        params:
          # `tt` はTriggerTemplateの略
          - name: private-github-repo-url
            value: $(tt.params.gitrepositoryurl)
          - name: revision
            value: $(tt.params.revision)
          - name: image-name
            value: $(tt.params.image-name)
          - name: image-tag
            value: $(tt.params.image-tag)
        workspaces:
          - name: result-workspace
            volumeClaimTemplate:
              metadata:
                name: result-workspace
                namespace: tekton-pipelines
              spec:
                accessModes:
                  - ReadWriteOnce
                resources:
                  requests:
                    storage: 1Gi
          - name: ssh-creds
            secret:
              secretName: github-tekton-secret
          - name: aws-secrets
            secret:
              secretName: aws-credentials
          - name: cache-volume
            emptyDir: {}
EventListener の作成
Webhookイベントを検知し、トリガーを実行するための定義です。EventListener をデプロイすると、Webhook受信用の Service と Pod も一緒にデプロイされます。
Service には el-${metadata.name} という名前が付与されます。また、cel.filter でパイプラインの実行可否を判定することも可能です。
apiVersion: triggers.tekton.dev/v1alpha1
kind: EventListener
metadata:
  name: github-push-listener
  namespace: tekton-pipelines
spec:
  serviceAccountName: trigger-sa
  triggers:
    - template:
        ref: github-push-template
      bindings:
      - ref: github-push-binding
      interceptors:
        - github:
            secretRef:
              secretName: github-webhook-token
              secretKey: webhook-token
            eventTypes:
              - push
        - cel:
            filter: "body.ref == 'refs/heads/main' && !body.commits[0].message.startsWith('[Skip-ci]')"
Ingress 作成
Ingress を作成して、ダッシュボードとWebhook受信用エンドポイントを外部に公開します。
EventListener と一緒に作成されたService がWebhook受信用のエンドポイントとなります。
apiVersion: networking.k8s.io/v1
kind: Ingress
metadata:
  name: tekton-pipelines-ingress
  namespace: tekton-pipelines
spec:
  ingressClassName: nginx
  rules:
    - http:
        paths:
        - backend:
            service:
              name: el-github-push-listener
              port:
                number: 8080
          path: /webhook/
          pathType: Prefix
        - backend:
            service:
              name: tekton-dashboard
              port:
                number: 9097
          path: /
          pathType: Prefix
Github のWebhook設定
こちらを参考にGithubのWebhook を追加してください。
今回の場合、ペイロードURLは Ingressのホスト名 + /webhook となります。
# e.g. http://a263bbd22f869436b96c2b29cdf30f32-9dc865adffa4ecfa.elb.ap-northeast-1.amazonaws.com/webhook
$ kubectl get ing -n tekton-pipelines
NAME                       CLASS   HOSTS   ADDRESS                                                                              PORTS   AGE
tekton-pipelines-ingress   nginx   *       a263bbd22f869436b96c2b29cdf30f32-9dc865adffa4ecfa.elb.ap-northeast-1.amazonaws.com   80      24h
ADDRESS のURLにアクセスすると、ダッシュボードが表示されることが確認できます。
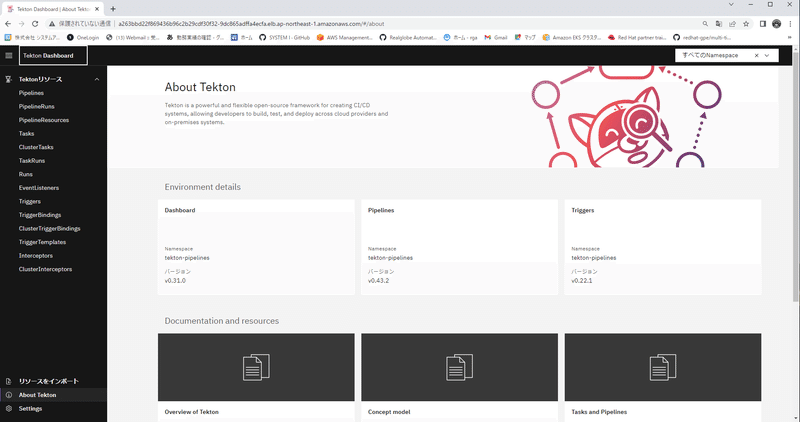
また、GithubのUIからWebhookイベントのテスト送信が可能です。

動作確認
これで準備ができたので、Githubの main ブランチにPushしてパイプラインを動かしてみます。
$ git commit -a -m "build commit" --allow-empty && git push
[main 5f95110] build commit
Enumerating objects: 1, done.
Counting objects: 100% (1/1), done.
Writing objects: 100% (1/1), 191 bytes | 191.00 KiB/s, done.
Total 1 (delta 0), reused 0 (delta 0), pack-reused 0
To github.com:tmatsuno200/tekton-ci-test.git
   14229d7..5f95110  main -> main
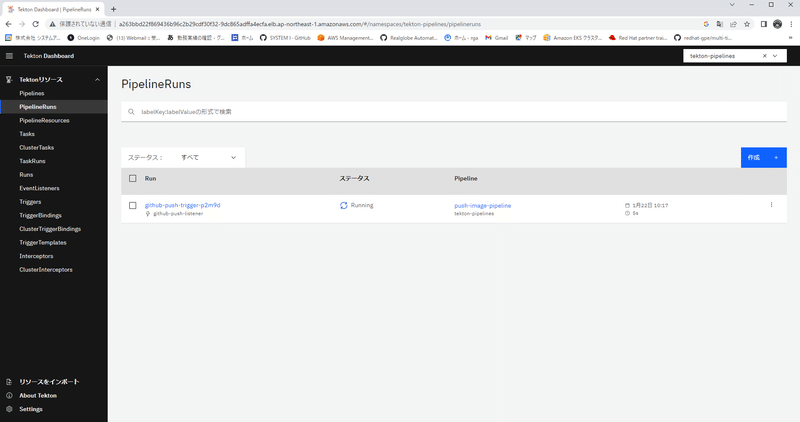
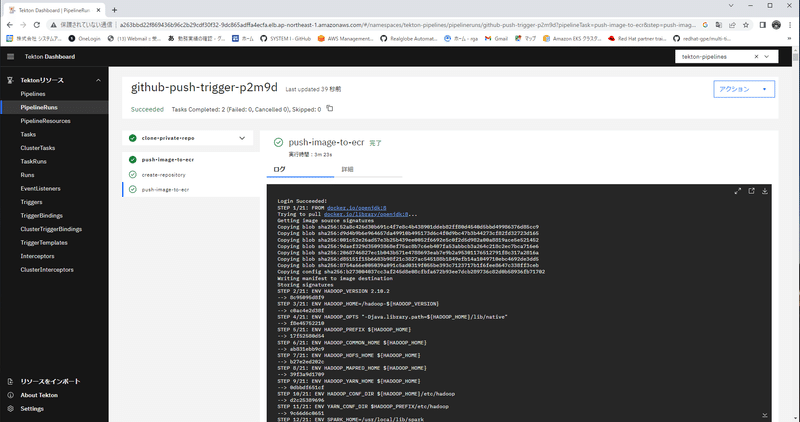
自動でパイプラインが開始されました。
ダッシュボードからログなどの詳細を確認できます。
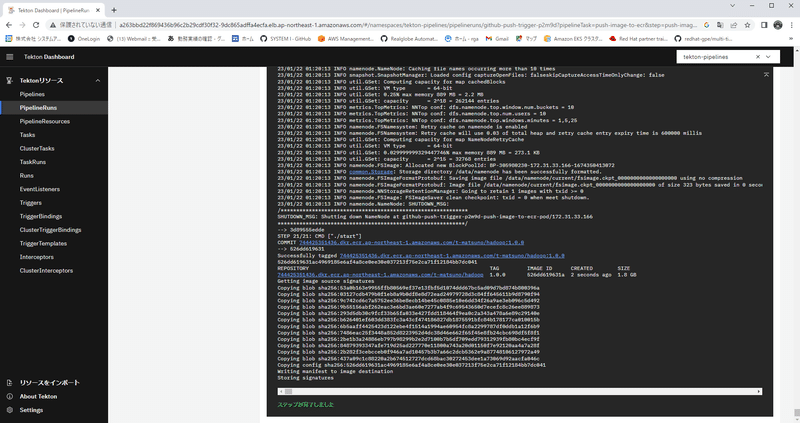
tkn コマンドでログを見てみます。
初期構築時などのエラー原因調査は、CLIコマンドでデバッグするケースが多くなりそうです。
ジョブ実行時に作成されたPodは残るので、kubectl logs などのデバッグも可能です。
# tkn コマンドで確認
$ tkn p logs -n tekton-pipelines
+ '[' false '=' true ]
+ '[' true '=' true ]
+ cp -R /workspace/ssh-directory /home/git/.ssh
+ chmod 700 /home/git/.ssh
+ chmod -R 400 /home/git/.ssh/id_rsa /home/git/.ssh/known_hosts
+ '[' false '=' true ]
+ CHECKOUT_DIR=/workspace/output/
+ '[' false '=' true ]
+ test -z
+ test -z
+ test -z
+ git config --global --add safe.directory /workspace/output
+ /ko-app/git-init '-url=git@github.com:tmatsuno200/tekton-ci-test.git' '-revision=775fe15acc81f6cc3cc14eb0cfd0bbfb60983e9b' '-refspec=' '-path=/workspace/output/' '-sslVerify=true' '-submodules=true' '-depth=1' '-sparseCheckoutDirectories='
{"level":"warn","ts":1674350254.9570239,"caller":"git/git.go:271","msg":"URL(\"git@github.com:tmatsuno200/tekton-ci-test.git\") appears to need SSH authentication but no SSH credentials have been provided"}
{"level":"info","ts":1674350257.46261,"caller":"git/git.go:176","msg":"Successfully cloned git@github.com:tmatsuno200/tekton-ci-test.git @ 775fe15acc81f6cc3cc14eb0cfd0bbfb60983e9b (grafted, HEAD) in path /workspace/output/"}
{"level":"info","ts":1674350257.4904568,"caller":"git/git.go:215","msg":"Successfully initialized and updated submodules in path /workspace/output/"}
...

# kubectl で確認
$ kubectl get po -n tekton-pipelines | grep github
el-github-push-listener-7f9d6cc55f-99v2g             1/1     Running     0          20h
github-push-trigger-p2m9d-clone-private-repo-pod     0/1     Completed   0          14m
github-push-trigger-p2m9d-push-image-to-ecr-pod      0/2     Completed   0          14m
まとめ
Githubのwebhookトリガーを使って、TektonでCIジョブを実行させることができました。
Tekton自体はスケールアウトが容易だったり、細かい権限設定がしやすい所が好印象ですが、webhookを使うために色々設定しないといけないので、もう少しシンプルに使えるようになると嬉しいですね。
次回はTektonとArgoCDを組み合わせて、GitOPSのワークフローを試してみたいと思います。
――――――――――――――――――――――――――――――――――
執筆者プロフィール:松野 聖弘
前職はSESの会社でWebシステムの設計・構築に携わっており、Java、Python、Node.js等を用いたフルスタック開発やk8s環境へのリリース、CICDパイプライン構築を担当。
現在はその経験を活かして、k8s環境やCICDパイプラインの導入支援、コンサル業務に従事している。
【ご案内】
ITシステム開発やITインフラ運用の効率化、高速化、品質向上、その他、情シス部門の働き方改革など、IT自動化導入がもたらすメリットは様々ございます。
IT業務の自動化にご興味・ご関心ございましたら、まずは一度、IT自動化の専門家リアルグローブ・オートメーティッド(RGA)にご相談ください!
お問合せは以下の窓口までお願いいたします。
【お問い合わせ窓口】
窓口:rga@systemi.co.jp
URL:https://rg-automated.jp