
Googleフォームを自由にカスタマイズする

Googleフォームはアンケートや問い合わせフォームなどで手軽に利用でき、回答結果をスプレッドシートに書き込めるので、集計や分析にも便利だが、フォームのデザインが決まっていて自由にカスタマイズすることができない。そこで、今回はGoogleフォームを自由にカスタマイズする方法を紹介する。
概要
今回紹介する方法では、予めGoogleフォームとスプレッドシートを用意するが、フォームは自由にデザインして自作し、送信時のactionや入力項目のname属性をGoogleフォームのものと揃えることで、結果的にGoogleフォーム経由で送信する。
Googleフォームとスプレッドシートの用意
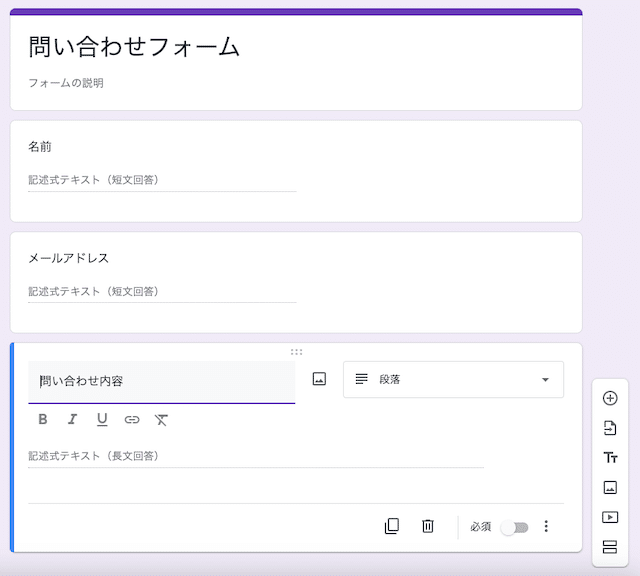
まずGoogleフォームで新規フォームを作成して、必要な項目を追加しておく。また、「回答」タブから回答を保存するスプレッドシートも作成する。
必要な情報の取得
自作のフォームとGoogleフォームを連携して回答を送信するには、以下の情報が必要となる。
formタグのaction属性値
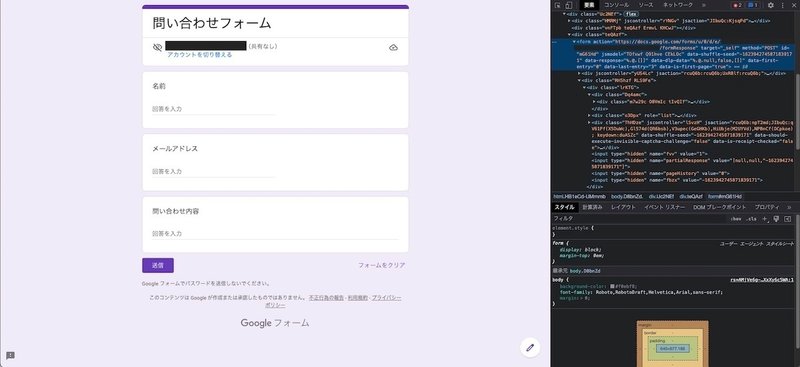
actionはフォームの送信先を示すもので、これをGoogleフォームのものと揃える必要がある。上で作成したGoogleフォームを「プレビュー」モードで表示して、デベロッパーツールからformタグのaction属性値を取得する。
inputなどのタグのname属性値
inputなどの入力項目のname属性値も取得する必要があり、こちらはデベロッパーツールの「要素」からentryを検索することで取得できるが、各項目との対応関係がわかりづらいので、次の方法がおすすめ。
Googleフォームの編集画面の右上から「その他」を開いて「事前入力したURLを取得」を選択。適当な値を入力して「リンクを取得」をクリックしてから「リンクをコピー」する。リンクは以下のような形になるが、entry.xxxxxxxxxの部分が各入力項目のname属性値になる。
<https://docs.google.com/forms/d/e/><フォームID>/viewform?usp=pp_url&entry.111111111=<項目1の入力値>&entry.222222222=<項目2の入力値>&entry.333333333=<項目3の入力値>
フォームの自作
任意のデザインでフォームを自作し、上記で取得できたaction属性値をformタグに、name属性値をinputなどのタグに設定するだけで、submit時にGoogleフォーム経由で回答が保存される。
<!DOCTYPE html>
<html lang="ja">
<head>
    <meta charset="UTF-8">
    <meta name="viewport" content="width=device-width, initial-scale=1.0">
    <link rel="stylesheet" href="form.css">
    <title>問い合わせフォーム</title>
</head>
<body>
    <h1 class="title">問い合わせフォーム</h1>

    <form action="<https://docs.google.com/forms/u/0/d/e/{フォームID}/formResponse>" method="post">
        <label for="entry.111111111">名前</label>
        <input type="text" name="entry.111111111" >

        <label for="entry.222222222">メールアドレス</label>
        <input type="email" name="entry.222222222" >

        <label for="entry.333333333">問い合わせ内容</label>
        <textarea name="entry.333333333"></textarea>

        <input type="submit" value="送信">
    </form>
</body>
</html>
補足
送信ボタン押下時に処理を実行させてから送信したい場合は、以下のように<input type=”button”>または<button>でボタンを作成し、onclickで任意の処理を実行してからフォームを送信すればよい。
<head>
    ...
    <!-- jQueryを利用する -->
    <script src="<https://code.jquery.com/jquery-3.6.3.js>"></script>
    <script>
        const onClickSubmit = () => {
            // 任意の処理をしてからsubmitする
            $("#form").submit();
        }
    </script>
</head>
<body>
    <h1 class="title">問い合わせフォーム</h1>

    <form action="<https://docs.google.com/forms/u/0/d/e/{フォームID}/formResponse>" method="post">
        ...
        <!-- どちらかの方法でボタンを作成 -->
        <input type="button" value="送信" onclick="onClickSubmit()">
        <button onclick="onClickSubmit()">送信</button>
    </form>
</body>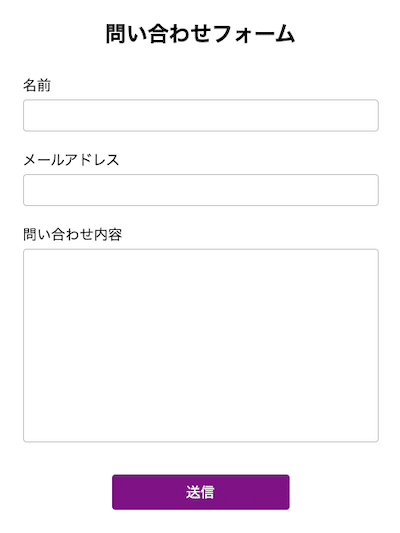
送信後の処理
上記の方法では確かにGoogleフォームと連携できたが、このままではsubmit後にGoogleフォームの完了ページに遷移してしまうので、それを回避する方法を紹介する。
ページ遷移させない場合
非表示のiframeを用意してformのtargetに指定すれば、フォーム送信時にページ遷移を防ぐことができ、送信完了時にページに留まってアラートを表示するなどができる。
<body>
    <form action={action属性値} method="post" target="hidden-iframe">
    ...
    </form>

    <iframe name="hidden-iframe" style="display: none;"></iframe>
</body>
指定の送信完了ページに遷移させる場合
formのonsubmitで送信完了フラグを立て、targetのiframeのonloadで関数を実行することで、指定ページに遷移させることができる。
<head>
    ...
    <script>
        // 送信完了フラグ: form submit時にtrueになる
        let submitted = false;

        const onloadFrame = () => {
            // 送信完了の場合に指定ページに遷移させる
            if (submitted) {
                window.location = "xxx.html";
            }
        }
    </script>
</head>
<body>
    <!-- onsubmitで送信完了フラグを立てる -->
    <form action={action属性値} method="post" target="hidden-iframe" onsubmit="submitted = true;">
        ...
    </form>

    <iframe name="hidden-iframe" style="display: none;" onload="onloadFrame()"></iframe>
</body>
サンプルコード
<!DOCTYPE html>
<html lang="ja">
<head>
    <meta charset="UTF-8">
    <meta name="viewport" content="width=device-width, initial-scale=1.0">
    <link rel="stylesheet" href="form.css">
    <title>問い合わせフォーム</title>

    <script>
        // 送信完了フラグ: form submit時にtrueになる
        let submitted = false;

        const onloadFrame = () => {
            if (submitted) {
                // 送信完了でアラート表示する場合
                alert("送信完了しました");

                // 送信完了で別ページに遷移する場合
                window.location = "xxx.html";
            }
        }
    </script>
</head>
<body>
    <h1 class="title">問い合わせフォーム</h1>

    <form
        action="<https://docs.google.com/forms/u/0/d/e/{フォームID}/formResponse>"
        method="post"
        target="hidden-iframe"
        onsubmit="submitted = true;"
    >
        <label for="entry.111111111">名前</label>
        <input type="text" name="entry.111111111" >

        <label for="entry.222222222">メールアドレス</label>
        <input type="email" name="entry.222222222" >

        <label for="entry.333333333">問い合わせ内容</label>
        <textarea name="entry.333333333"></textarea>

        <input type="submit" value="送信">
    </form>

    <iframe name="hidden-iframe" style="display: none;" onload="onloadFrame()"></iframe>
</body>
</html>
@charset "UTF-8";

body {
    padding: 20px;
}

form {
    display: flex;
    flex-direction: column;
    max-width: 400px;
    margin: 0px auto;
}

label {
    font-size: 16px;
    margin: 4px 0px;
}

input,textarea {
    padding: 8px;
    margin-bottom: 16px;
    font-size: 16px;
    border: solid 1px #c0c0c0;
    border-radius: 4px;
    outline: none;
}

textarea {
    height: 200px;
    resize: none;
}

input[type="submit"] {
    width: 50%;
    height: 40px;
    margin: 20px auto;
    border: none;
    background-color: #7f1184;
    color: white;
    border-radius: 4px;
    cursor: pointer;
}

input[type="submit"]:hover {
    background-color: #7e1184cc;
}

.title {
    font-size: 24px;
    text-align: center;
    margin-bottom: 24px;
}
参考
この記事が気に入ったらサポートをしてみませんか?