Inventor / iLogic : コンポーネントの色分け

アセンブリモデルの各コンポーネントを任意の色で色分けして表示したい時があります。ベンダー別に色分けするとか、担当者別に色分けするとかです。主題マッピングと言って白地図に色分けする事の3次元版です。
ここでは、その基本となる二つの処理「色分け用の外観を作成する」「コンポーネントの外観を変更する」を使って、ランダムに色分けをするルールを紹介します。
色分け用の外観を作成する
Inventorでは、パーツやコンポーネントの色は、Asset オブジェクトを使って設定します。Assetは、材料と外観のふるまいをより深く定義できるオブジェクトです。Assetは、ドキュメントとライブラリに保存されます。コンポーネントに色を付けるには、ドキュメント内に保存されたAssetに中から選んで設定します。
Inventorの色は、R(赤)G(緑)B(青)それぞれ256階調の組合せで表現されます。256x256x256で16,777,216色(フルカラー)で出来る計算になります。
最初に触ったAutoCADが16色でしたが、その後256色まで使える様になりました。その時、AutoCADに色番号というものが出来ました。256色を1から255までの番号で管理するという考えです。これが分かりやすいので、AutoCADの色番号に基づいて、外観を作ることにします。
ただ、色の中でも「暗い色」は色分けには向きません。映えないです。そこで、暗い色は登録しない。という処理も加えることにします。
まず、iLogic ルールの前半(Main)です。
Class ADD_ACAD_COLOR

	Dim invApp As Inventor.Application

Sub Main()

	'ACADCOLORを現在のドキュメントの外観に追加する
	'暗い色は映えないので追加しない

	invApp = ThisApplication
	Dim doc As Document = invApp.ActiveDocument

   ' ドキュメントの外観コレクションの確保
   Dim docAssets As Assets
   Try
       docAssets = doc.Assets
   Catch ex As Exception
       Dim doc2 As Inventor.PartDocument = invApp.ActiveDocument
		docAssets = doc2.Assets
   End Try

   ' 外観オブジェクト(Asset)の新規作成
   Dim appearance As Asset
   Dim tobjs As TransientObjects
   Dim color As ColorAssetValue

   Dim indx As Integer
   Dim RR As Integer
   Dim GG As Integer
   Dim BB As Integer
   Dim ColorName As String = ""

   For indx = 1 To 255
       Dim AMARI As Integer = indx Mod 10
       If AMARI < 5 Then
           GetRGB(RR, GG, BB, indx, ColorName)
           Try
               appearance = docAssets.Add(AssetTypeEnum.kAssetTypeAppearance, "Generic", ColorName, ColorName)
               tobjs = invApp.TransientObjects
               color = appearance.Item("generic_diffuse")
               color.Value = tobjs.CreateColor(RR, GG, BB)
           Catch ex As Exception
               ' 同名の外観がある場合は何もしない
           End Try
       End If
   Next
End Sub
AutoCADの色番号は、下一桁で明るさが分かります。5以上だと暗い色なので、色番号の下一桁が5未満のときに、外観を作成する処理にしています。
   For indx = 1 To 255
       Dim AMARI As Integer = indx Mod 10
       If AMARI < 5 Then
           GetRGB(RR, GG, BB, indx, ColorName)
           Tryが
GETRGBは、indx番号から、RGBのそれぞれの階調、色の名前を返すサブプログラムです。
Private Sub GetRGB(ByRef RR As Integer, ByRef GG As Integer, ByRef BB As Integer, ByRef ACADColor As Integer, ByRef ColorName As String)

   ColorName = "ACAD_CN_" + ACADColor.ToString("000")

   Select Case ACADColor
       Case 0 : RR = 0 : GG = 0 : BB = 0
       Case 1 : RR = 255 : GG = 0 : BB = 0
       Case 2 : RR = 255 : GG = 255 : BB = 0
       Case 3 : RR = 0 : GG = 255 : BB = 0
       Case 4 : RR = 0 : GG = 255 : BB = 255
       Case 5 : RR = 0 : GG = 0 : BB = 255
       Case 6 : RR = 255 : GG = 0 : BB = 255
       Case 7 : RR = 255 : GG = 255 : BB = 255
       Case 8 : RR = 65 : GG = 65 : BB = 65
       Case 9 : RR = 128 : GG = 128 : BB = 128
       Case 10 : RR = 255 : GG = 0 : BB = 0
       Case 11 : RR = 255 : GG = 170 : BB = 170

       (中略)

       Case 250 : RR = 51 : GG = 51 : BB = 51
       Case 251 : RR = 80 : GG = 80 : BB = 80
       Case 252 : RR = 105 : GG = 105 : BB = 105
       Case 253 : RR = 130 : GG = 130 : BB = 130
       Case 254 : RR = 190 : GG = 190 : BB = 190
       Case 255 : RR = 255 : GG = 255 : BB = 255

   End Select
End Sub
End Class色番号ごとのRGBの配色は、Webに掲載されています。例えば、AutoCAD Color Index (ACI) RGB equivalents
ルールを実行すると、以下の図の様に外観が作成されます。

コンポーネントの色分け
アセンブリモデル上のコンポーネントですが、色分けの対象としてアセンブリ直下のコンポーネントとするか、サブアセンブリ以下すべてのパーツ(リーフコンポーネント)とするかの2通りがあります。今回は、両方に対応できるような処理とし、どちらの方法にするかは、Modeという内部変数で切り替えることにします。
Class コンポーネント色分け
Dim InvApp As Inventor.Application
Sub Main
InvApp = ThisApplication
Dim oDoc As Inventor.AssemblyDocument = invapp.ActiveDocument
Dim oAprAssets As Inventor.AssetsEnumerator = oDoc.AppearanceAssets
Dim CountOfAprAssets As Integer = oAprAssets.Count - 1
'
Dim ViewRepName As String = "ACAD_COLOR_MAP"
Dim oViewRep As Inventor.DesignViewRepresentation
Try
oViewRep = oDoc.ComponentDefinition.RepresentationsManager.DesignViewRepresentations.Item(ViewRepName)
Catch ex As Exception
oViewRep = oDoc.ComponentDefinition.RepresentationsManager.DesignViewRepresentations.Add(ViewRepName)
End Try
Dim oComponents As Inventor.ComponentOccurrences = oDoc.ComponentDefinition.Occurrences
Dim ColorIndx As Integer
Dim Mode As Integer
Mode = 1 ' 1のとき、パーツレベル。それ以外は、コンポーネントレベル
If Mode = 1 Then
Dim oAllLefOcc As Inventor.ComponentOccurrencesEnumerator = oDoc.ComponentDefinition.Occurrences.AllLeafOccurrences
Dim oLeaf As Object = Nothing 'ComponentOccurrenceProxy=nothing
Dim oLeafProxy As Inventor.ComponentOccurrenceProxy = Nothing
Dim oLeafCompo As Inventor.ComponentOccurrence = Nothing
For Each oLeaf In oAllLefOcc
If oLeaf.visible Then
ColorIndx = CountOfAprAssets * Rnd() + 1
Select Case oLeaf.Type
Case ObjectTypeEnum.kComponentOccurrenceProxyObject
oLeafProxy = oLeaf
Try
oLeafProxy.Appearance = oAprAssets.Item(ColorIndx)
Catch ex As Exception
' No Action
End Try
Case ObjectTypeEnum.kComponentOccurrenceObject
oLeafCompo = oLeaf
oLeafCompo.Appearance = oAprAssets.Item(ColorIndx)
Case Else
End Select
End If
Next
Else
Dim oComp As Inventor.ComponentOccurrence
For Each oComp In oComponents
ColorIndx = CountOfAprAssets * Rnd() + 1
oComp.Appearance = oAprAssets.Item(ColorIndx)
Next
End If
End Sub
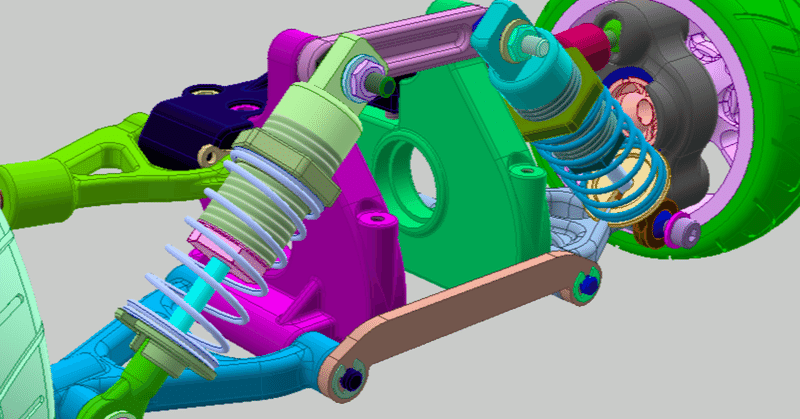
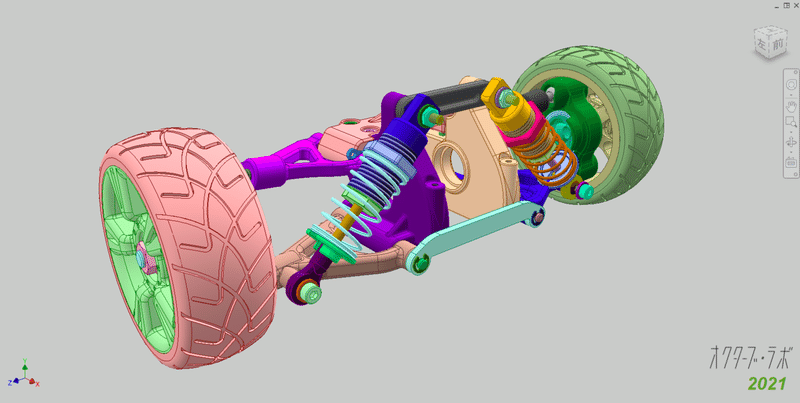
End Classこのルールを実行すると、図の様に色分けされます。
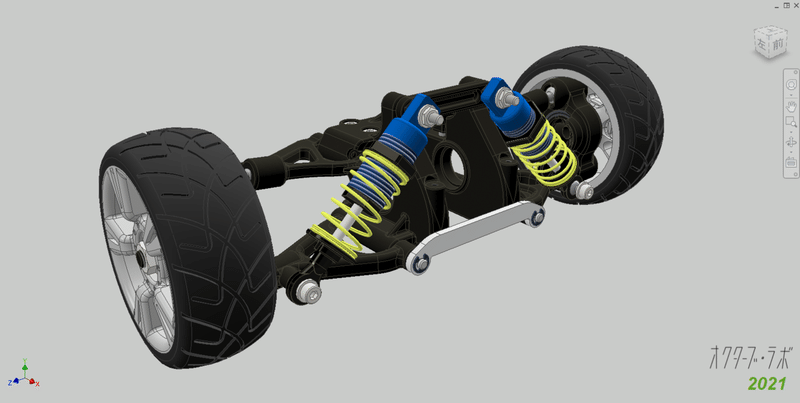
もちろん、この配色のままにしておけないので、元に戻す方法を用意しておきます。ここでは、View Representaion の機能を使います。
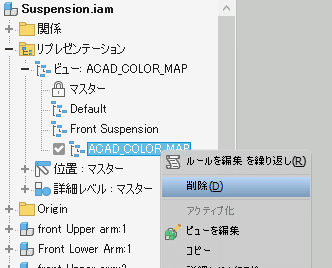
ACAD_COLOR_MAP という名前のリプレゼンテーションが出来ています。このリプレゼンテーションを削除すると、元の配色に戻ります。
View Representaion の作成は以下の部分になります。
Dim ViewRepName As String = "ACAD_COLOR_MAP"
Dim oViewRep As Inventor.DesignViewRepresentation

Try
    oViewRep = oDoc.ComponentDefinition.RepresentationsManager.DesignViewRepresentations.Item(ViewRepName)
Catch ex As Exception
    oViewRep = oDoc.ComponentDefinition.RepresentationsManager.DesignViewRepresentations.Add(ViewRepName)
End Try
パーツレベルのとき
アセンブリ構成の全てのパーツ(リーフコンポーネント)を取得するには、AllLeafOccurrences という便利なプロパティがあるので、これを使います。このプロパティに含まれるオブジェクトは型の異なるものが混じっているのでタイプを判断し、それぞれのタイプに用意されたAPIを使ってアセットを設定します。
       For Each oLeaf In oAllLefOcc
           If oLeaf.visible Then
               ColorIndx = CountOfAprAssets * Rnd() + 1
               Select Case oLeaf.Type
                   Case ObjectTypeEnum.kComponentOccurrenceProxyObject
                       oLeafProxy = oLeaf
						Try
                       	oLeafProxy.Appearance = oAprAssets.Item(ColorIndx)
                       Catch ex As Exception
                           ' No Action
                       End Try
                   Case ObjectTypeEnum.kComponentOccurrenceObject
                       oLeafCompo = oLeaf
                       oLeafCompo.Appearance = oAprAssets.Item(ColorIndx)
                   Case Else
               End Select
           End If
       Next
コンポーネントレベルのとき
直下のコンポーネントの場合の処理はこちら
       Dim oComp As Inventor.ComponentOccurrence
       For Each oComp In oComponents
           ColorIndx = CountOfAprAssets * Rnd() + 1
           oComp.Appearance = oAprAssets.Item(ColorIndx)
       Next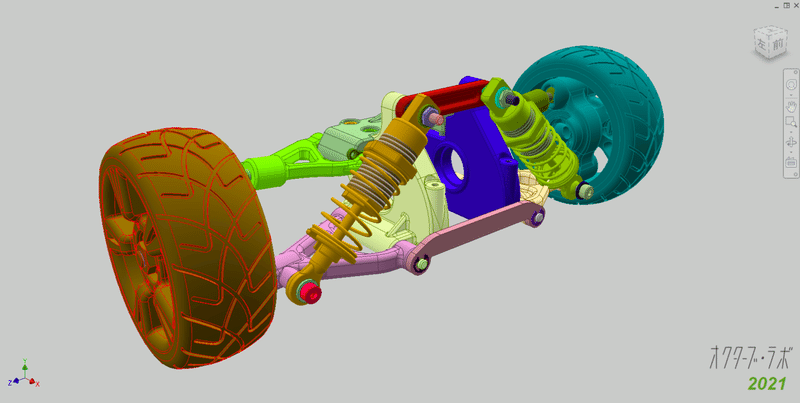
モードの切り替え
   Dim Mode As Integer

   Mode = 1	' 1のとき、パーツレベル。それ以外は、コンポーネントレベル

   If Mode = 1 Then

   ' パーツレベルの処理

   Else

   ' コンポーネントレベルの処理

   End If

End Sub
ここでは、ルールの直接書き換えさせていますが、実際に運用する時に編集が必要です。Modeをパラメータ化する方法もありますが、それぞれのモード用のルールを別々に用意するのが早いですね。
応用
主題マッピングをするには、そのパーツなりコンポーネントのプロパティ情報が必要です。こちらは、For Each ループで取り出したコンポーネントから取り出すことができます。その情報から、然るべき色の外観を設定するという処理になります。
役に立った!という記事にはぜひサポートお願いします。サポート頂けると大変に励みになります。