Houdini / Making Datasets for ML

In this article, I will explain how to make datasets for Machine Learning by using PDG(TOP network).
Note: this only covers datasets pats but not train data part using python(because I haven't finished yet...).
SOP Part
Making Terrain
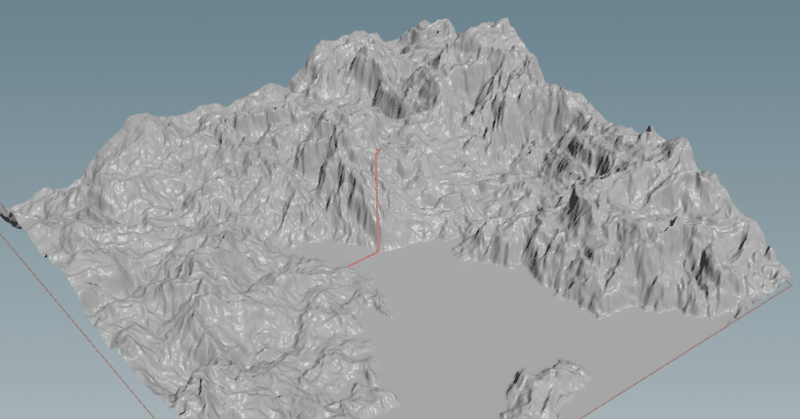
First of all, you need to have a model for ML. In this time, I made a terrain using some Heightfield nodes just like SideFX's video did.
Since there are so many tutorials for making terrain, I'm not explaining how I made it. But the nodes I used are below.
(There are some error flags on some nodes somehow. Ignore them because they worked when I tried.)
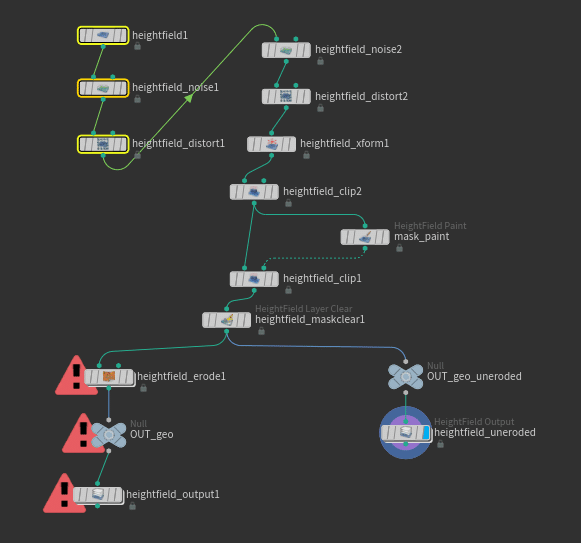
Heightfield Output node
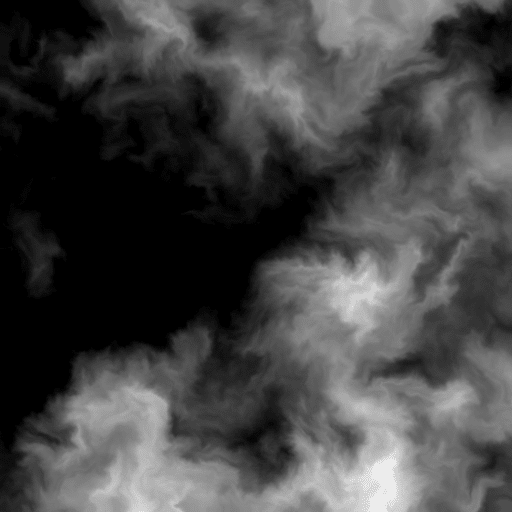
This node exports layers such as height, mask, water,etc. as images(see the images below. Top one is the image before eroded and bottom is after eroded). In the parameter, there is called Filename. So, you need to type path to the image file to write. Make sure you include ../`@wedgeindex` in the path so the output filename have wedge index number.

TOP Part
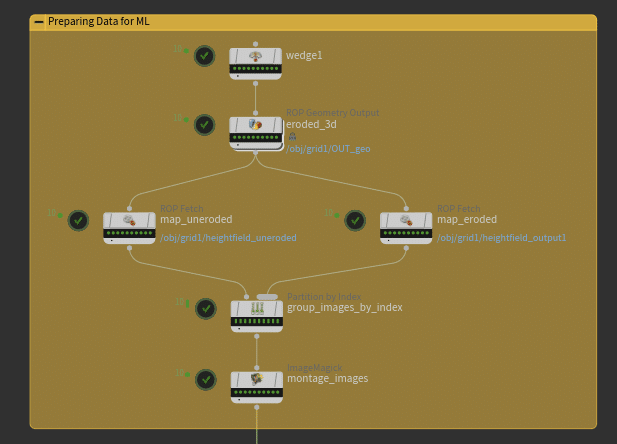
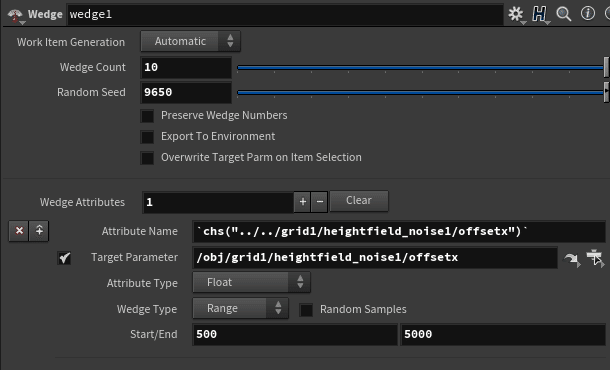
Wedge node
This node creates so-called work items with various values of attributes. For example, work items with various height(@P.y values).
Wedge count: This is how many of work items you want to create.
Start/End: This is the range of attribute values.
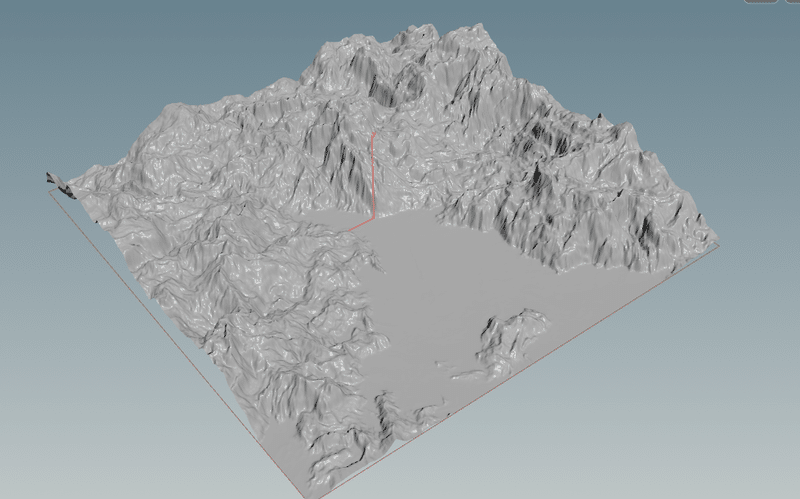
In my case(image below), I made 10 work items with different offset_x values(range between 500 to 5000).
ROP Geometry Output node
This node export work items as geometry data.
As the image below shows, "OUT_geo" null node(which is "after eroded" data) is put in SOP Path.
And you need to put `@wedgeindex` in the path of Output File. In this case, you wold have filename like heighterode.112.bgeo.sc as output data.

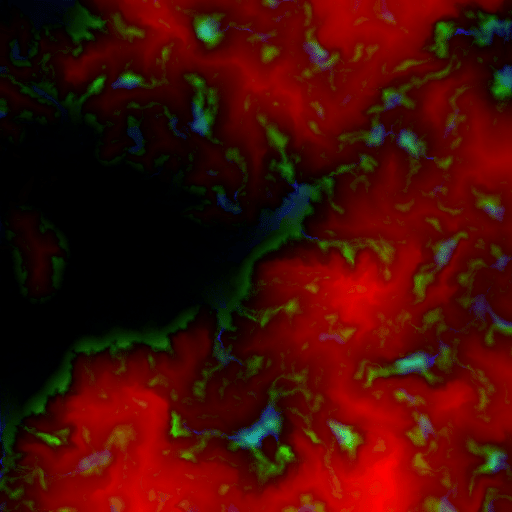
ROP Fetch node
This node exports data from ROP Path. In this case, there are two ROP Fetch node(for before erode and for before after eroded). And I put the path of Heightfield Output SOP nodes(one for before erode and one for after eroded). As a result, I got images like below.


Partition by Index node
This node is about grouping. There are two types of images, before-eroded and after-eroded. And they have wedge index on their filename. When they share the same index, then they are the same group.
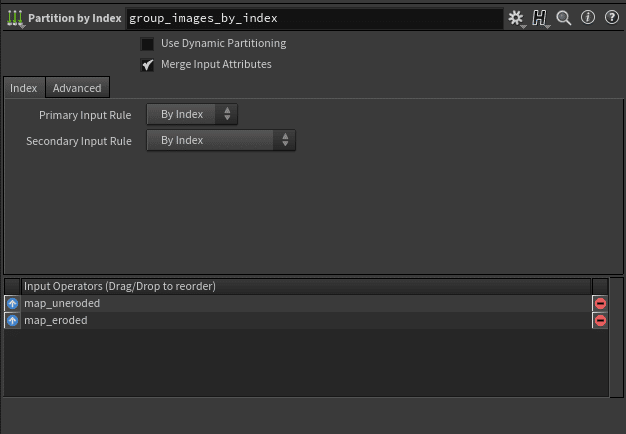
Image Magick node
In Image Magick node, you can manipulate images such as resizing, converting, and image mosaicing. In this case, makes two image with the same wedge index one image(like image below).

To use Image Magick, you need to install Image Magick application before you use it.
When you go to the website above, you would notice that there are several version. In my case(Windows10) the top one(ImageMagick-7.0.8-39-Q16-x64-dll.exe) worked fine.
Then, you need add the path into houdini.env file. The path is below.

After you add the path, you can use Image Magick node and finally making dataset are completed.
If you have any question or suggestion, feel free to contact me.
この記事が気に入ったらサポートをしてみませんか?