リアルタイム・アップスケール改良版

セミリアルタイムアップスケールの記事を書きましたが、再度利用場面やAPIS仕様の見直しをしました。条件によりますがRTX4070クラスでも20fpsをクリアできるようになりました。RTX4090だと40fpsも可能です。
どんな時に必要か再検討
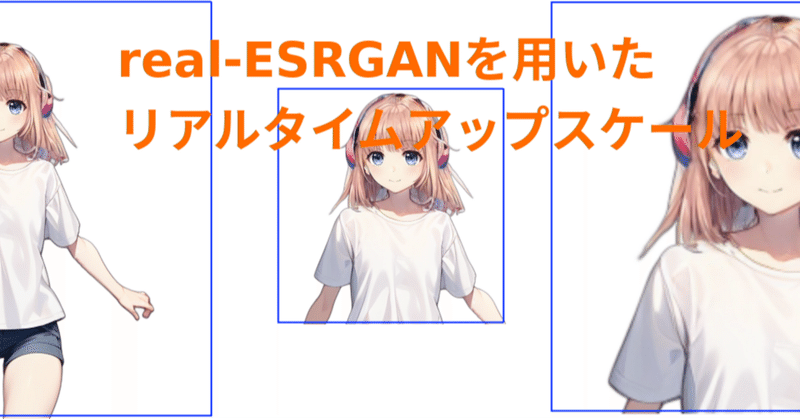
動画のアップスケールを行うことが前提ですが、生成AIで生成した動画を拡大する用途です。例えば512x512を2倍に拡大すると1024X1024になるわけですが、よくよく考えると拡大が必要なのは全体ではなく拡大率に合わせた画像の一部の拡大動画で十分だと考えました。例えば配信で使うときやブラウザーで使う時に1024x1024は大きすぎます。キャラクタを拡大したい場合は上半身であったり、胸から上であったりします。であれば、生成AI(具体的にはTalking-Head-AnimeFace-3です)が出力した512x512画像から必要な部分をクロッピングしてアップスケールすれば入力画像サイズが小さくなってアップスケール速度が劇的に改善されます(下の図を参照)。さらにアップスケール速度が改善されたことでαチャンネルを維持したままアップスケールする余裕が出てきます。αチャンネルはキャラクタを背景上に表示する場合には必ず必要でどこかで背景削除やクロマキ処理が必要になりますが、アップスケールでαチャンネル付き画像がそのまま扱えるなら、後の処理が簡略化できることが期待できます。

高速化
モデルの変更
モデルを軽量のアニメ用に変更しました。これで4倍程度高速化できます。
API通信の高速化
画像ファイルをOpenCV形式に変更することで1.5倍程度高速になります。特に拡大率を上げて画像が大きくなった時に効果が高いです。
αチャンネルを導入
Talking-Head-AnimeFace-3で生成されたフレームは背景がないαチャンネル付きです。今まではαチャンネルを削除していましたが、real-ESRGANはαチャンネル付き画像をアップスケールする能力があります。今回はこの機能を有効にしています。
コードの見直し
サーバ側API
ほとんど変更はありません。αチャンネルを使えるように以下の部分に変更を加えました。
out_img, _ = upsampler.enhance(img, outscale=scale)アップスケーラが自動判別してくれます。
モデル
デフォルトモデルをrealesr-animevideov3に変更しました。最もサイズの小さいモデルでアニメvideoのアップスケール用です。
クライアント側API
拡大したい画像部分を切り出すクロップト機能を追加しました。
    if mode=="breastup":
        cropped_image = crop_image(image, top=55, left=128, height=256, width=256)
    elif mode=="waistup":
        cropped_image = crop_image(image, top=55, left=128, height=290, width=256)
    elif mode=="upperbody":
        cropped_image = crop_image(image, top=55, left=143, height=336, width=229)
    elif mode=="full":
     cropped_image = image
    else:
        cropped_image = crop_image(image, top=mode[0], left=mode[1], height=mode[2], width=mode[3])
このコードは切り出す部分毎に縦横比も変えています。Talking-Head-AnimeFace-3のレファレンス画像のテンプレートの条件に「手は体に近いこと」があるので、腰から上のような画像では必要な範囲が縦長になります。real-ESRGANでは画像の縦横比は問いませんので、切り出し範囲を可能な限り狭めることでピクセルサイズを小さくしてアップスケール速度を上げる夜にしています。
注)昨日から以下を追加→カスタムクロップ指定
else:
cropped_image = crop_image(image, top=mode[0], left=mode[1], height=mode[2], width=mode[3])
サーバ側コード
テストコードが冒頭にあります。
−−test True でテストすることができます。
import argparse
import cv2
import glob
import os
from basicsr.archs.rrdbnet_arch import RRDBNet
from basicsr.utils.download_util import load_file_from_url
from realesrgan import RealESRGANer
from realesrgan.archs.srvgg_arch import SRVGGNetCompact
from datetime import datetime
import pickle
from fastapi import FastAPI, File, UploadFile, Form
from starlette.responses import Response,StreamingResponse
from io import BytesIO
import numpy as np
import time

# ++++++++++++++  up scale ++++++++++++++++
def  up_scale(img , scale):
        print("inf_start_time=",datetime.now())
        global upsampler
        try:
            output, _ = upsampler.enhance(img , outscale=scale)
        except RuntimeError as error:
            print('Error', error)
            print('If you encounter CUDA out of memory, try to set --tile with a smaller number.')
        print("inf_end_time=",datetime.now())
        return output

parser = argparse.ArgumentParser()
parser.add_argument('-i', '--input', type=str, default='inputs', help='Input image or folder')
parser.add_argument('-n','--model_name', type=str, default='realesr-animevideov3', help=('Model names: RealESRGAN_x4plus | RealESRNet_x4plus | RealESRGAN_x4plus_anime_6B | RealESRGAN_x2plus | realesr-animevideov3 | realesr-general-x4v3'))
parser.add_argument('-o', '--output', type=str, default='results', help='Output folder')
parser.add_argument('-dn','--denoise_strength',type=float, default=0.5, help=('Denoise strength. 0 for weak denoise (keep noise), 1 for strong denoise ability. Only used for the realesr-general-x4v3 model'))
parser.add_argument('-s', '--outscale', type=float, default=4, help='The final upsampling scale of the image')
parser.add_argument( '-t', '--test', type=bool, default=False, help='excecute test PG if True')
parser.add_argument("--host", type=str,  default="0.0.0.0",  help="サービスを提供するip アドレスを指定。")
parser.add_argument("--port", type=int,  default=50008,    help="サービスを提供するポートを指定。")
args = parser.parse_args()

# determine models according to model names
args.model_name = args.model_name.split('.')[0]
if args.model_name == 'RealESRGAN_x4plus':  # x4 RRDBNet model
        model = RRDBNet(num_in_ch=3, num_out_ch=3, num_feat=64, num_block=23, num_grow_ch=32, scale=4)
        netscale = 4
elif args.model_name == 'RealESRGAN_x4plus_anime_6B':  # x4 RRDBNet model with 6 blocks
        model = RRDBNet(num_in_ch=3, num_out_ch=3, num_feat=64, num_block=6, num_grow_ch=32, scale=4)
        netscale = 4
elif args.model_name == 'RealESRGAN_x2plus':  # x2 RRDBNet model
        #model = RRDBNet(num_in_ch=3, num_out_ch=3, num_feat=64, num_block=23, num_grow_ch=32, scale=2)
        model = RRDBNet(num_in_ch=3, num_out_ch=3, num_feat=64, num_block=23, num_grow_ch=32, scale=2)
        netscale = 2
elif args.model_name == 'realesr-animevideov3':  # x4 VGG-style model (XS size)
        #model = SRVGGNetCompact(num_in_ch=3, num_out_ch=3, num_feat=64, num_conv=16, upscale=4, act_type='prelu')
        model = SRVGGNetCompact(num_in_ch=3, num_out_ch=3, num_feat=64, num_conv=16, upscale=4, act_type='prelu')
        netscale = 4
elif args.model_name == 'realesr-general-x4v3':  # x4 VGG-style model (S size)
        model = SRVGGNetCompact(num_in_ch=3, num_out_ch=3, num_feat=64, num_conv=32, upscale=4, act_type='prelu')
        netscale = 4

 #+++++++++++++++++++  init  +++++++++++++++++++
model_path = "./weights/" + args.model_name +".pth"
print(model_path )
print(netscale)
# use dni to control the denoise strength
dni_weight = None
if args.model_name == 'realesr-general-x4v3' and args.denoise_strength != 1:
        wdn_model_path = model_path.replace('realesr-general-x4v3', 'realesr-general-wdn-x4v3')
        model_path = [model_path, wdn_model_path]
        dni_weight = [args.denoise_strength, 1 - args.denoise_strength]
    # restorer
upsampler = RealESRGANer(
        scale=netscale,
        model_path=model_path,
        dni_weight=dni_weight,
        model=model,
        tile=0,
        tile_pad=10,
        pre_pad=0,
        half=True,
        gpu_id=0)

#+++++++++++++++++++ TEST +++++++++++++++++++
if args.test==True:
        if os.path.isfile(args.input):
            paths = [args.input]
        else:
            paths = sorted(glob.glob(os.path.join(args.input, '*')))
        img_list=[]
        for idx, path in enumerate(paths):
            imgname, extension = os.path.splitext(os.path.basename(path))
            print('Testing', idx, imgname)
            cv_img = cv2.imread(path, cv2.IMREAD_UNCHANGED)
            img_list.append(cv_img)
        print("start_time=",datetime.now())
        count=len(img_list)
        for i in range(0,count):
            img=img_list[i]
            output = up_scale(img , args.outscale)
            #output = cv2.resize(output,(1024,1024 ))
            if len(img.shape) == 3 and img.shape[2] == 4:
                extension = '.png'
            else:
                extension = '.jpg'
            save_path = "./results/" + args.output+ str(i)+extension
            cv2.imwrite(save_path, output) #if files are require
        print("end_time=",datetime.now())

# =============    FastAPI  ============
app = FastAPI()

@app.post("/resr_upscal/")
def resr_upscal(image: UploadFile = File(...),scale:int= Form(...)): #file=OpenCV
    #print("Recive_time0=",datetime.now())
    print("scale=",scale)
    start_now=time.time()
    image_data = image.file.read()
    img =(pickle.loads(image_data))
    out_img, _ = upsampler.enhance(img, outscale=scale)
    frame_data = pickle.dumps(out_img, 5)  # tx_dataはpklデータ、イメージのみ返送
    print("Upscale time=",(time.time()-start_now)*1000,"mS")
    #print("send_time=",datetime.now())
    return Response(content=frame_data, media_type="application/octet-stream")

if __name__ == "__main__":
    import uvicorn
    uvicorn.run(app, host="0.0.0.0", port=8008)
クライアント側コード
アプリからは
import upscale import ファイル名
upscale(url ,image, mode, scale)で呼び出します。
url:サーバのアドレス デフォルトは http://0.0.0.0:50008
image:アップスケールしたいイメージ(ここからクロップします)
mode:クロックしたいエリア部分を指定
"breastup"/"waistup"/"upperbody"/"full" から選択
mode=[top,left,hight,width] でカスタムエリアを切り出し
top:切り出したいエリアの上ピクセル位置
left:切り出したいエリアの左ピクセル位置
→画像の左上の位置です
hight:切り出したい画像の高さ
width:切り出したい画像の幅
scale:拡大率 2/4/8が選べます。
大きくなればアップスケール時間が長くなります
import time
from time import sleep
import numpy as np
import cv2
from PIL import Image
import argparse
import pickle
import requests


#PIL形式の画像を動画として表示
def image_show(imge):
    imge = np.array(imge)
    imge = cv2.cvtColor(imge, cv2.COLOR_RGBA2BGRA)
    cv2.imshow("Loaded image",imge)
    cv2.waitKey(1)

# ++++++++++++++  up scale ++++++++++++++++
def up_scale(url , img ,  scale=4):
    #_, img_encoded = cv2.imencode('.jpg', img)
    images_data = pickle.dumps(img, 5)
    files = {"image": ("img.dat",  images_data, "application/octet-stream")}
    data = {"scale": scale}
    response = requests.post(url, files=files,data=data)

    all_data =response.content
    up_data = (pickle.loads(all_data))#元の形式にpickle.loadsで復元
    return up_data #形式はimg_mode指定の通り

def main():

    print("TEST")

    parser = argparse.ArgumentParser(description='Talking Head')
    parser.add_argument('--filename','-i', default='000002.png', type=str)
    parser.add_argument('--mode', default="full", type=str)#full,breastup,waistup,upperbody
    parser.add_argument('--scale', default=4, type=int)#2,4,8
    parser.add_argument("--host", type=str,  default="0.0.0.0",  help="サービスを提供するip アドレスを指定。")
    parser.add_argument("--port", type=int,  default=50008,    help="サービスを提供するポートを指定。")
    args = parser.parse_args()

    host="0.0.0.0"    # サーバーIPアドレス定義
    port=8008          # サーバー待ち受けポート番号定義
    url="http://" + host + ":" + str(port) + "/resr_upscal/"

    mode = args.mode
    scale= args.scale
    print("upscale=",mode,"scale=",scale)
    filename =args.filename
    print("filename=",filename)

    image = Image.open(filename)#image=512x512xαチャンネル
    imge = np.array(image)
    cv2_imge = cv2.cvtColor(imge, cv2.COLOR_RGBA2BGRA)

    upscale_image = upscale(url ,cv2_imge, mode, scale)

    cv2.imshow("Loaded image",upscale_image)
    cv2.waitKey(1000)

def crop_image(image, top, left, height, width):
    # 画像を指定された位置とサイズで切り出す
    cropped_image = image[top:top+height, left:left+width]

    return cropped_image

def upscale(url ,image, mode, scale):
    if mode=="breastup":
        cropped_image = crop_image(image, top=55, left=128, height=256, width=256)
    elif mode=="waistup":
        cropped_image = crop_image(image, top=55, left=128, height=290, width=256)
    elif mode=="upperbody":
        cropped_image = crop_image(image, top=55, left=143, height=336, width=229)
    elif mode=="full":
        cropped_image = image
    else:
        cropped_image = crop_image(image, top=mode[0], left=mode[1], height=mode[2], width=mode[3])
    return up_scale(url , cropped_image ,  scale)

    #image_show(imge)
    #cv2.waitKey(10000)

if __name__ == "__main__":
    main()
まとめ
次回はリアルタイムアップスケールを用いたTalking-Head-AnimeFace-3出力の拡大機能について記事にします。