
【テスト駆動開発】Springboot & React - 第9回 : プロフィール画像の修正


1. はじめに
こんにちは、前回はプロフィール修正を実装しました。
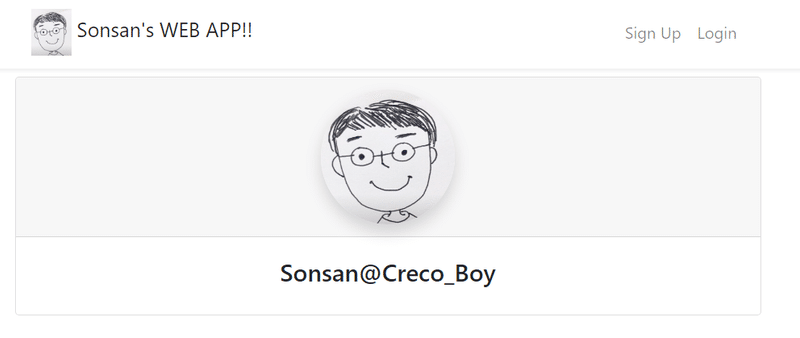
今回はプロファイル画像を修正する機能を実装してみます。今日の実装完成の画面です。
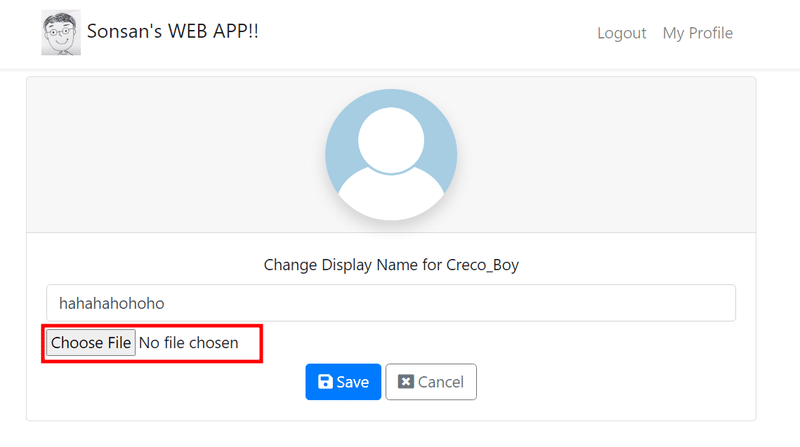
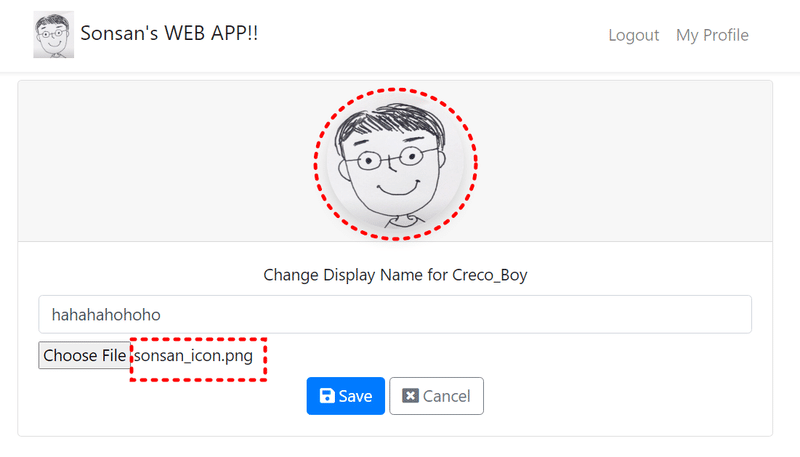
ファイルの選択ボタンの右に画面名が表示されます。

2. 実装過程
2.1 ユーザー画像の更新(バックエンド)
/user/vm/UserUpdateVM.java
public class UserUpdateVM {

	private String displayName;

	private String image;

}
まず、UserVMにimageフィールドを追加します。
/pom.xml
		<dependency>
		    <groupId>commons-io</groupId>
		    <artifactId>commons-io</artifactId>
		    <version>2.6</version>
		</dependency>
Apache Commons IOは、Javaプログラミング言語向けのオープンソースのライブラリで、Apache Commonsプロジェクトの一部です。このライブラリは、ファイルおよびディレクトリの操作、入出力(I/O)処理、およびストリームの管理に関連する機能を提供します。
/UserControllerTest.java
@Test
public void putUser_withValidRequestBodyWithSupportedImageFromAuthorizedUser_receiveUserVMWithRandomImageName() throws IOException {
    // 有効なユーザー情報を持つユーザーを保存
    User user = userService.save(TestUtil.createValidUser("user1"));

    // ユーザーを認証(ログイン)
    authenticate(user.getUsername());

    // テスト用の画像ファイルをClassPathResourceから読み込み
    ClassPathResource imageResource = new ClassPathResource("profile.png");

    // 有効なユーザー更新情報を作成
    UserUpdateVM updatedUser = createValidUserUpdateVM();

    // 画像ファイルをバイト配列に変換し、Base64エンコードして文字列に変換して更新情報に設定
    byte[] imageArr = FileUtils.readFileToByteArray(imageResource.getFile());
    String imageString = Base64.getEncoder().encodeToString(imageArr);
    updatedUser.setImage(imageString);

    // 更新情報を含むHTTPリクエストエンティティを作成
    HttpEntity<UserUpdateVM> requestEntity = new HttpEntity<>(updatedUser);

    // ユーザーを更新し、更新後のユーザー情報を取得
    ResponseEntity<UserVM> response = putUser(user.getId(), requestEntity, UserVM.class);

    // レスポンスのユーザー情報の画像名が "profile-image.png" でないことを検証
    assertThat(response.getBody().getImage()).isNotEqualTo("profile-image.png");
}
/user/UserService.java
public User update(long id, UserUpdateVM userUpdate) {
    // 指定されたIDに対応するユーザーをデータベースから取得
    User inDB = userRepository.getOne(id);

    // 取得したユーザーの表示名を更新情報から取得した表示名に設定
    inDB.setDisplayName(userUpdate.getDisplayName());

    // ユーザーの画像名をユーザー名 + ランダムなUUID文字列で構成されるものに設定
    String savedImageName = inDB.getUsername() + UUID.randomUUID().toString().replaceAll("-", "");
    inDB.setImage(savedImageName);

    // 更新したユーザー情報をデータベースに保存
    return userRepository.save(inDB);
}
2.2 ファイルストレージ(バックエンド)
/StaticResourceTest.java
@RunWith(SpringRunner.class)
@SpringBootTest(webEnvironment = WebEnvironment.RANDOM_PORT)
@ActiveProfiles("test")
public class StaticResourceTest {

    @Test
    public void checkStaticFolder_whenAppIsInitialized_uploadFolderMustExist() {
        // アップロードフォルダのFileオブジェクトを作成
        File uploadFolder = new File("uploads-test");

        // アップロードフォルダが存在し、ディレクトリであるかどうかを確認
        boolean uploadFolderExist = uploadFolder.exists() && uploadFolder.isDirectory();

        // アップロードフォルダが存在していることを検証
        assertThat(uploadFolderExist).isTrue();
    }
}
アプリケーションが初期化されたときに、指定されたアップロードフォルダが存在するかどうかを確認しています。
webEnvironment = WebEnvironment.RANDOM_PORTはランダムなポートを使用してWeb環境でテストを行うことを示しています。@ActiveProfiles("test")は、"test"プロファイルがアクティブであることを示しています。
/configuration/WebConfiguration.java
@Configuration
public class WebConfiguration implements WebMvcConfigurer {

    // アプリケーション起動時に実行されるタスクを設定するBean
    @Bean
    CommandLineRunner createUploadFolder() {
        return (args) -> {
            // アップロードフォルダのFileオブジェクトを作成
            File uploadFolder = new File("uploads-test");

            // アップロードフォルダが存在し、ディレクトリであるかどうかを確認
            boolean uploadFolderExist = uploadFolder.exists() && uploadFolder.isDirectory();

            // アップロードフォルダが存在しない場合は作成
            if (!uploadFolderExist) {
                uploadFolder.mkdir();
            }
        };
    }
}SpringのWebMvcConfigurerを実装しており、アプリケーションのWeb構成に関する設定を提供しています。また、CommandLineRunnerを使用してアプリケーションが起動した際に実行されるタスクを設定しています。「uploads-test」という名前のディレクトリが存在するかどうかを確認し、存在しない場合はそのディレクトリを作成します。
2.3 外部設定(バックエンド)
/pom.xml
		<dependency>
			<groupId>org.springframework.boot</groupId>
			<artifactId>spring-boot-configuration-processor</artifactId>
			<optional>true</optional>
		</dependency>
spring-boot-configuration-processorは、Spring Bootプロジェクトで使用される依存関係の一つです。これは、構成クラス(@ConfigurationPropertiesアノテーションで注釈付けされたクラス)を処理し、関連するメタデータを生成するためのプロセッサです。このメタデータは、IDE(Integrated Development Environment)やビルドツールなどのツールが、構成プロパティの補完、バリデーション、ドキュメンテーションを行うのに役立ちます。
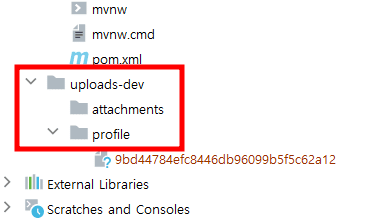
/resources/application.yml
hoaxify:
  upload-path: uploads-test
upload-path は、アプリケーション内で使用されるアップロードファイルの保存先パスを示しています。具体的には、ここでは "uploads-test" というディレクトリが指定されています。
/configuration/AppConfiguration.java
@Configuration
@ConfigurationProperties(prefix = "hoaxify")
@Data
public class AppConfiguration {

    String uploadPath;

    String profileImagesFolder = "profile";

    String attachmentsFolder = "attachments";

    // アップロード先のプロフィール画像のフルパスを取得
    public String getFullProfileImagesPath() {
        return this.uploadPath + "/" + this.profileImagesFolder;
    }

    // アップロード先の添付ファイルのフルパスを取得
    public String getFullAttachmentsPath() {
        return this.uploadPath + "/" + this.attachmentsFolder;
    }
}
@ConfigurationProperties アノテーションを使用して、指定されたプレフィックスを持つ構成プロパティをマッピングします。
getFullProfileImagesPath() および getFullAttachmentsPath(): これらのメソッドは、アップロード先のプロフィール画像と添付ファイルのフルパスを組み立てるためのものです。
/configuration/WebConfiguration.java
@Configuration
public class WebConfiguration implements WebMvcConfigurer {

    @Autowired
    AppConfiguration appConfiguration;

    // アプリケーション起動時に実行されるタスクを設定するBean
    @Bean
    CommandLineRunner createUploadFolder() {
        return (args) -> {
            // アップロード関連のフォルダを作成
            createNonExistingFolder(appConfiguration.getUploadPath());
            createNonExistingFolder(appConfiguration.getFullProfileImagesPath());
            createNonExistingFolder(appConfiguration.getFullAttachmentsPath());
        };
    }

    // フォルダが存在しない場合にフォルダを作成するメソッド
    private void createNonExistingFolder(String path) {
        File folder = new File(path);
        boolean folderExist = folder.exists() && folder.isDirectory();
        if (!folderExist) {
            folder.mkdir();
        }
    }
}
アプリケーションが起動したときに実行されるタスクを設定するBeanメソッドです。(CommandLineRunner)
/StaticResourceTest.java
@Test
public void checkStaticFolder_whenAppIsInitialized_profileImageSubFolderMustExist() {
    // AppConfigurationからプロフィール画像のフォルダパスを取得
    String profileImageFolderPath = appConfiguration.getFullProfileImagesPath();

    // フォルダが存在するかどうかを確認
    File profileImageFolder = new File(profileImageFolderPath);
    boolean profileImageFolderExist = profileImageFolder.exists() && profileImageFolder.isDirectory();

    // フォルダが存在することを検証
    assertThat(profileImageFolderExist).isTrue();
}

@Test
public void checkStaticFolder_whenAppIsInitialized_attachmentsSubFolderMustExist() {
    // AppConfigurationから添付ファイルのフォルダパスを取得
    String attachmentsFolderPath = appConfiguration.getFullAttachmentsPath();

    // フォルダが存在するかどうかを確認
    File attachmentsFolder = new File(attachmentsFolderPath);
    boolean attachmentsFolderExist = attachmentsFolder.exists() && attachmentsFolder.isDirectory();

    // フォルダが存在することを検証
    assertThat(attachmentsFolderExist).isTrue();
}
アプリケーションが起動したときに指定されたフォルダ構造が正しく作成されていることを確認するためのテストコードです。
checkStaticFolder_whenAppIsInitialized_profileImageSubFolderMustExist: プロフィール画像のサブフォルダが存在するかどうかを確認します。
checkStaticFolder_whenAppIsInitialized_attachmentsSubFolderMustExist: 添付ファイルのサブフォルダが存在するかどうかを確認します。
2.4 Spring Profiles (バックエンド)
「スプリングプロファイル(Spring Profiles)」は、アプリケーションの設定を特定の環境や条件によって異なるように構成することができます。これにより、開発者は同じコードベースを使用しながら、多様な環境でアプリケーションを実行し、テストすることができます。 各プロファイルは特定の環境や目的に合わせて設定されたビーン(bean)とプロパティを含んでいます。主に開発、テスト、ステージング、プロダクションなどの様々な環境で使われます。
/resources/application.yml
# 開発プロファイル
spring:
  profiles:
    active:
    - dev
  h2:
    console:
      enabled: true
      path: /h2-console
  jpa:
    properties:
      javax:
        persistence:
          validation:
            mode: none
  data:
    web:
      pageable:
        default-page-size: 10
        max-page-size: 100

# 本番プロファイル
---
spring:
  profiles: prod
  datasource:
    url: jdbc:h2:./hoaxify-prod
  jpa:
    hibernate:
      ddl-auto: update
  h2:
    console:
      enabled: false
hoaxify:
  upload-path: uploads-prod

# 開発プロファイル
---
spring:
  profiles: dev
  datasource:
    url: jdbc:h2:mem:hoaxify-dev
hoaxify:
  upload-path: uploads-dev

# テストプロファイル
---
spring:
  profiles: test
hoaxify:
  upload-path: uploads-test
この設定ファイルでは、異なるプロファイルに基づいて開発、本番、テスト環境向けの設定が行われています。
hibernate.ddl-auto を update に設定すると、Hibernate はデータベース・テーブルが存在しない場合は自動的に作成し、エンティティ・クラスに変更がある場合はスキーマを更新します。しかし、テーブルを削除して再作成することはないので、既存のデータは保持されます。
2.5 静的リソースのチェックとキャッシュ(バックエンド)
/StaticResourceTest.java
@RunWith(SpringRunner.class)
@SpringBootTest(webEnvironment = WebEnvironment.RANDOM_PORT)
@ActiveProfiles("test")
@AutoConfigureMockMvc
public class StaticResourceTest {

    @Autowired
    AppConfiguration appConfiguration;

    @Autowired
    MockMvc mockMvc;

    // ...

    @Test
    public void getStaticFile_whenImageExistInProfileUploadFolder_receiveOk() throws Exception {
        // テスト用の画像ファイルのコピーをプロフィール画像フォルダに作成
        String fileName = "profile-picture.png";
        File source = new ClassPathResource("profile.png").getFile();
        File target = new File(appConfiguration.getFullProfileImagesPath() + "/" + fileName);
        FileUtils.copyFile(source, target);

        // GETリクエストを実行し、期待されるステータスコードが得られることを検証
        mockMvc.perform(get("/images/"+appConfiguration.getProfileImagesFolder()+"/"+fileName))
                .andExpect(status().isOk());
    }

    @Test
    public void getStaticFile_whenImageExistInAttachmentFolder_receiveOk() throws Exception {
        // テスト用の画像ファイルのコピーを添付ファイルフォルダに作成
        String fileName = "profile-picture.png";
        File source = new ClassPathResource("profile.png").getFile();
        File target = new File(appConfiguration.getFullAttachmentsPath() + "/" + fileName);
        FileUtils.copyFile(source, target);

        // GETリクエストを実行し、期待されるステータスコードが得られることを検証
        mockMvc.perform(get("/images/"+appConfiguration.getAttachmentsFolder()+"/"+fileName))
                .andExpect(status().isOk());
    }

    @Test
    public void getStaticFile_whenImageDoesNotExist_receiveNotFound() throws Exception {
        // 存在しない画像に対するGETリクエストを実行し、期待されるステータスコードが得られることを検証
        mockMvc.perform(get("/images/"+appConfiguration.getAttachmentsFolder()+"/there-is-no-such-image.png"))
                .andExpect(status().isNotFound());
    }

    @After
    public void cleanup() throws IOException {
        // テスト後に生成されたファイルをクリーンアップ
        FileUtils.cleanDirectory(new File(appConfiguration.getFullProfileImagesPath()));
        FileUtils.cleanDirectory(new File(appConfiguration.getFullAttachmentsPath()));
    }
}
getStaticFile_whenImageExistInProfileUploadFolder_receiveOk: プロフィール画像フォルダに存在する画像に対してGETリクエストを行い、期待されるステータスコードが 200 OK であることを検証します。
getStaticFile_whenImageExistInAttachmentFolder_receiveOk: 添付ファイルフォルダに存在する画像に対してGETリクエストを行い、期待されるステータスコードが 200 OK であることを検証します。
getStaticFile_whenImageDoesNotExist_receiveNotFound: 存在しない画像に対してGETリクエストを行い、期待されるステータスコードが 404 Not Found であることを検証します。
cleanup: テストが終了した後、生成されたテスト用ファイルをクリーンアップします。これにより、テスト実行ごとに環境がクリーンになります。
/configuration/WebConfiguration.java
	@Override
	public void addResourceHandlers(ResourceHandlerRegistry registry) {
		registry.addResourceHandler("/images/**")
			.addResourceLocations("file:" + appConfiguration.getUploadPath() + "/");
	}
addResourceHandlers(ResourceHandlerRegistry registry): このメソッドはWebMvcConfigurer インターフェースの実装において、静的リソースのハンドリング設定を行います。
registry.addResourceHandler("/images/**"): この行は、"/images/**"というパスへのリクエストに対して静的リソースをハンドリングするためのハンドラを設定しています。"/images/"で始まるリクエストはこのハンドラに渡されます。
.addResourceLocations("file:" + appConfiguration.getUploadPath() + "/"): 静的リソースの実際のファイルが配置されているディレクトリのパスを指定しています。file:の後に実際のファイルのパスが続きます。appConfiguration.getUploadPath()は、アプリケーションの設定からアップロード先のディレクトリのパスを取得しています。
/StaticResourceTest.java
@Test
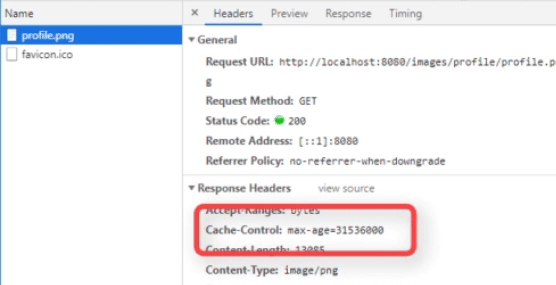
public void getStaticFile_whenImageExistInAttachmentFolder_receiveOkWithCacheHeaders() throws Exception {
// テスト用の画像ファイルのコピーを添付ファイルフォルダに作成
String fileName = "profile-picture.png";
File source = new ClassPathResource("profile.png").getFile();
File target = new File(appConfiguration.getFullAttachmentsPath() + "/" + fileName);
FileUtils.copyFile(source, target);
// GETリクエストを実行し、MvcResultを取得
MvcResult result = mockMvc.perform(get("/images/"+appConfiguration.getAttachmentsFolder()+"/"+fileName)).andReturn();
// Cache-Controlヘッダーを取得
String cacheControl = result.getResponse().getHeaderValue("Cache-Control").toString();
// Cache-Controlヘッダーに "max-age=31536000" が含まれていることを検証
assertThat(cacheControl).containsIgnoringCase("max-age=31536000");
}
アタッチメントフォルダに存在する画像に対してGETリクエストを実行し、期待されるステータスコードが 200 OK であることと、キャッシュヘッダーに適切な設定がされていることを検証しています。
/configuration/WebConfiguration.java
	@Override
	public void addResourceHandlers(ResourceHandlerRegistry registry) {
		registry.addResourceHandler("/images/**")
			.addResourceLocations("file:" + appConfiguration.getUploadPath() + "/")
			.setCacheControl(CacheControl.maxAge(365, TimeUnit.DAYS));
	}
.setCacheControl(CacheControl.maxAge(365, TimeUnit.DAYS)): この行は、キャッシュコントロールの設定を行っています。具体的には、リソースのキャッシュが有効な期間を365日に設定しています。クライアント側でのキャッシュが1年間有効となります。


2.6 アップロードの実装(バックエンド)
/UserControllerTest.java
@Test
// 有効なリクエストボディと認証済みユーザーからの画像更新リクエスト
public void putUser_withValidRequestBodyWithSupportedImageFromAuthorizedUser_receiveUserVMWithRandomImageName() throws IOException {
    // テスト用のユーザーを保存し、そのユーザーで認証
    User user = userService.save(TestUtil.createValidUser("user1"));
    authenticate(user.getUsername());

    // 有効なユーザーアップデートデータを作成し、サポートされている画像をBase64エンコードしてセット
    UserUpdateVM updatedUser = createValidUserUpdateVM();
    String imageString = readFileToBase64("profile.png");
    updatedUser.setImage(imageString);

    // リクエストを実行し、更新されたユーザー情報(UserVM)を取得
    HttpEntity<UserUpdateVM> requestEntity = new HttpEntity<>(updatedUser);
    ResponseEntity<UserVM> response = putUser(user.getId(), requestEntity, UserVM.class);

    // レスポンスのプロフィール画像の名前が "profile-image.png" とは異なることを検証
    assertThat(response.getBody().getImage()).isNotEqualTo("profile-image.png");
}

@Test
// 有効なリクエストボディと認証済みユーザーからの画像更新リクエスト
// 画像が適切に指定されたプロフィールフォルダに保存されていることを確認
public void putUser_withValidRequestBodyWithSupportedImageFromAuthorizedUser_imageIsStoredUnderProfileFolder() throws IOException {
    // テスト用のユーザーを保存し、そのユーザーで認証
    User user = userService.save(TestUtil.createValidUser("user1"));
    authenticate(user.getUsername());

    // 有効なユーザーアップデートデータを作成し、サポートされている画像をBase64エンコードしてセット
    UserUpdateVM updatedUser = createValidUserUpdateVM();
    String imageString = readFileToBase64("profile.png");
    updatedUser.setImage(imageString);

    // リクエストを実行し、更新されたユーザー情報(UserVM)を取得
    HttpEntity<UserUpdateVM> requestEntity = new HttpEntity<>(updatedUser);
    ResponseEntity<UserVM> response = putUser(user.getId(), requestEntity, UserVM.class);

    // レスポンスから保存されたプロフィール画像の名前を取得
    String storedImageName = response.getBody().getImage();

    // 保存されたプロフィール画像のパスを構築
    String profilePicturePath = appConfiguration.getFullProfileImagesPath() + "/" + storedImageName;

    // 保存されたプロフィール画像が存在することを検証
    File storedImage = new File(profilePicturePath);
    assertThat(storedImage.exists()).isTrue();
}

// 画像ファイルを読み取り、Base64エンコードされた文字列に変換するヘルパーメソッド
private String readFileToBase64(String fileName) throws IOException {
    ClassPathResource imageResource = new ClassPathResource(fileName);
    byte[] imageArr = FileUtils.readFileToByteArray(imageResource.getFile());
    return Base64.getEncoder().encodeToString(imageArr);
}

@After
// テスト後に生成されたファイルをクリーンアップ
public void cleanDirectory() throws IOException {
    FileUtils.cleanDirectory(new File(appConfiguration.getFullProfileImagesPath()));
    FileUtils.cleanDirectory(new File(appConfiguration.getFullAttachmentsPath()));
}
ユーザーのプロフィール画像を更新するエンドポイントに対するテストケースを定義しています。
putUser_withValidRequestBodyWithSupportedImageFromAuthorizedUser_receiveUserVMWithRandomImageName: 有効なユーザー情報とサポートされている画像が含まれるリクエストを認証済みユーザーとして送信し、更新されたユーザー情報(UserVM)のプロフィール画像がランダムな名前になっていることを検証します。これにより、プロフィール画像が更新され、ランダムな名前で保存されていることを確認します。
putUser_withValidRequestBodyWithSupportedImageFromAuthorizedUser_imageIsStoredUnderProfileFolder: 有効なユーザー情報とサポートされている画像が含まれるリクエストを認証済みユーザーとして送信し、更新されたユーザー情報(UserVM)のプロフィール画像がランダムな名前で保存されていることを検証します。これにより、プロフィール画像が適切なプロフィールフォルダに保存されていることを確認します。
readFileToBase64: ファイルを読み取り、Base64エンコードされた文字列に変換して返すヘルパーメソッドです。これを使用して、画像ファイルをBase64エンコードした文字列に変換します。
cleanDirectory: テスト後に生成されたファイルをクリーンアップするヘルパーメソッドです。これにより、テストごとにアップロードされたプロフィール画像が削除されます。
/user/UserService.java
@Service
public class UserService {

	UserRepository userRepository;
	PasswordEncoder passwordEncoder;
	FileService fileService;

	public UserService(UserRepository userRepository, PasswordEncoder passwordEncoder, FileService fileService) {
		super();
		this.userRepository = userRepository;
		this.passwordEncoder = passwordEncoder;
		this.fileService = fileService;
	}

	...

	// ユーザー更新メソッド
	public User update(long id, UserUpdateVM userUpdate) {
		// データベースからIDに対応するユーザー情報を取得
		User inDB = userRepository.getOne(id);

		// ユーザーの表示名を更新
		inDB.setDisplayName(userUpdate.getDisplayName());

		// 更新された画像が渡された場合
		if(userUpdate.getImage() != null) {
			String savedImageName;
			try {
				// ファイルサービスを使用してプロフィール画像を保存し、保存された画像の名前を取得
				savedImageName = fileService.saveProfileImage(userUpdate.getImage());
				// ユーザーエンティティに保存された画像の名前を設定
				inDB.setImage(savedImageName);
			} catch (IOException e) {
				// IOExceptionが発生した場合はスタックトレースを出力
				e.printStackTrace();
			}
		}

		// 更新されたユーザー情報を保存して返す
		return userRepository.save(inDB);
	}
}
ユーザーの表示名を更新し、もし画像が提供された場合はその画像を保存してユーザーエンティティに関連付けます。
/file/FileService.java
@Service
public class FileService {

	AppConfiguration appConfiguration;

	public FileService(AppConfiguration appConfiguration) {
		super();
		this.appConfiguration = appConfiguration;
	}

	// プロフィール画像を保存するメソッド
	public String saveProfileImage(String base64Image) throws IOException {
		// ユニークな画像名を生成
		String imageName = UUID.randomUUID().toString().replaceAll("-", "");

		// Base64でエンコードされた画像データをデコード
		byte[] decodedBytes = Base64.getDecoder().decode(base64Image);

		// 保存先ファイルを作成し、デコードされた画像データを書き込む
		File target = new File(appConfiguration.getFullProfileImagesPath() + "/" + imageName);
		FileUtils.writeByteArrayToFile(target, decodedBytes);

		// 保存された画像の名前を返す
		return imageName;
	}

}
saveProfileImageメソッドはBase64でエンコードされたプロフィール画像を保存します。ユニークな画像名を生成し、デコードされた画像データを指定されたパスに保存します。
2.7 レイアウト・画像選択・リクエスト(フロントエンド)
レイアウト
/components/ProfileCard.spec.js
   it('displays Cancel button in edit mode', () => {
      const { queryByText } = render(
        <ProfileCard user={user} inEditMode={true} isEditable={true} />
      );
      const cancelButton = queryByText('Cancel');
      expect(cancelButton).toBeInTheDocument();
    });

    it('displays file input when inEditMode property set as true', () => {
      const { container } = render(
        <ProfileCard user={user} inEditMode={true} />
      );
      const inputs = container.querySelectorAll('input');
      const uploadInput = inputs[1];
      expect(uploadInput.type).toBe('file');
    });
第1のテストは「編集モード」で「Cancel」ボタンが表示されることを確認。
第2のテストは「編集モード」でファイルの入力欄が表示されることを確認しています。
const { queryByText } = render(
  <ProfileCard user={user} inEditMode={true} isEditable={true} />
);
queryByTextはテストライブラリであるTesting Libraryが提供する関数の一つです。
const { queryByText } 部分は「分割代入(Destructuring Assignment)」を使ったコードです。 この文法はオブジェクトや配列から欲しい値を抽出して変数に割り当てる時使います。
分割代入は、オブジェクトや配列から目的の値を抽出して変数に割り当てるJavaScriptの文法です。
const person = { name: 'John', age: 30, city: 'New York' };

// 既存の方式
const name = person.name;
const age = person.age;

// 分割代入
const { name, age } = person;
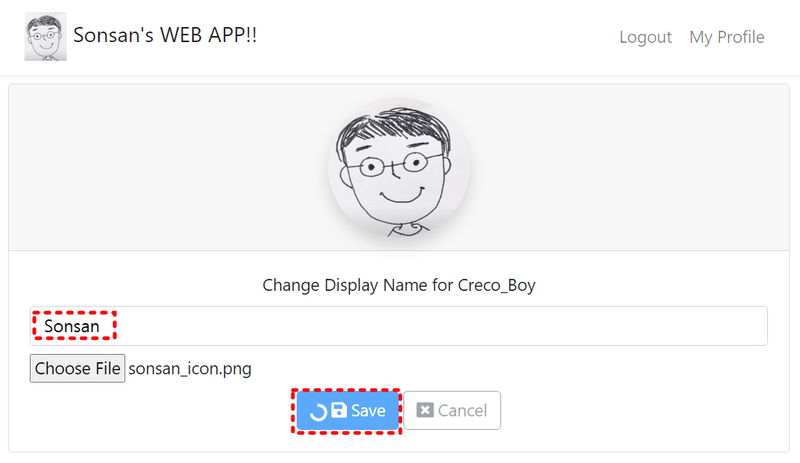
frontend/src/components/ProfileCard.js
{props.inEditMode && (
          <div className="mb-2">
            <Input
              value={displayName}
              label={`Change Display Name for ${username}`}
              onChange={props.onChangeDisplayName}
            />
            <input className="form-control-file mt-2" type="file" />
          </div>
        )}
ファイルアップロードインプットタグを作成します。
画像選択
frontend/src/pages/UserPage.spec.js
// 画像を編集モードで表示
it('displays the selected image in edit mode', async () => {
  const { container } = await setupForEdit();

  // 画像を選択
  const inputs = container.querySelectorAll('input');
  const uploadInput = inputs[1];
  const file = new File(['dummy content'], 'example.png', { type: 'image/png' });
  fireEvent.change(uploadInput, { target: { files: [file] } });

  await waitForDomChange();  // DOMの変更を待機

  // 画像が表示されていることを確認
  const image = container.querySelector('img');
  expect(image.src).toContain('data:image/png;base64');
});

// 新しい画像がアップロードボックスに追加されたがキャンセルされた場合、元の画像に戻る
it('returns back to the original image even the new image is added to upload box but cancelled', async () => {
  const { queryByText, container } = await setupForEdit();

  // 画像を選択
  const inputs = container.querySelectorAll('input');
  const uploadInput = inputs[1];
  const file = new File(['dummy content'], 'example.png', { type: 'image/png' });
  fireEvent.change(uploadInput, { target: { files: [file] } });

  await waitForDomChange();  // DOMの変更を待機

  // キャンセルボタンをクリック
  const cancelButton = queryByText('Cancel');
  fireEvent.click(cancelButton);

  // 元の画像が表示されていることを確認
  const image = container.querySelector('img');
  expect(image.src).toContain('/images/profile/profile1.png');
});

// ファイルが選択されなかった場合、エラーが発生しないことを確認
it('does not throw error after file not selected', async () => {
  const { container } = await setupForEdit();

  // ファイルが選択されなかった場合のエラーを確認
  const inputs = container.querySelectorAll('input');
  const uploadInput = inputs[1];
  expect(() =>
    fireEvent.change(uploadInput, { target: { files: [] } })
  ).not.toThrow();
});
frontend/src/pages/UserPage.js
state = {
  user: undefined,
  userNotFound: false,
  isLoadingUser: false,
  inEditMode: false,
  originalDisplayName: undefined,
  pendingUpdateCall: false,
  image: undefined  // プロフィール画像
};

// キャンセルボタンがクリックされたときの処理
onClickCancel = () => {
  const user = { ...this.state.user };
  // 編集前の表示名があれば、ユーザー情報を元に戻す
  if (this.state.originalDisplayName !== undefined) {
    user.displayName = this.state.originalDisplayName;
  }
  this.setState({
    user,
    originalDisplayName: undefined,
    inEditMode: false,
    image: undefined  // プロフィール画像をクリア
  });
};

// ファイルが選択されたときの処理
onFileSelect = (event) => {
  // 選択されたファイルがないい場合
  if (event.target.files.length === 0) {
    return;
  }
  const file = event.target.files[0];

  // FileReaderを使用してファイルを読み込み、読み込み完了時にstateを更新
  let reader = new FileReader();
  reader.onloadend = () => {
    this.setState({
      image: reader.result  // プロフィール画像を更新
    });
  };
  reader.readAsDataURL(file);
};

render() {
  let pageContent;
  if (this.state.isLoadingUser) {

  } else {
    const isEditable =
      this.props.loggedInUser.username === this.props.match.params.username;
    pageContent = this.state.user && (
      <ProfileCard
        user={this.state.user}
        isEditable={isEditable}
        inEditMode={this.state.inEditMode}
        onClickEdit={this.onClickEdit}
        onClickCancel={this.onClickCancel}
        onClickSave={this.onClickSave}
        onChangeDisplayName={this.onChangeDisplayName}
        pendingUpdateCall={this.state.pendingUpdateCall}
        loadedImage={this.state.image}
    // 選択されたファイル
        onFileSelect={this.onFileSelect}
      />
    );
  }
};
frontend/src/components/ProfileCard.js
const ProfileCard = (props) => {
  const { displayName, username, image } = props.user;
  const showEditButton = props.isEditable && !props.inEditMode;
  return (
    <div className="card">
      <div className="card-header text-center">
        <ProfileImageWithDefault
          alt="profile"
          width="200"
          height="200"
          image={image}
          src={props.loadedImage}
          className="rounded-circle shadow"
        />
      </div>
      <div className="card-body text-center">
        {!props.inEditMode && <h4>{`${displayName}@${username}`}</h4>}
        {props.inEditMode && (
          <div className="mb-2">
            <Input
              value={displayName}
              label={`Change Display Name for ${username}`}
              onChange={props.onChangeDisplayName}
            />
            <input
              className="form-control-file mt-2"
              type="file"
              onChange={props.onFileSelect}
            />
          </div>
        )}
リクエスト
frontend/src/pages/UserPage.spec.js
// 新しい画像が含まれていない状態で updateUser API が呼び出されることを確認
it('calls updateUser API without new image when not included', async () => {
  const { queryByText, container } = await setupForEdit();
  apiCalls.updateUser = jest.fn().mockResolvedValue(mockSuccessUpdateUser);

  // ファイル選択
  const inputs = container.querySelectorAll('input');
  const uploadInput = inputs[1];
  const file = new File(['dummy content'], 'example.png', {
    type: 'image/png'
  });
  fireEvent.change(uploadInput, { target: { files: [file] } });

  await waitForDomChange();

  // 保存ボタンをクリック
  const saveButton = queryByText('Save');
  fireEvent.click(saveButton);

  // API呼び出し時のリクエストボディを取得
  const requestBody = apiCalls.updateUser.mock.calls[0][1];

  // 新しい画像が含まれていないことを確認
  expect(requestBody.image).not.toContain('data:image/png;base64');
});

// 画像をもう一度変更したが、キャンセルした場合に最後に更新された画像に戻ることを確認
it('returns to last updated image when changed again but cancelled', async () => {
  const { queryByText, container } = await setupForEdit();
  apiCalls.updateUser = jest.fn().mockResolvedValue(mockSuccessUpdateUser);

  // 初めてのファイル選択
  const inputs = container.querySelectorAll('input');
  const uploadInput = inputs[1];
  const file = new File(['dummy content'], 'example.png', {
    type: 'image/png'
  });
  fireEvent.change(uploadInput, { target: { files: [file] } });

  await waitForDomChange();

  // 保存ボタンをクリック
  const saveButton = queryByText('Save');
  fireEvent.click(saveButton);

  // 保存後、編集ボタンをクリック
  const editButtonAfterClickingSave = await waitForElement(() =>
    queryByText('Edit')
  );
  fireEvent.click(editButtonAfterClickingSave);

  // 新しい画像を選択
  const newFile = new File(['another content'], 'example2.png', {
    type: 'image/png'
  });
  fireEvent.change(uploadInput, { target: { files: [newFile] } });

  // キャンセルボタンをクリック
  const cancelButton = queryByText('Cancel');
  fireEvent.click(cancelButton);

  // 画像が最後に更新されたものに戻っていることを確認
  const image = container.querySelector('img');
  expect(image.src).toContain('/images/profile/profile1-update.png');
});
これらのテストは、画像の変更やキャンセルの動作を確認するものです。最初のテストでは、updateUser APIが呼び出されたときに新しい画像が含まれていないことを確認しています。2番目のテストでは、画像を変更した後にキャンセルした場合に、最後に更新された画像に戻ることを確認しています。
frontend/src/pages/UserPage.js
// 保存ボタンがクリックされたときの処理
onClickSave = () => {
  const userId = this.props.loggedInUser.id;

  // ユーザーアップデートのためのリクエストボディ
  const userUpdate = {
    displayName: this.state.user.displayName,
    image: this.state.image && this.state.image.split(',')[1]  // 画像があればbase64データに変換
  };

  this.setState({ pendingUpdateCall: true });

  // updateUser API を呼び出し
  apiCalls
    .updateUser(userId, userUpdate)
    .then((response) => {
      const user = { ...this.state.user };
      user.image = response.data.image;

      // 状態を更新して編集モードを終了
      this.setState({
        inEditMode: false,
        originalDisplayName: undefined,
        pendingUpdateCall: false,
        user,
        image: undefined
      });
    })
    .catch((error) => {
      // エラーが発生した場合、状態を更新して更新処理を終了
      this.setState({
        pendingUpdateCall: false
      });
    });
};
3. 最後に
今までプロフィール写真を変更する機能をバックエンドからフロントエンドまで実装してみました。 バックエンドではファイルを読み込んでフォルダパスに保存するロジックで、 Base64デコードして画像バイト配列を取得し、バイト配列をファイルとして作成することは重要でした。
	public String saveProfileImage(String base64Image) throws IOException {
		String imageName = UUID.randomUUID().toString().replaceAll("-", "");

        // Base64デコードして画像バイト配列を取得します。
		byte[] decodedBytes = Base64.getDecoder().decode(base64Image);
		File target = new File(appConfiguration.getFullProfileImagesPath() + "/" + imageName);

        // 画像バイト配列をファイルとして作成
        FileUtils.writeByteArrayToFile(target, decodedBytes);
		return imageName;
	}
ついでに、Spring Profilesを設定して環境を分けることも学びました。
フロントエンドではJavaScriptの分割代入を文法的に簡単に見ました。分割代入を利用すれば、コードの簡潔性と可読性が向上されます。
const person = { name: 'John', age: 30, city: 'New York' };

// 既存の方式
const name = person.name;
const age = person.age;

// 分割代入
const { name, age } = person;
画像ファイルが選択された状態でキャンセルボタンを押した時、どうすれば元の画像に戻れるかを見ました。 核心はonClickCancel関数でimageをundefiendに設定することでした。
  onClickCancel = () => {
    const user = { ...this.state.user };
    if (this.state.originalDisplayName !== undefined) {
      user.displayName = this.state.originalDisplayName;
    }
    this.setState({
      user,
      originalDisplayName: undefined,
      inEditMode: false,
      image: undefined // ****ポイント!!****
    });
また、画像ファイルを何も選択せずに選択ボックスをキャンセルした時、条件文ですぐにリターンをするセンスも学びました。
 onFileSelect = (event) => {
  // ****ポイント!!****
    if (event.target.files.length === 0) {
      return;
    }

    const file = event.target.files[0];
    let reader = new FileReader();
    reader.onloadend = () => {
      this.setState({
        image: reader.result
      });
    };
    reader.readAsDataURL(file);
  };
単純に文字列を処理するだけでなく、ファイル処理が一緒にあるため、もう少し複雑なので必ず復習と熟知が必要です!!
エンジニアファーストの会社 株式会社CRE-CO
ソンさん
【参考】
[Udemy] Spring Boot and React with Test Driven Development
この記事が気に入ったらサポートをしてみませんか?