Feedly API + ChatGPTでデザインの英語記事を毎朝日本語でおすすめしてくれるSlackボットを作った

⚠ 2024.1.22追記: この手順で使用しているFeedlyのMixes APIやAccessTokenの取得方法は現在公式ドキュメントから削除されています。現状問題なく動作していますが予告なく停止する可能性がります。ご注意ください。
⚠ 2023.10.29追記:無料アカウントでのFeedly APIの提供は終了し、利用にはFeedly Pro(月額$8)の登録が必要になりました。
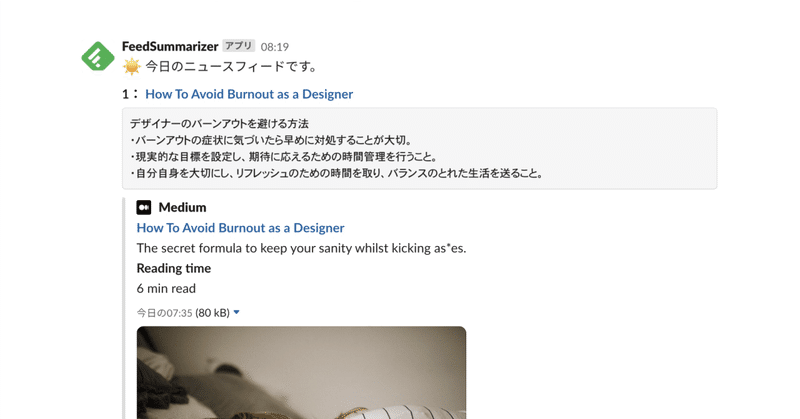
こんな感じのSlackボットを作りました。
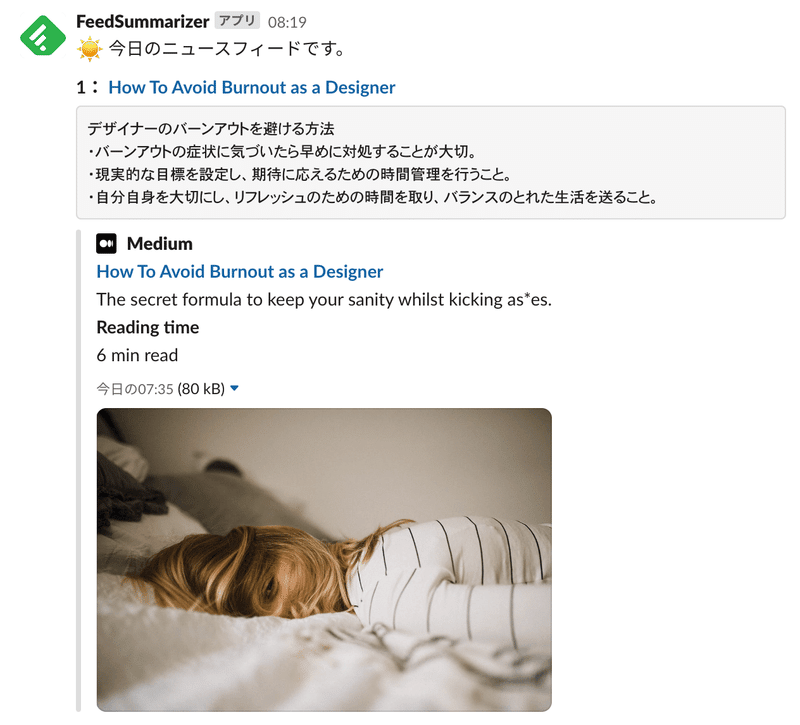
毎朝8時ごろに、デザイン系の英語記事を10件ほどSlackでおすすめしてくれます。
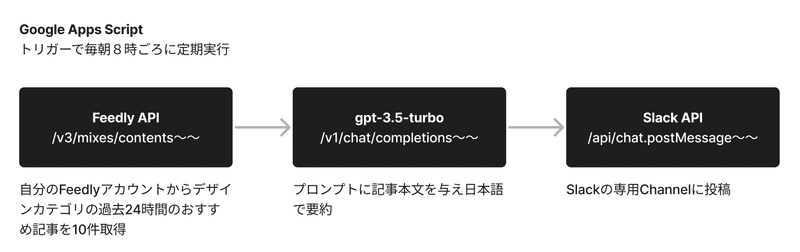
Feedly API + ChatGPT (gpt-3.5-turbo) + Slack API + GAS (Google Apps Script) を使用しています。
1. 前提
前提として以下の準備が必要です。
Google Apps Scriptの利用
Feedlyのアカウント登録とニュースフィードの追加
Feedly APIのAccessTokenを取得
Slackのアカウント登録とAPIのTokenの取得
Open AIのアカウント登録とAPI Keyの取得
それぞれ以下の記事が参考になります。
2. Feedlyからの記事の取得
Feedlyからの記事の取得にはMixes APIを使用します。
フィード、カテゴリ、トピックを指定して、Feedlyのロジック上でおすすめされる記事を取得できます。今回は自分が追加した「デザイン」カテゴリのフィードの中から、過去24時間でおすすめの記事を10件取得します。
const feedlyAccessToken = '○○○○'
const feedlyStreamId = "user/○○○○/category/design"

function getNewFeedList() {
  return getMixesConntents(feedlyAccessToken, feedlyStreamId)
}

function getMixesConntents(accessToken, streamId) {
  // 過去24時間のおすすめコンテンツを10件取得
  let param = encodeURIComponent(streamId) + "&count=10&hours=24"
  return requestFeedlyGetApi(accessToken,'/v3/mixes/contents?streamId=' + param)
}

function requestFeedlyGetApi(accessToken, api) {
  let url = 'https://cloud.feedly.com' + api
  let headers = {
    'Content-Type': 'application/json',
    'Authorization': 'Bearer ' + accessToken,
  };
  let options = {
    'method' : 'get',
    'headers' : headers,
  };
  var response = JSON.parse(UrlFetchApp.fetch(url,options).getContentText());
  return response
}
GASを実行すると、記事の情報が items に格納されて返ってきます。
  let feedList = getNewFeedList();
  console.log(feedList)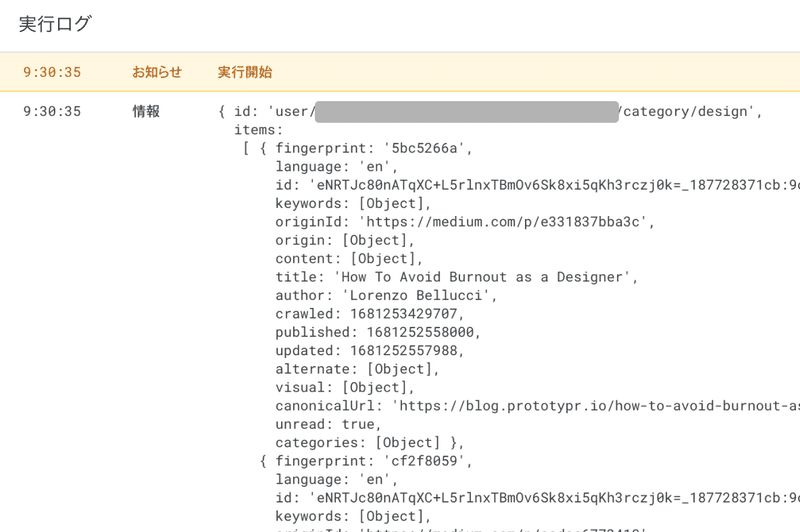
記事のタイトルとURLと本文は以下のように取得できます。
feedList.items.forEach(function(item){
    let title = item.title
    let url = item.canonicalUrl || item.originId
    let article
    if(item.content){
      article = item.content.content
    }else{
      // 本文がない場合はURLから取得
      article = getArticle(url)
    }
})
本文はitem.content.contentに文字列として格納されていますが、フィードの種類によってnullの場合があります。その場合はURLを元に記事本文を取得します。
3. 記事本文の取得
記事本文の取得にはGASのUrlFetchAppクラスを使います。
function getArticle(url){
  let options = {
    'method':'get',
    // 1. ボットとして除外されないようにMac OSのChromeのUser-Agentを設定
    'headers':{
      'User-Agent': 'Mozilla/5.0 (Macintosh; Intel Mac OS X 10_15_7) AppleWebKit/537.36 (KHTML, like Gecko) Chrome/108.0.0.0 Safari/537.36',
      'Accept':'text/html,application/xhtml+xml,application/xml;q=0.9,image/avif,image/webp,image/apng,*/*;q=0.8,application/signed-exchange;v=b3;q=0.9',
      'Accept-Encoding':'gzip, deflate, br',
      'Accept-Language': 'ja',
      'Cache-Control':'no-cache'
    }
  }
  try{
    let res = UrlFetchApp.fetch(url, options).getContentText("UTF-8")
    // 2. 本文と関係なさそうなタグを除去
    res = res.replace(/(<(head|script|style|header|footer|nav|iframe|aside)[^>]*>([\s\S]*?)<\/(head|script|style|header|footer|nav|iframe|aside)>)/g, '')
    // 3. htmlタグを除去
    res = res.replace(/<("[^"]*"|'[^']*'|[^'">])*>/g,'')
    // 4. 連続する改行やスペースを除去
    res = res.replace(/\s{2,}/g, ' ');
    return res

  }catch(error){
    Logger.log(error)
    return null
  }
}
サイトによってはリクエストヘッダを元にボットを除外している場合があるので、Mac OSのChromeのUser-Agentを加えています。
取得したhtmlから本文と関係なさそうなタグを除去します。
htmlタグを除去します。
連続する改行やスペースを除去します。
また、URLのリダイレクトに対応するために、本文を取得する前にリダイレクト先のURLを取得します。
function getRedirect(url) {
  Logger.log(['getRedirect', url])
  var response = UrlFetchApp.fetch(url, {'followRedirects': false, 'muteHttpExceptions': false})
  var redirectUrl = response.getHeaders()['Location']
  var responseCode = response.getResponseCode()
  if (redirectUrl && redirectUrl != url) {
    var nextRedirectUrl = getRedirect(redirectUrl)
    return nextRedirectUrl
  } else {
    return url
  }
}
レスポンスヘッダにLocationがある場合はURLが置き換わります。
以上をGASで実行します。
let url = 'https://blog.prototypr.io/how-to-avoid-burnout-as-a-designer-e331837bba3c'
url = getRedirect(url)
let article = getArticle(url)
console.log(article)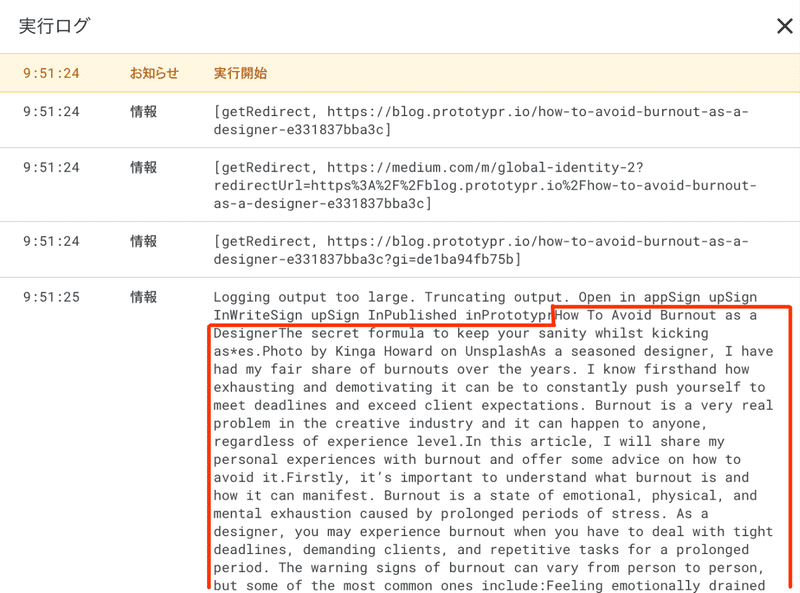
複数回のリダイレクトを経て本文が取得できました。本来の本文は赤枠の部分なので、手前に余分なテキストが残っていることがわかりますが、今回はこれで良しとします。
どなたか本文のみを抜き出すより良い方法があったら教えて下さい 🙇♂️
4. ChatGPTでの要約
取得した記事の要約には gpt-3.5-turbo を使います。
まずは、Open AI APIのChat completionsにmessagesを送信する処理を書きます。
const gptApiKey = '○○○'

function gptRequestCompletion(messages) {
  const apiUrl = 'https://api.openai.com/v1/chat/completions'
  let headers = {
    // 1. リクエストヘッダのAuthorizationにAPI KEYを設定
    'Authorization':'Bearer '+ gptApiKey,
    'Content-type': 'application/json',
    'X-Slack-No-Retry': 1
  };

  let options = {
    'muteHttpExceptions' : true,
    'headers': headers,
    'method': 'POST',
    'payload': JSON.stringify({
      // 2. POSTするpayloadにモデルとして gpt-3.5-turbo を指定
      'model': 'gpt-3.5-turbo',
      'messages': messages})
  };

  const response = JSON.parse(UrlFetchApp.fetch(apiUrl, options).getContentText());

  try {
    let text = response.choices[0].message.content;
    return text;
  }catch(error){
    Logger.log(error);
    return null
  }

}
リクエストヘッダのAuthorizationにAPI KEYを設定します。
POSTするpayloadにモデルとして gpt-3.5-turbo を指定します。
次に送信メッセージとしてsystemとuserのプロンプトを作成します。
記事のタイトルと本文を元に規定のフォーマットで要約してもらいます。
function gptSummarize(title, article){
  // 1. systemにテキストフォーマットを指定
  let system =
`与えられた文章の要点を3点のみでまとめ、以下のフォーマットで日本語で出力してください。
タイトルの日本語訳
・要点1
・要点2
・要点3`
  // 2. userに記事タイトルと本文(2000文字以内)を指定。
  let user = 'title: ' + title + '\nbody: ' + article.substring(0,2000)

  return gptRequestCompletion([
    {"role": "system", "content": system},
    {"role": "user", "content": user}
  ])
}
systemにテキストフォーマットを指定します。日本語の記事タイトルと記事本文の要点を3点箇条書きにしてもらいます。
userにタイトルと本文を指定します。APIに送信できるTokenに上限があるため、本文は2000文字以内になるように削ります。
長文の記事の場合は前方2000文字しか要約対応になりませんが、実用上これで良しとします。
GASで実行してみます。
let title = 'How To Avoid Burnout as a Designer'
let article = 'Asa seasoned designer, I have had my fair share of burnouts over the years. I know firsthand how exhausting and demotivating it can be to constantly push yourself to meet deadlines and exceed client expectations. Burnout is a very real problem in the creative industry and it can happen to anyone, regardless of experience level.  In this article, I will share my personal experiences with burnout and offer some advice on how to avoid it.  Firstly, it’s important to understand what burnout is and how it can manifest. Burnout is a state of emotional, physical, and mental exhaustion caused by prolonged periods of stress. As a designer, you may experience burnout when you have to deal with tight deadlines, demanding clients, and repetitive tasks for a prolonged period. The warning signs of burnout can vary from person to person, but some of the most common ones include:  Feeling emotionally drained and unable to cope with stress. Lack of motivation and interest in your work. Difficulty sleeping or staying focused. Chronic fatigue or physical exhaustion. Physical and emotional detachment from colleagues and clients. Increased irritability and short temper. Decreased productivity and creativity. If you notice any of these symptoms, it’s important to take action and address them before they worsen.  Here are some tips on how to avoid burnout as a designer: 1. Set realistic goals and manage expectations One of the main causes of burnout is the pressure to meet unrealistic goals and expectations. To avoid this, make sure you set achievable goals and communicate clearly with your clients and colleagues. If you are feeling overwhelmed, it’s important to speak up and ask for help. This can mean delegating tasks, pushing back on unrealistic deadlines, or re-negotiating the scope of a project.  Something I found extremely useful in the past is to buddy up with somebody at work. Have weekly or bi-weekly check-ins with them. Talk about how you feel. Ideally, this would be someone who does not work directly with you or within the same project. Since it’s very useful to have an external point of view. The buddy should listen to the situation, and give advice. Knowing that sometimes having a rant is also all the other person would like to do. Externalising your emotions may be good enough to save you from stress.  2. Take breaks and prioritize self-care Design work can be intense and demanding, but it’s important to take regular breaks and prioritize self-care. This means taking time to rest, exercise, and engage in activities that you enjoy outside of work. Try to establish a healthy work-life balance that allows you to recharge your batteries and prevent burnout. '
let summary = gptSummarize(title, article)
console.log(summary)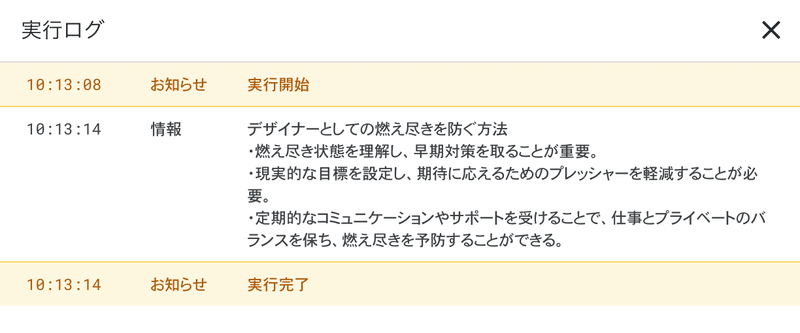
実行から6秒ほどで指定したフォーマットに記事を要約してくれました。
5. Slackへの投稿
Slack APIを利用し、指定したChannelにテキストを送信する処理を書きます。
const slackApiToken = '○○○'

\function postSlack(text, channelName){
  // POSTするpayloadにAPI TokenとChannel名と送信したいテキストを指定
  let payload = {
    "token" : slackApiToken,
    "channel" : channelName,
    "as_user" : true,
    "text" : text
  }
  var options =
   {
     "method" : "post",
     "payload" : payload
   };
  var response = UrlFetchApp.fetch('https://slack.com/api/chat.postMessage', options);
  return JSON.parse(response.getContentText());
}
POSTするpayloadにAPI TokenとChannel名と送信したいテキストを指定します。
GASで実行してみます。
let channelName = "9_shingo"
let url = 'https://blog.prototypr.io/how-to-avoid-burnout-as-a-designer-e331837bba3c'
let title = 'How To Avoid Burnout as a Designer'
let summary = `デザイナーとしての燃え尽きを防ぐ方法
・燃え尽き状態を理解し、早期対策を取ることが重要。
・現実的な目標を設定し、期待に応えるためのプレッシャーを軽減することが必要。
・定期的なコミュニケーションやサポートを受けることで、仕事とプライベートのバランスを保ち、燃え尽きを予防することができる。`
let message = "*<" + url + "|" + title + ">*\n```" + summary + '\n```'
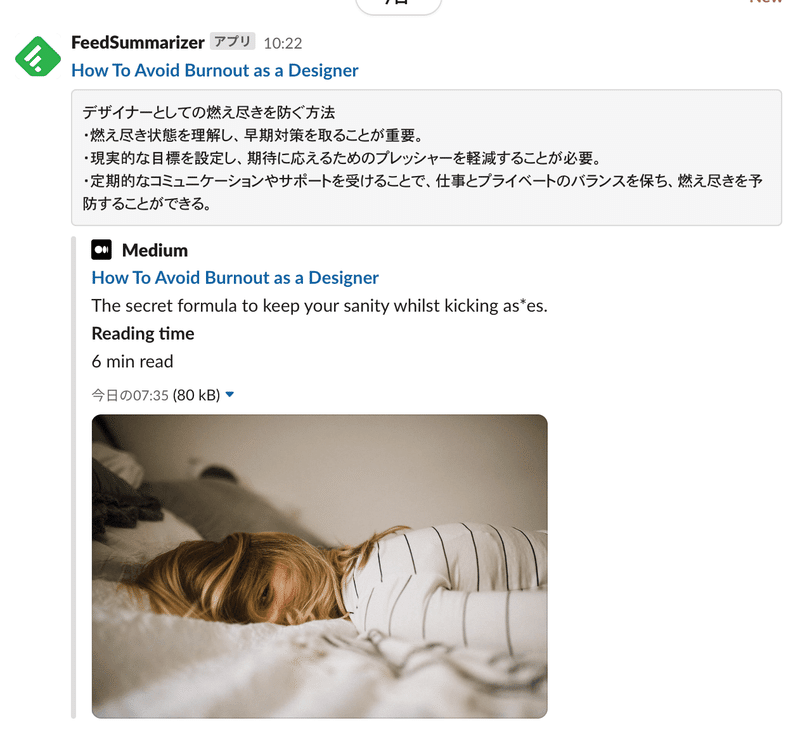
postSlack(message, slackChannelName)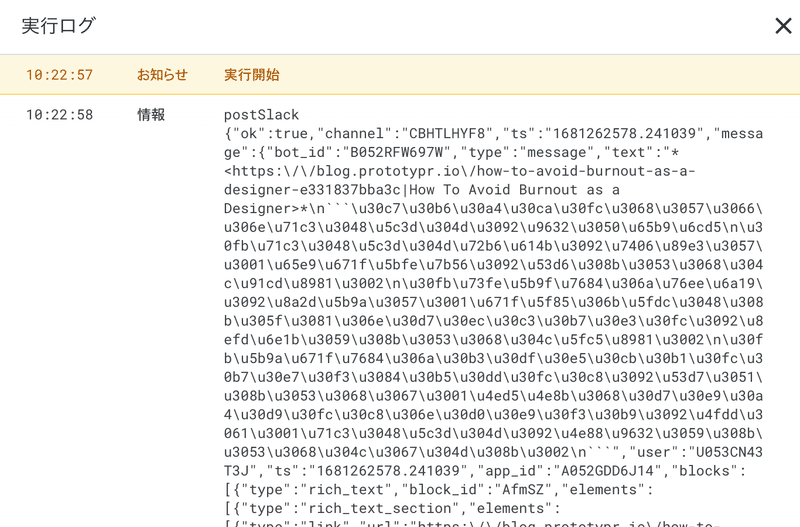
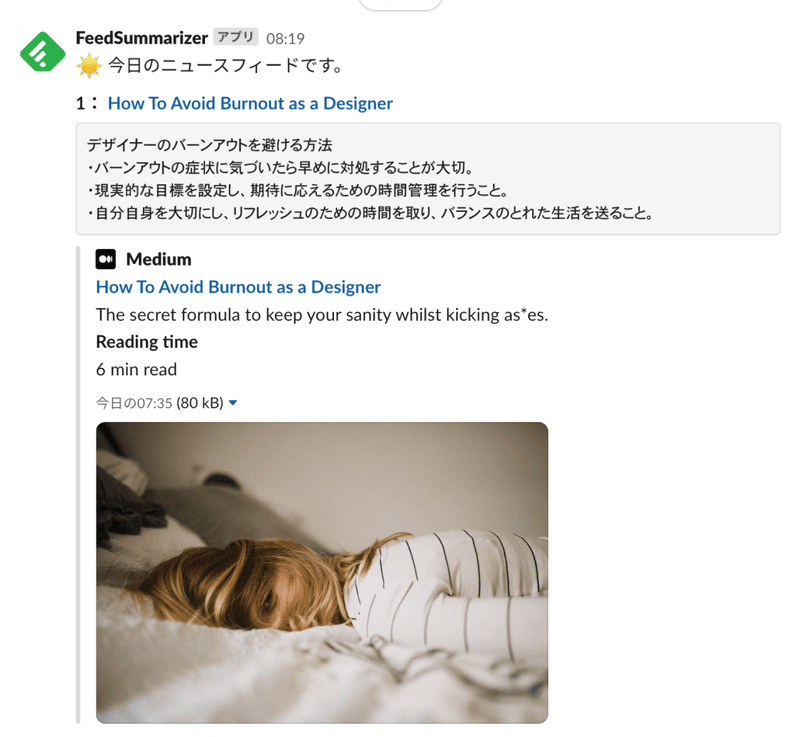
送信が成功しました。指定したSlack Channelにこんな感じで投稿されます。
6. GASでの定期実行
以上で必要な関数が一通り完成しました。毎朝定期実行する処理を書きます。
const slackChannelName = "○○○"
const slackApiToken = '○○○'
const feedlyAccessToken = '○○○'
const feedlyStreamId = "user/○○○/category/○○○"
const gptApiKey = '○○○'

function task(){
  let feedList = getNewFeedList();
  postSlack('☀ 今日のニュースフィードです。', slackChannelName)
  let messageCount = 0
  feedList.items.forEach(function(item){
    let url = item.canonicalUrl || item.originId
    let article
    if(item.content){
      article = item.content.content
    }else{
      article = getArticle(url)
    }
    if(article){
      let summary = gptSummarize(item.title, article)
      if(summary){
        messageCount += 1
        let message =  "*" + messageCount + ": <" + url + "|" + item.title + ">*\n```" + summary + '\n```'
        postSlack(message, slackChannelName)
      }
    }
  })
}
実行すると、Feedlyから取得した過去24時間のおすすめ記事がSlackに最大10件投稿されることがわかります。
毎朝1回実行されるように時間主導型のトリガーを設定します。
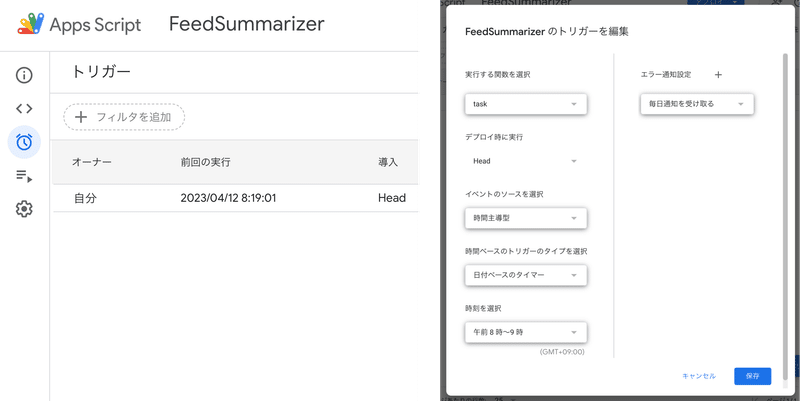
以上で完成です。毎朝指定した時間帯に日本語で要約された英語ニュースがSlackに届きます。
ソースコードはこちらです。自己責任の範囲でご利用ください。
Open AI API使用料
最後に、APIの使用料について。Open AIのAPIは有料で使用したToken数による従量課金です。
一週間ほど運用してみた結果、1日10件の記事を要約させて$0.01〜$0.02程度でした。
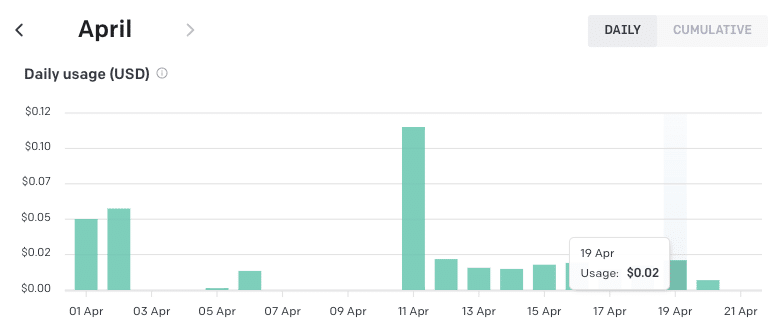
多めに見積もっても年間1,000円程度の出費です。
⚠ 2023.10.29追記:無料アカウントでのFeedly APIの提供は終了し、Feedly Pro(月額$8)の登録が必要になりました。そのため年間で15,000円程度の出費になってしまいます。
Twitterで主にUIデザインについて発信しています。感想やコメントなどいただけると嬉しいです!
この記事が気に入ったらサポートをしてみませんか?